Simple instructions for using shimeta smart monitoring demo
1. Preparation
Prepare the following environment and items:
Available LAN, PC
Network camera, for example: Hikvision network camera, the corresponding video stream URL: rtsp://admin:smdttest123456@192.168.200.99:254/h264/ch1/main/av_stream
PC, network camera, and 416T server are connected to the same LAN
2. Usage steps
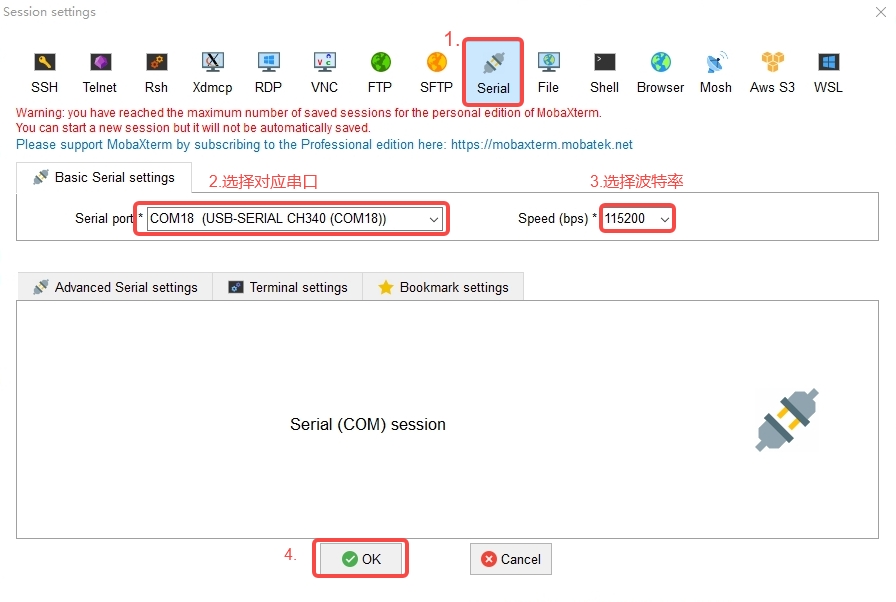
- Serial port login
Connect the computer's USB port and the device's type C port, and use SecureCRT or MobaXterm serial port tools to open the serial port; the computer needs to install the ch340 driver; select the corresponding com port, and set the baud rate to 115200;
Tips
Download path: Please click Tool Download to download driver files and serial port tools
Take MobaXterm for example:
Enter your username and password to log in to the terminal:
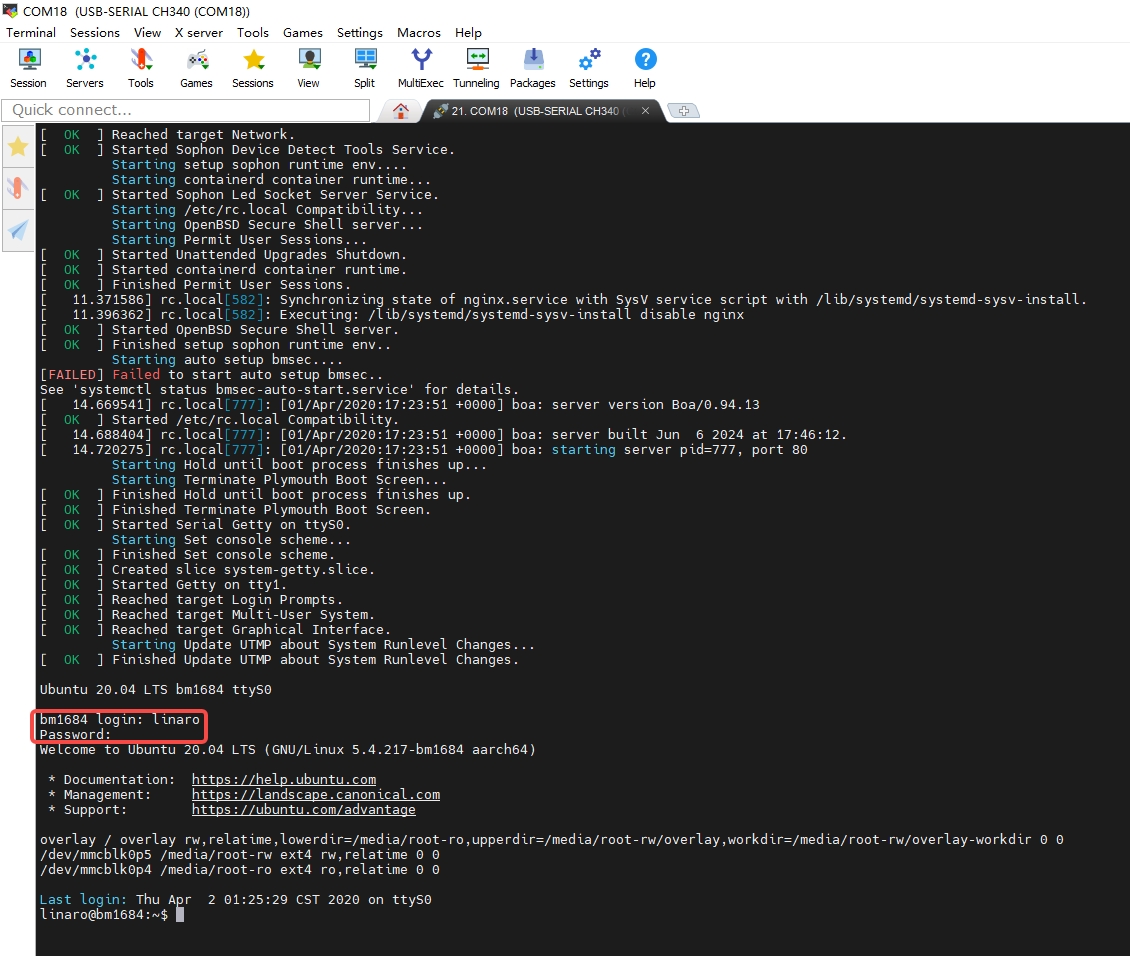
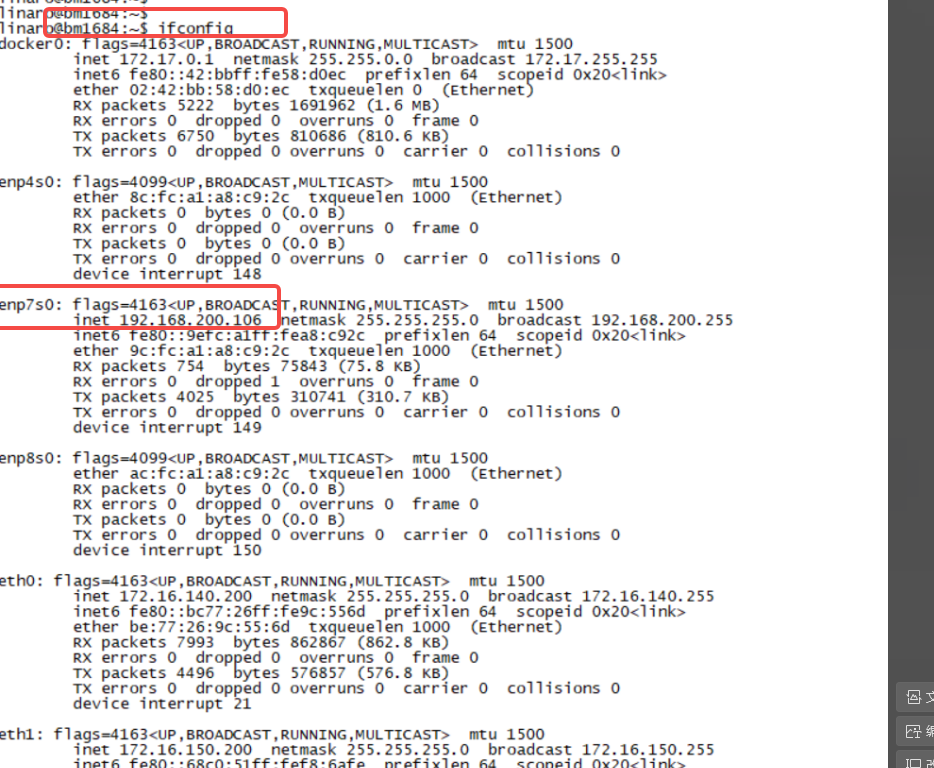
Enter ifconfig to check the device's IP: —— In the example below, it is the IP of the ETH1 port connected to the device.
- Network SSH login
Take MobaXterm for example:
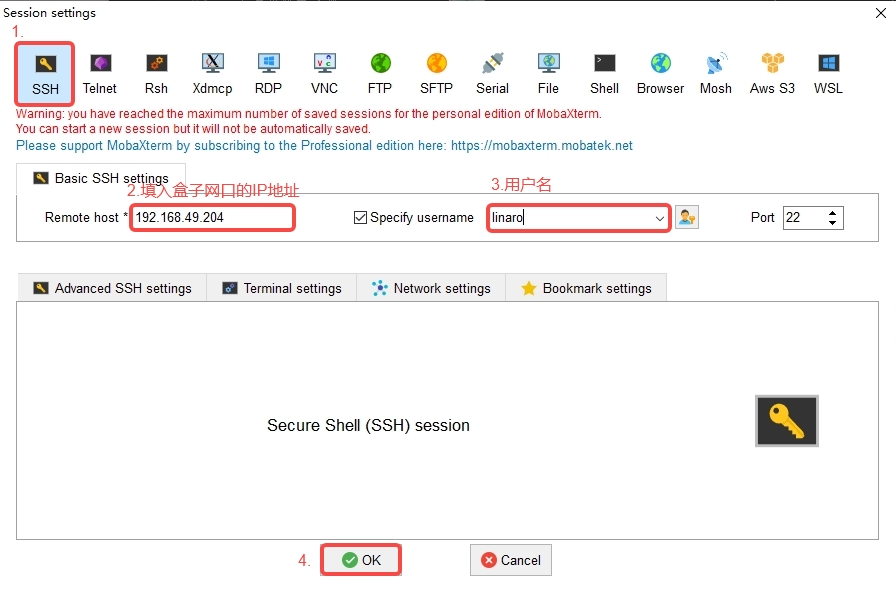
Enter the password to log in:
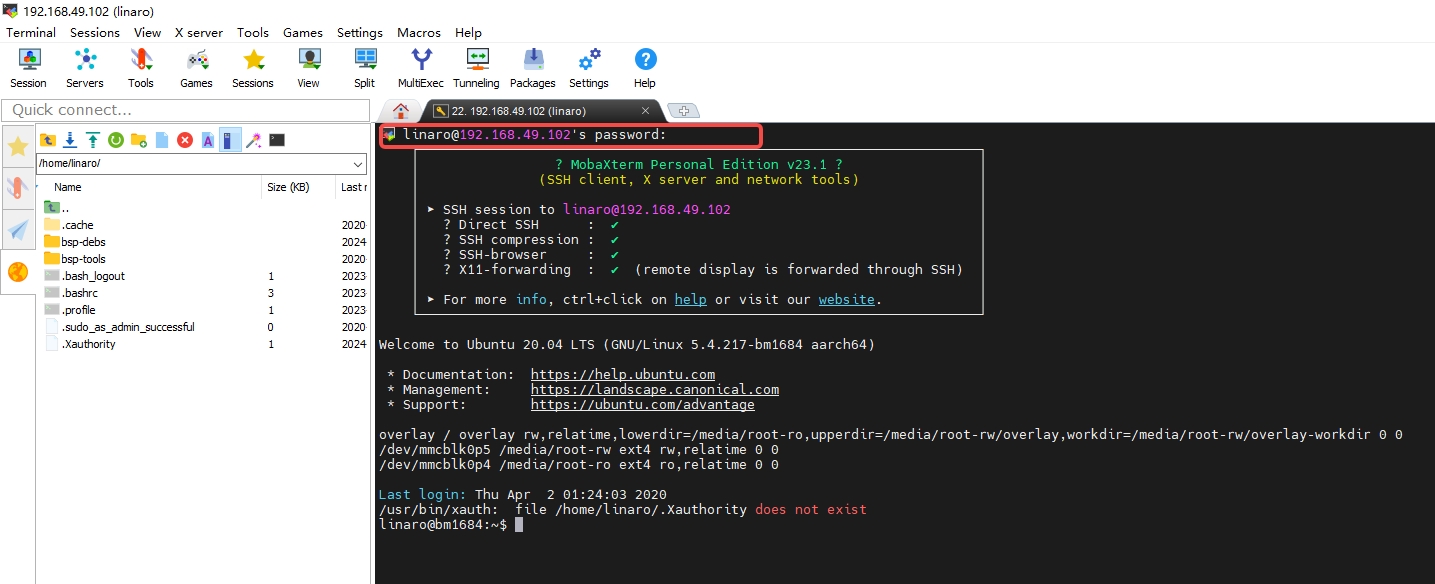
Tips
Root privileges are required. You can use sudo+ command or sudo -i to switch to the root user to execute commands.
- Network configuration: —— Not necessary, can be configured according to actual needs
Configure the network in the /etc/netplan/01-netcfg.yaml file:
suggestion
You can first use cp /etc/netplan/01-netcfg.yaml /etc/netplan/old-01-netcfg.yaml to copy and keep a copy of the original configuration file for backup.
You can edit the file using the command sudo vi /etc/netplan/01-netcfg.yaml

Enter i to enter editable mode, then modify the corresponding configuration as needed - note that the file format should be consistent
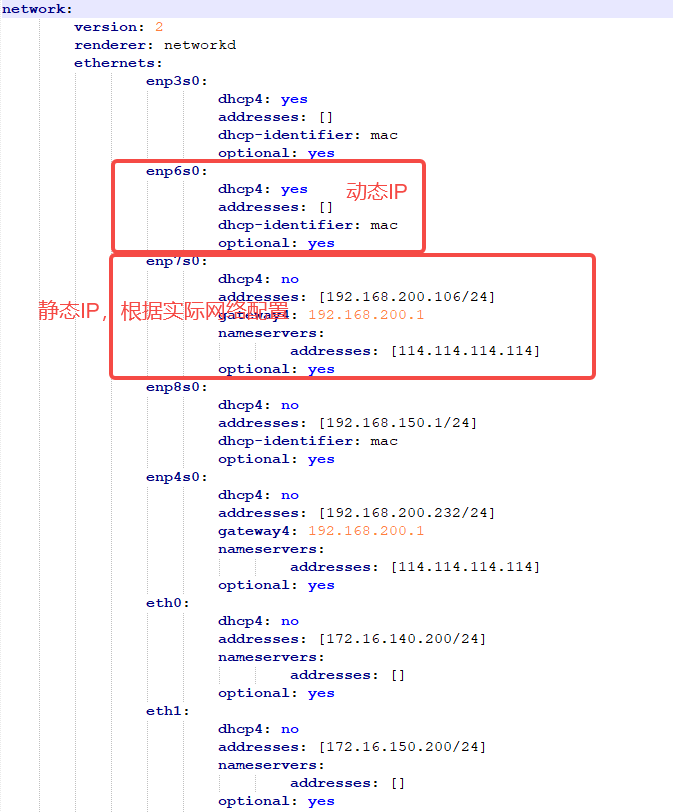
After the modification is completed, press Esc, enter :wq and press Enter to save and exit. - If you do not need to save and exit, enter :q! and press Enter.
After saving and exiting, execute netplan apply to restart the network service to ensure that all changes take effect.

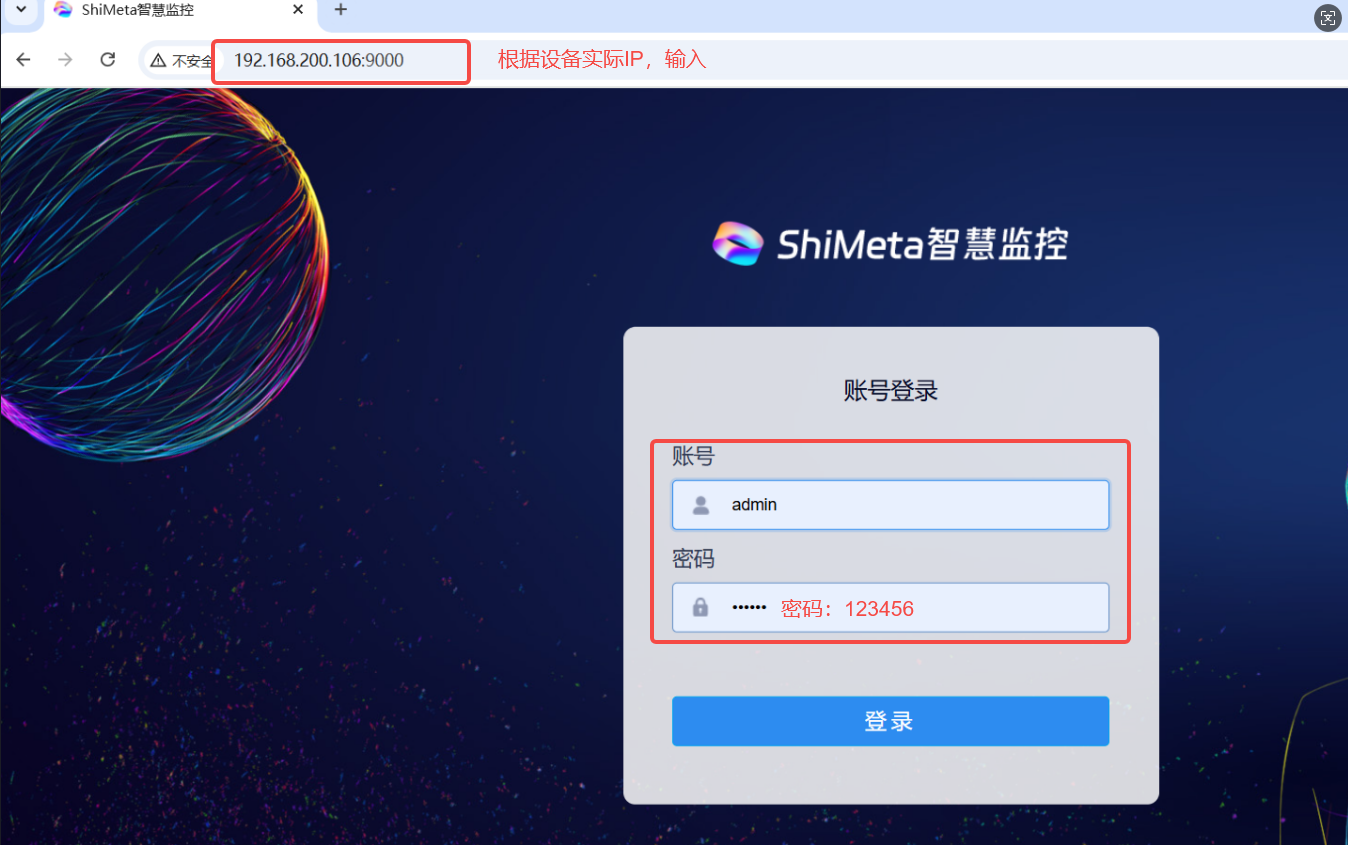
- Log in to Shimeta Smart Monitoring
Open the browser on the PC, enter the device IP:9000, visit the shimeta smart monitoring webpage, account: admin, password: 123456
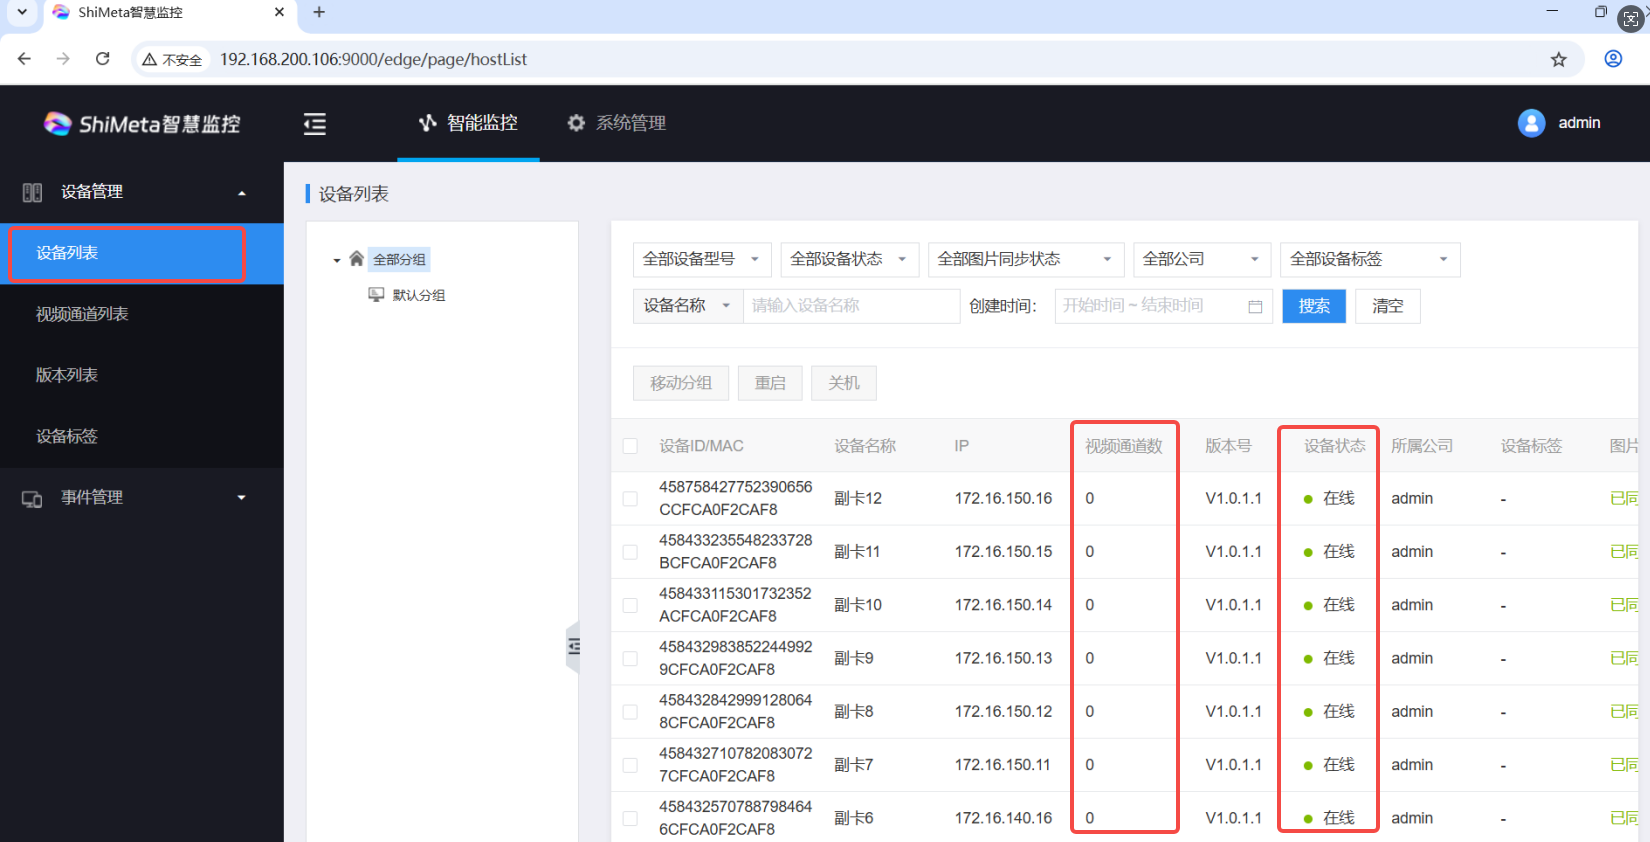
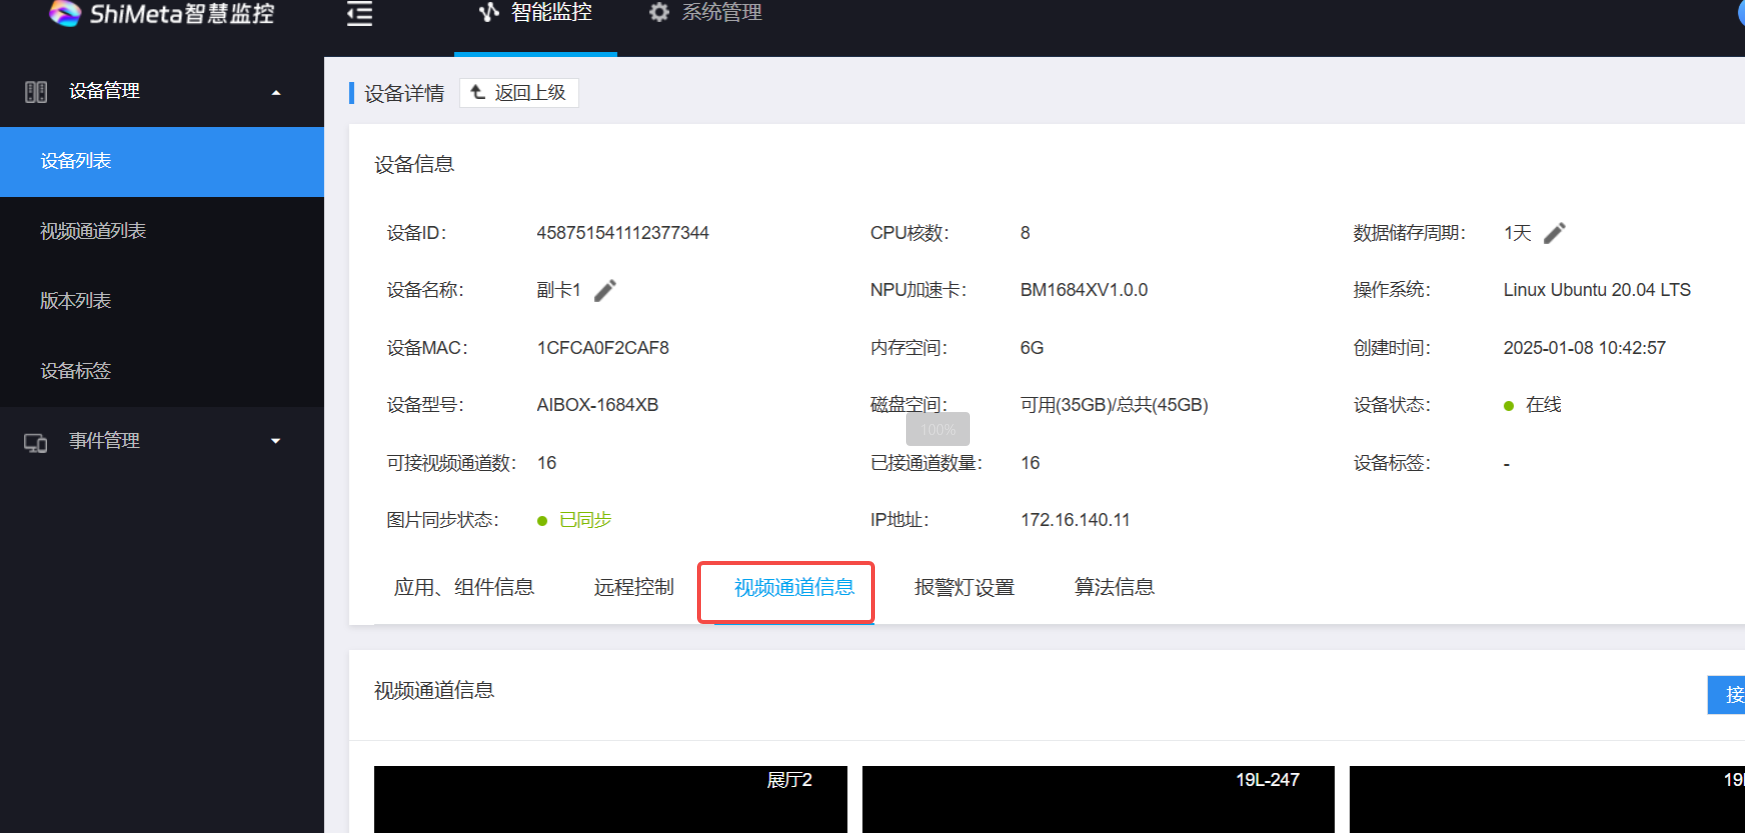
In the device list on the left, you can view the basic information of the device, the current status of each secondary card, the connected video channel information, etc.
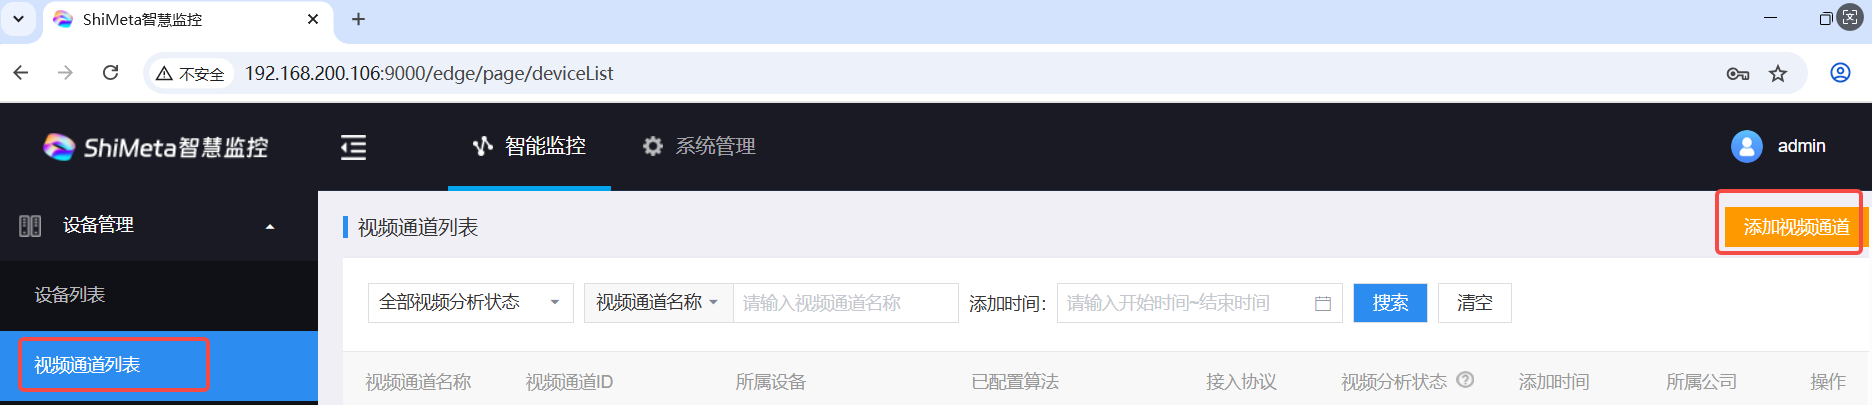
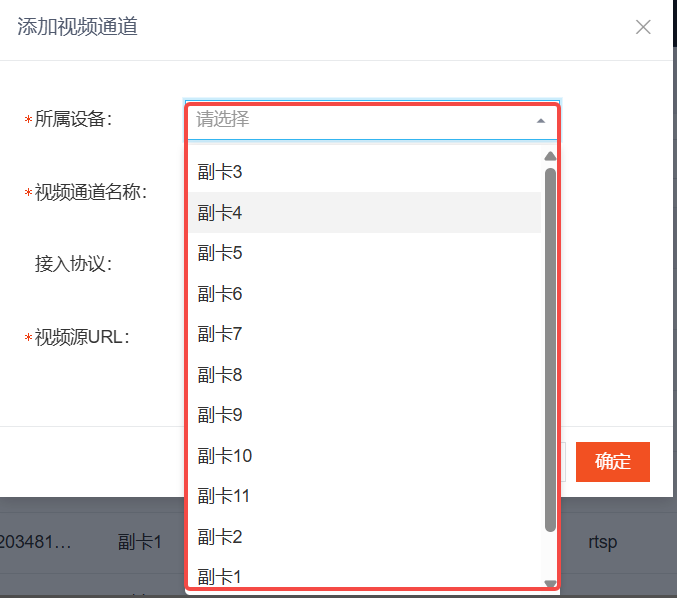
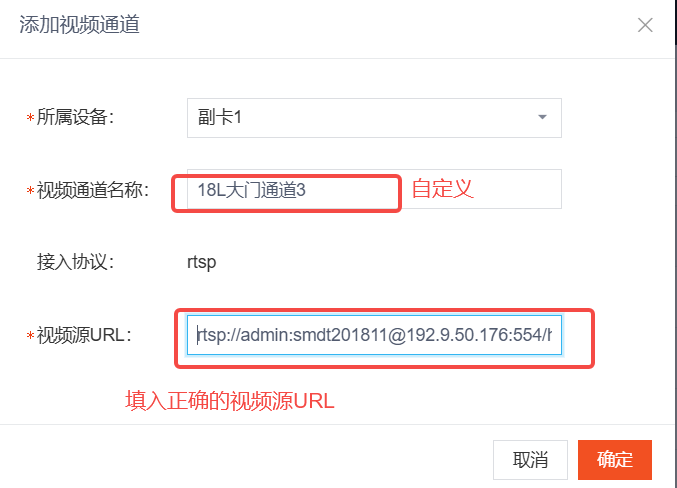
Add video channel: Click to open the video channel list, click Add video channel in the upper right corner, and then make relevant configurations:
Notice
1 secondary card, up to 16 video channels
Tips
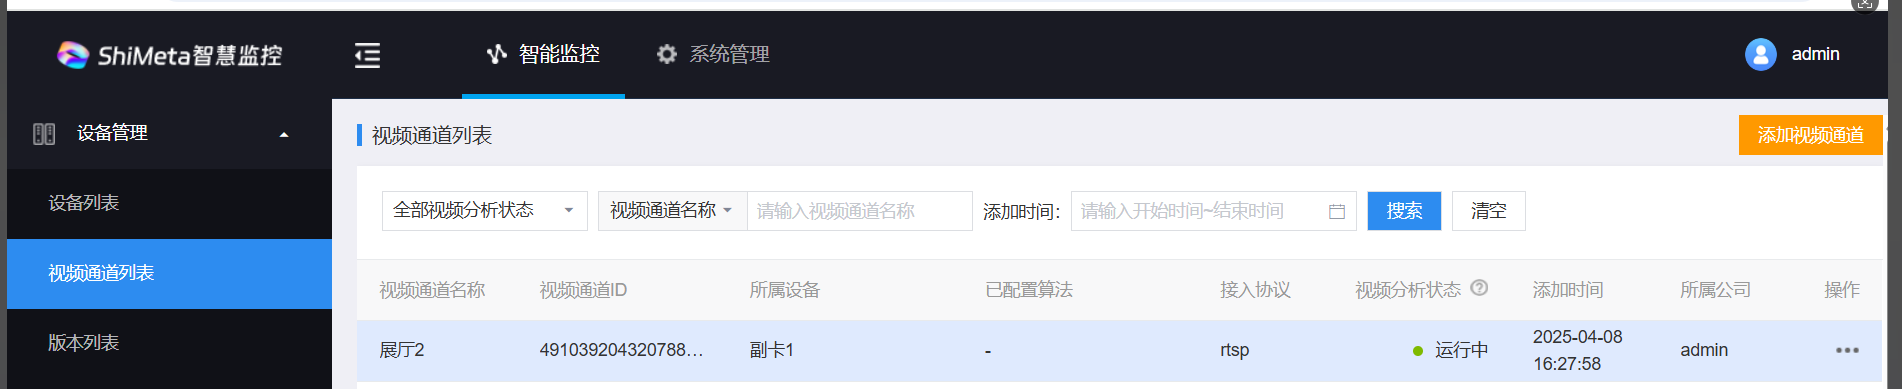
After the configuration is completed, the video analysis status is running, indicating that the configuration is successful.
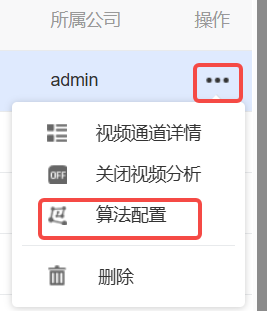
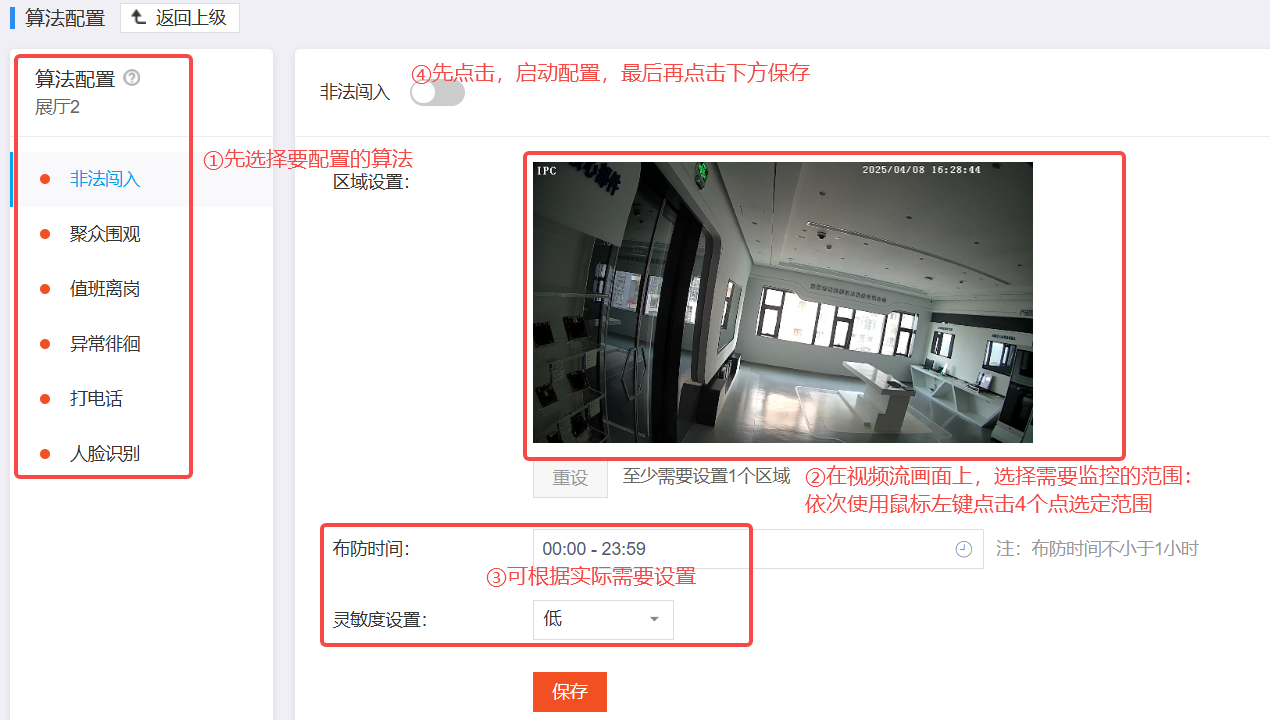
Algorithm configuration:
After adding the video channel, you can configure the algorithm. Click the ellipsis on the right-algorithm configuration, as shown in the figure below:
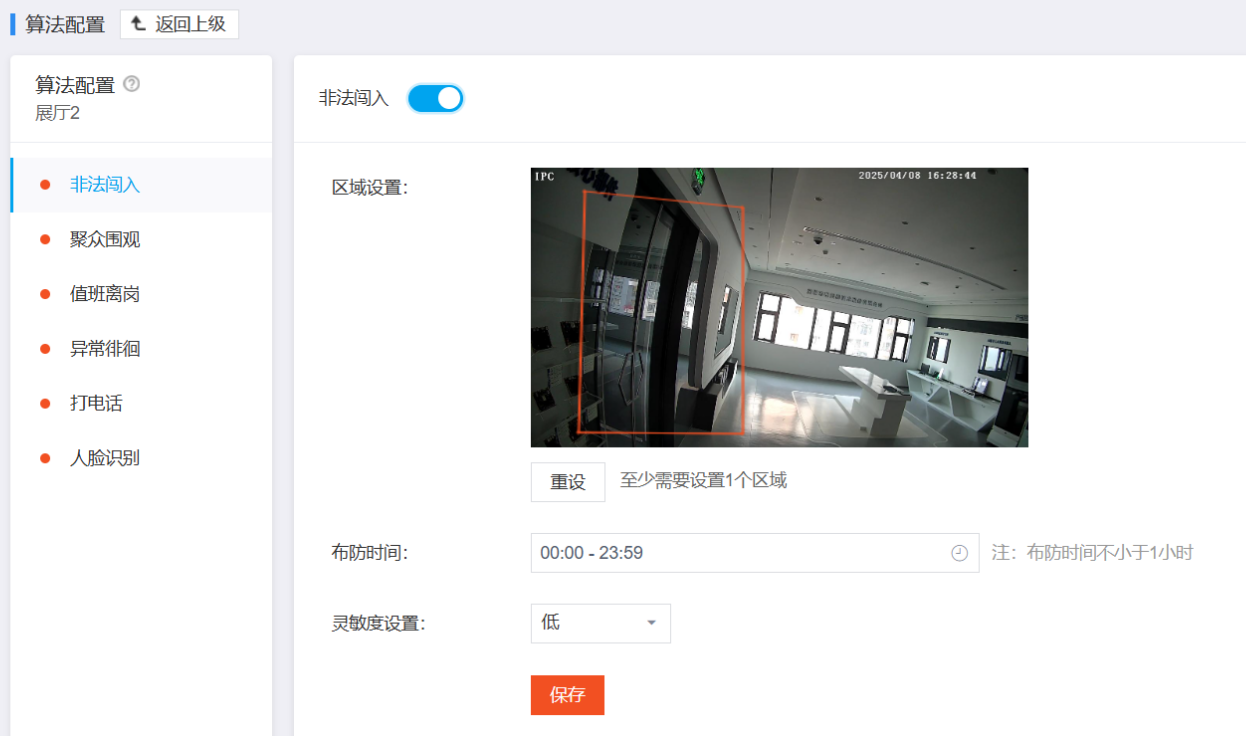

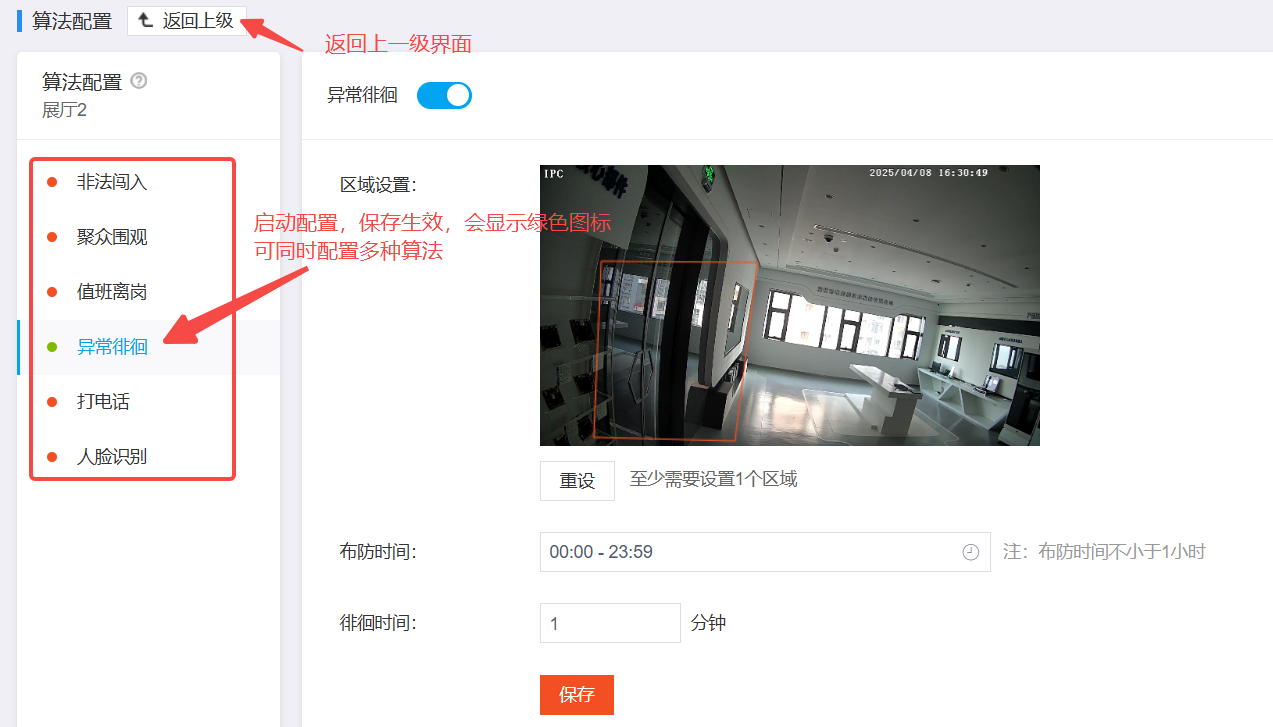
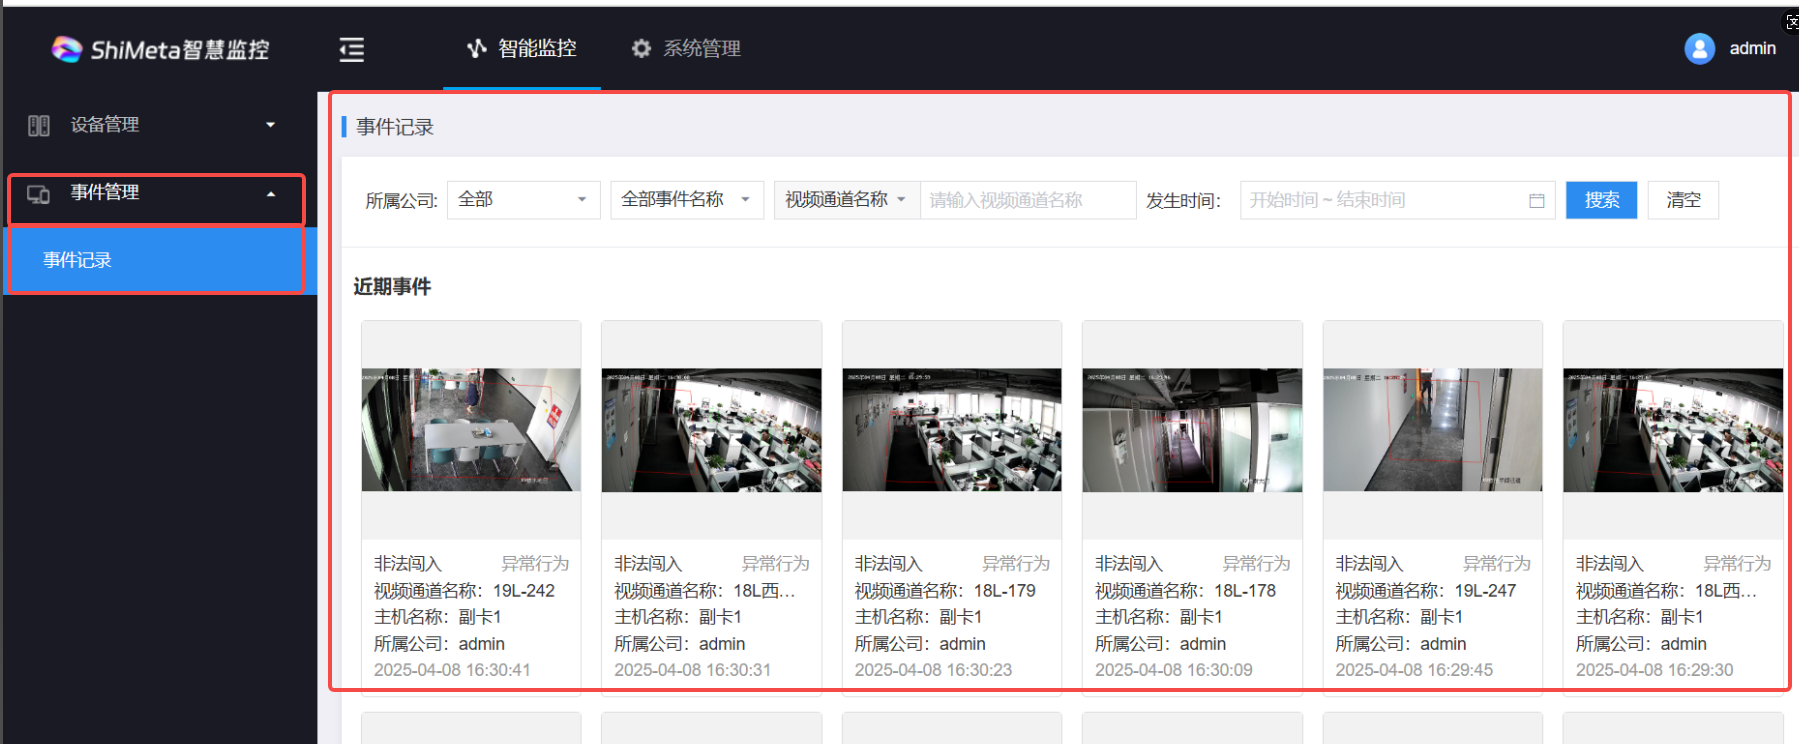
After configuring the algorithm, you can view the triggered events in Event Management-Event Records
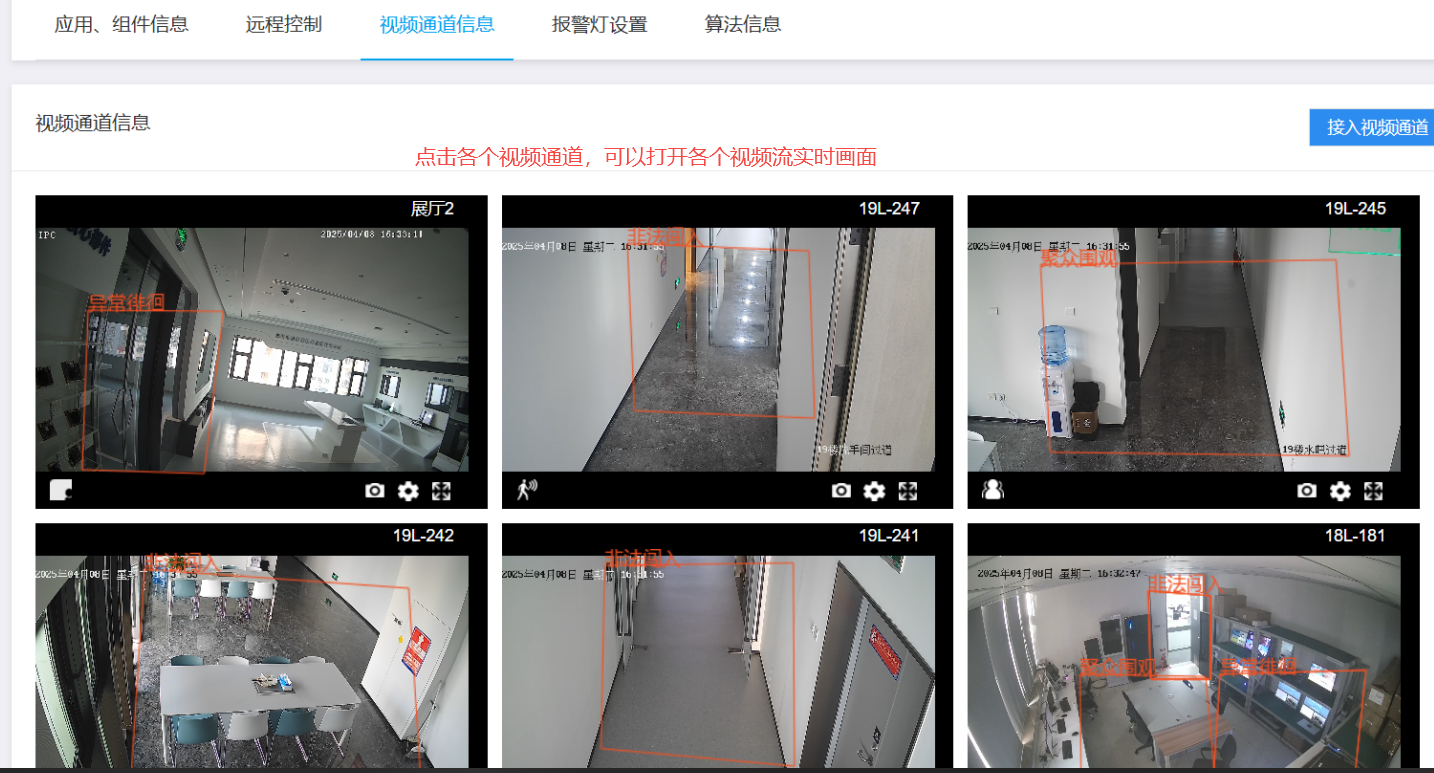
Live Video
In the device list, select the corresponding secondary card (configured with a video channel), click the ellipsis-view details to enter the details interface.

Click on the video channel information to view the currently configured video channel.
Warning
The video channels that can be opened are also related to the camera's own support. Make sure that the camera has enough video streams.
Copyright Notice
This user manual, including but not limited to all the information contained therein, is protected by copyright law. Without the permission of ShiMetaPi, no imitation, copying, excerpting, translating, distributing or other use is allowed.
Disclaimer
The ownership and intellectual property rights of third-party product names or contents mentioned in this user manual belong to the respective product or content owners and are protected by current intellectual property laws and international treaties.