Application Development Quick Start
Tips
All related materials have been uploaded to Baidu Netdisk. Developers can jump to Baidu Netdisk for download via the download link in Downloads.
1 Purpose
This document is intended for beginners in OpenHarmony application development. By building a simple application with page-jump/return functionality, you will quickly learn the main files of the application-development project directory and become familiar with the OpenHarmony application development process.
Tips
This document is only a quick development tutorial. For a detailed application development tutorial, please go to the Application Development section to view more content on application development.
2 Application Development Tool Preparation
2.1 Install DevEco Studio
There are two ways to download the installation package: one is to download from the official website, the other is to download from Baidu Netdisk.
Recommended version: DevEco Studio 5.1.0 Release 1.1) Official download link: Download Center - DevEco Studio
Note
Downloading DevEco Studio via the link above requires logging into a Huawei account. If you are not logged in, clicking the link will automatically redirect to the login interface.
1.2) Download the installation package from Baidu Netdisk: The DevEco Studio version provided on Baidu Netdisk is 5.1.0.828
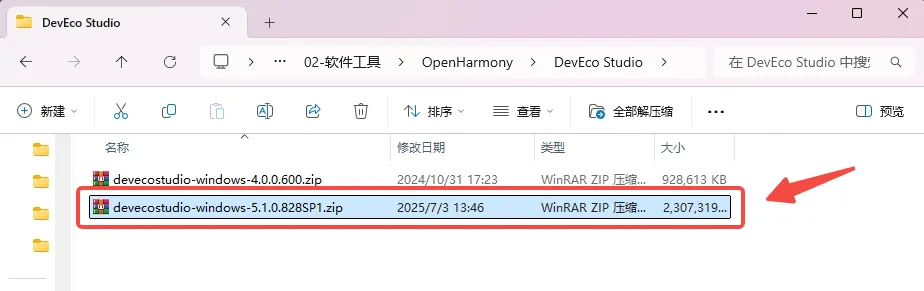
Note
DevEco Studio installation package path: 02-Software Tools>OpenHarmony>DevEco Studio>devecostudio-windows-5.1.0.828SP1.zip
- Extract devecostudio-windows-5.1.0.828SP1.zip Open the devecostudio-windows-5.1.0.828SP1 -> devecostudio-windows-5.1.0.828 directory It is recommended to keep the storage path short to prevent a possible 1024-character path error in subsequent operations.
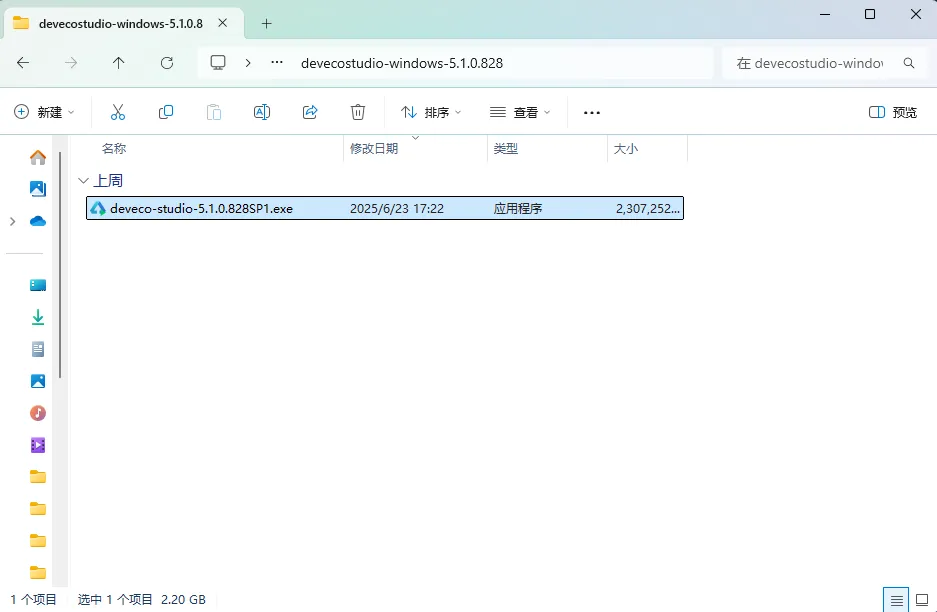
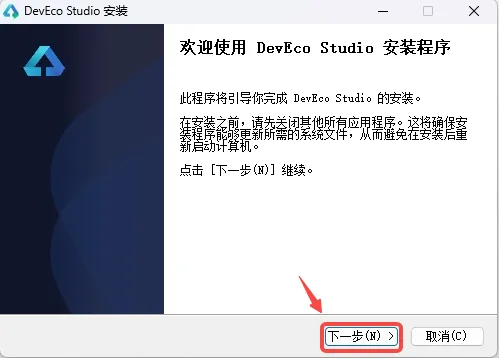
- Run deveco-studio-5.1.0.828SP1.exe. Wait for the installation prompt to appear, then click [Next].
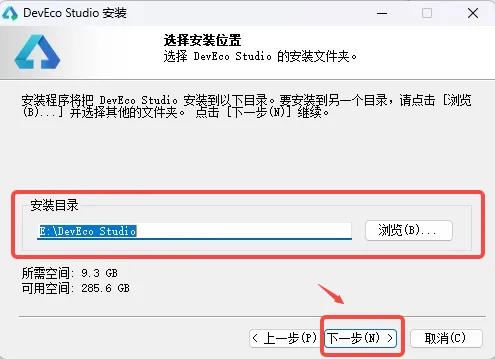
- Select the installation location. Choose whichever drive has more free space — this example places it on the E drive. Note that it must be an empty folder; usually it will be auto-filled. If it is not filled in, you need to create a new empty folder, otherwise an error will be reported. After selecting, click [Next].
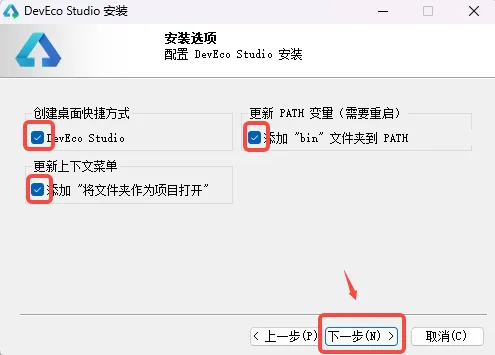
- Installation options: check all of them to facilitate later development, then click [Next].
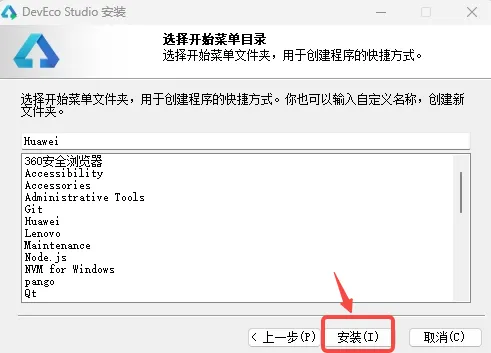
- Click [Install] and wait for installation to complete.
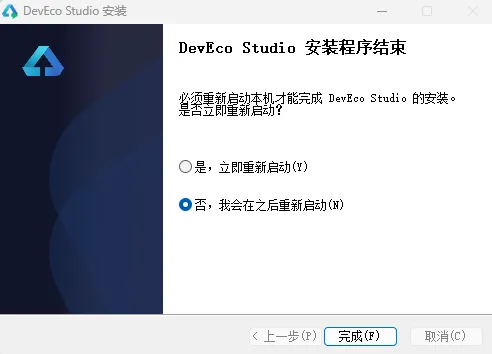
- The following display indicates that the installation is complete.
- At this point you can see the DevEco Studio shortcut on the desktop.

3 DevEco Studio Create Project
- Double-click to open the DevEco Studio shortcut icon on the desktop.
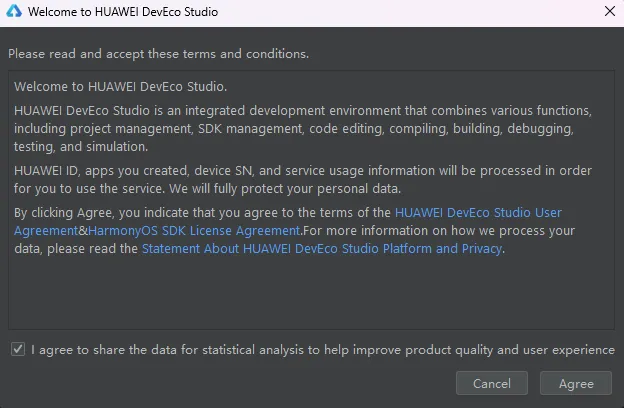
- You will see some statements; click [Agree] here to indicate that I agree.
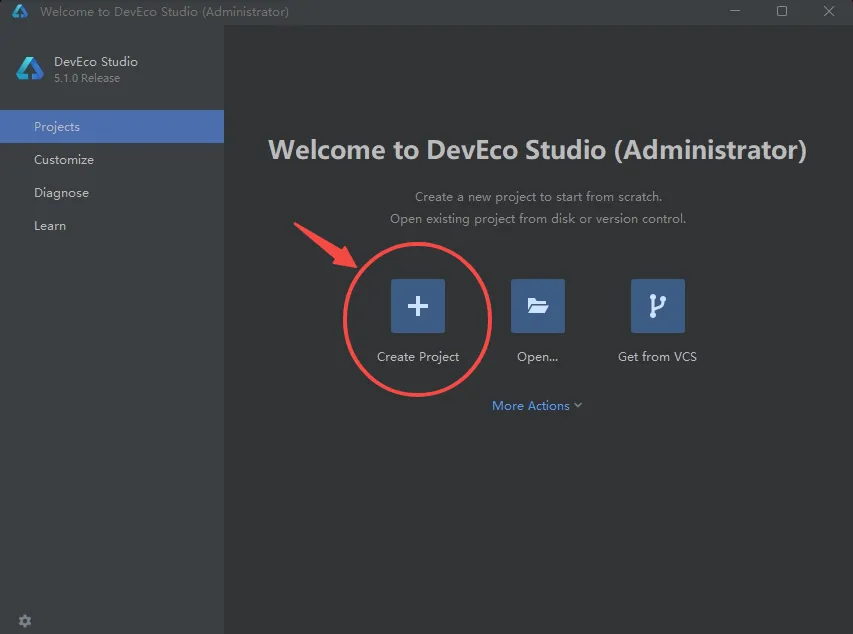
- Then you will enter the following interface. Create a project to enter the project interface.
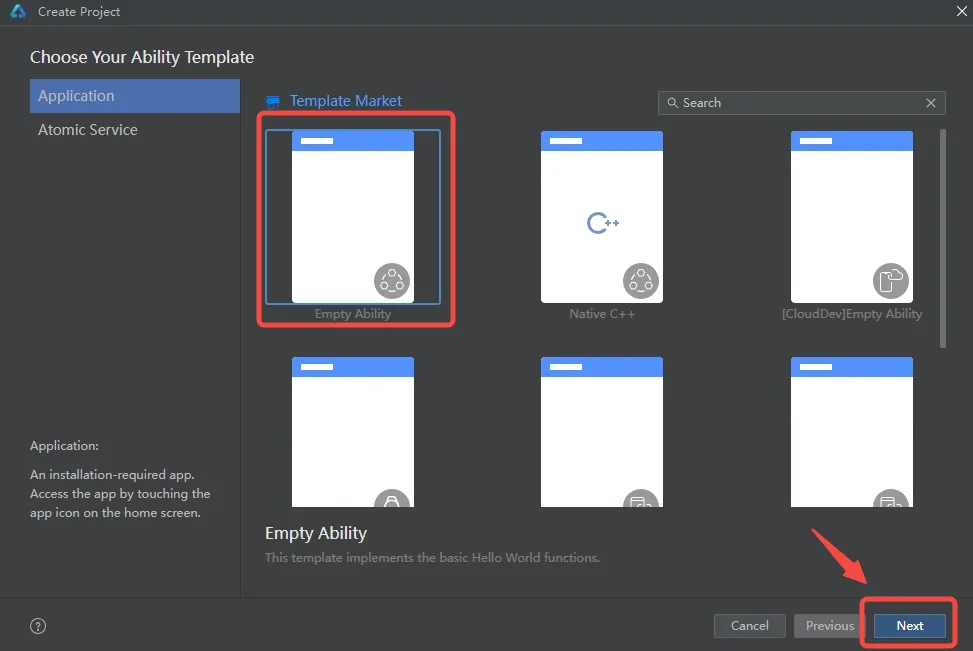
- Select Application for application development (this document uses application development as an example; Atomic Service corresponds to atomic-service development). Select the "Empty Ability" template and click Next to proceed with the next configuration.
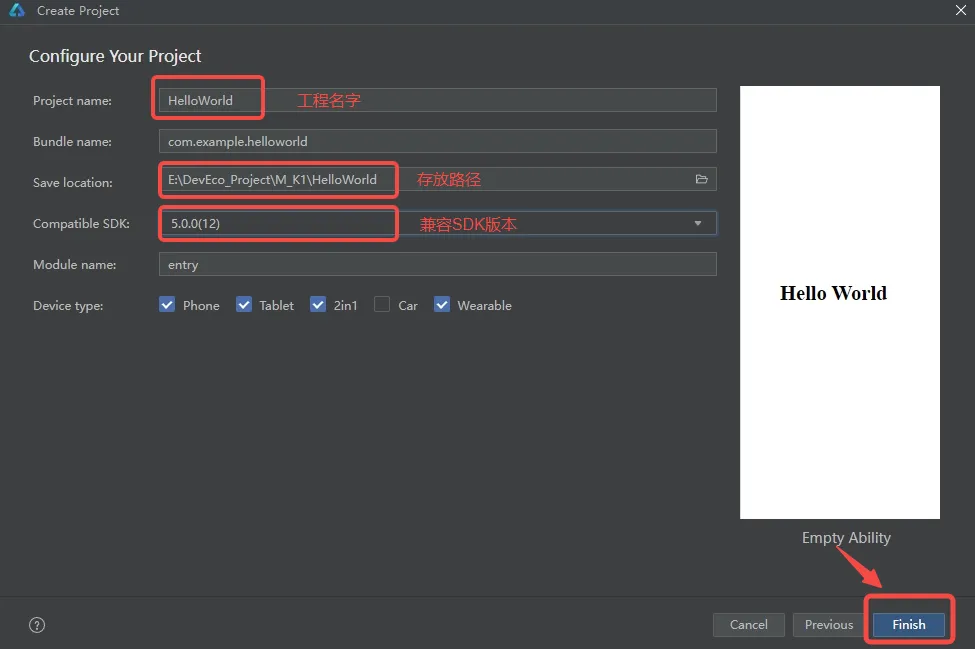
- Enter the project configuration interface. Modify the project storage path, project name, and compatible SDK version. Keep the other parameters as default. Click Finish to create the project. Note: The board-side API version of the M4-R1 development board is API 12, so select 5.0.0(12) for Compatible SDK.
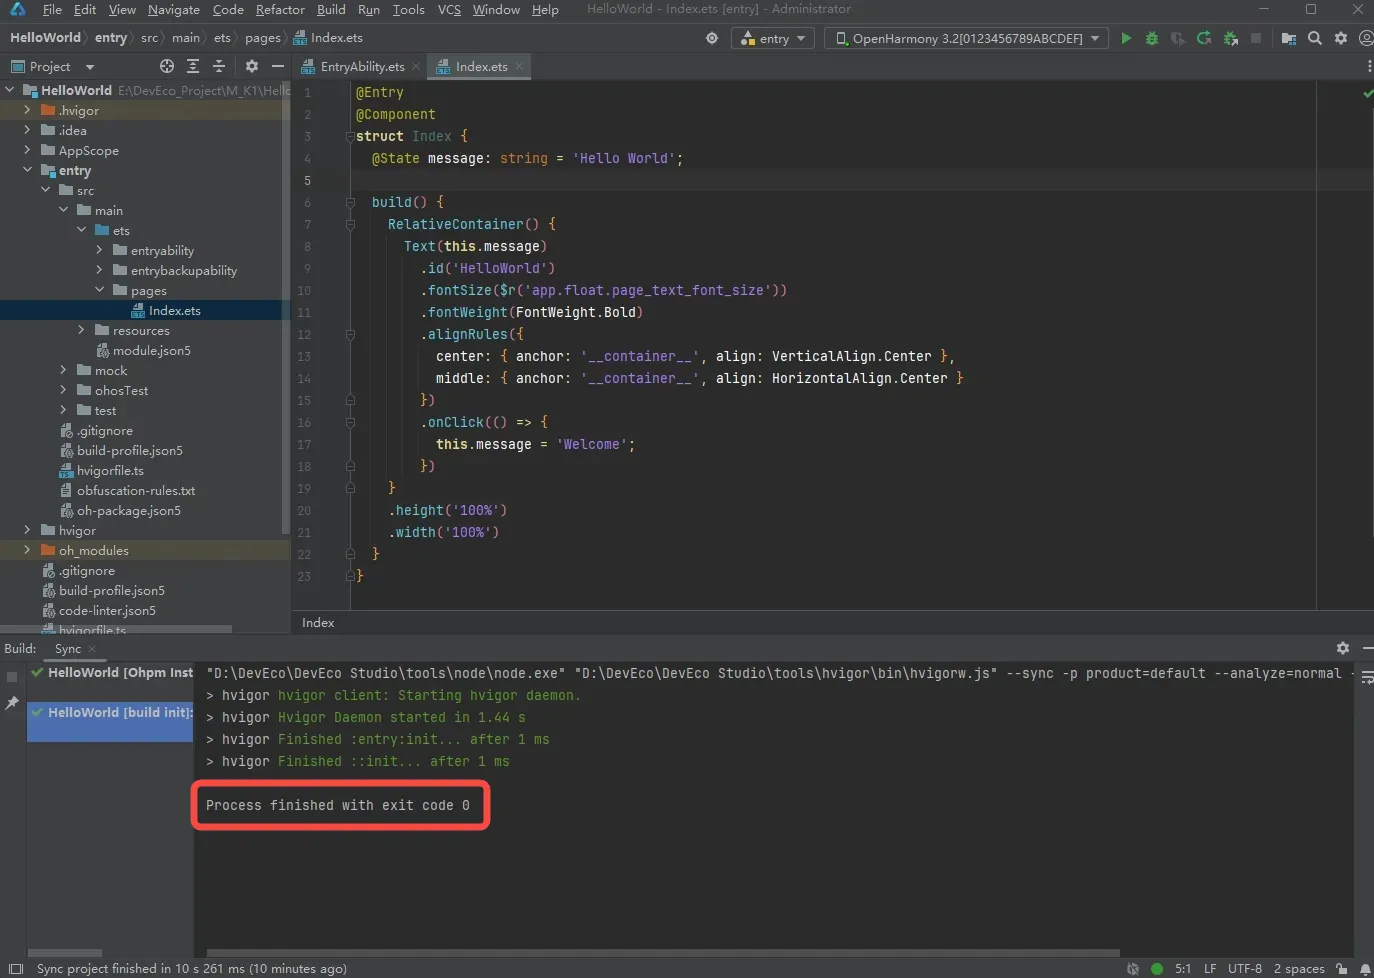
- The project initialization interface is shown below. When the statement in the red box is output in the Build status bar at the bottom, initialization is complete:
4 DevEco Studio Configure SDK
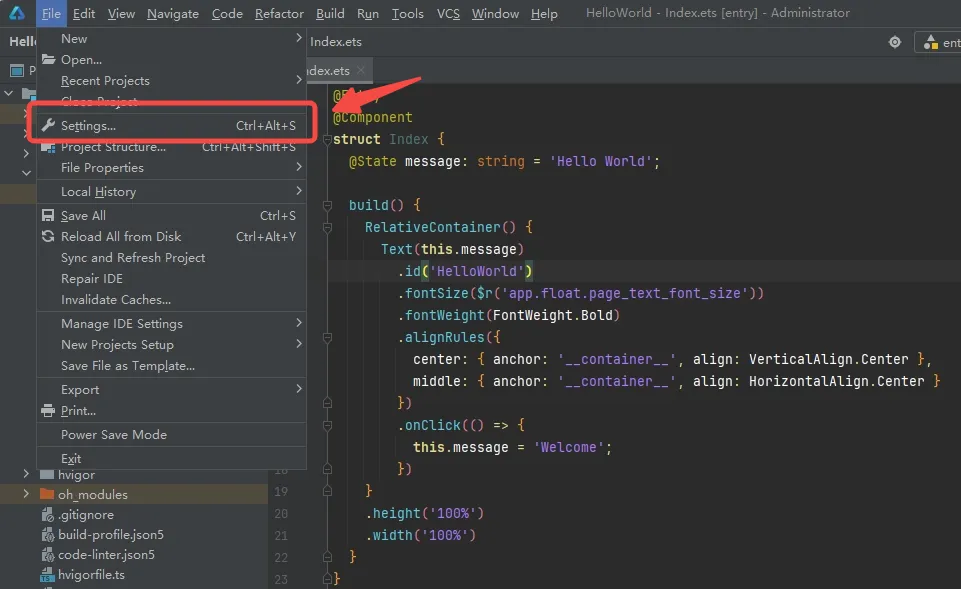
- Select File -> Settings from the menu bar.
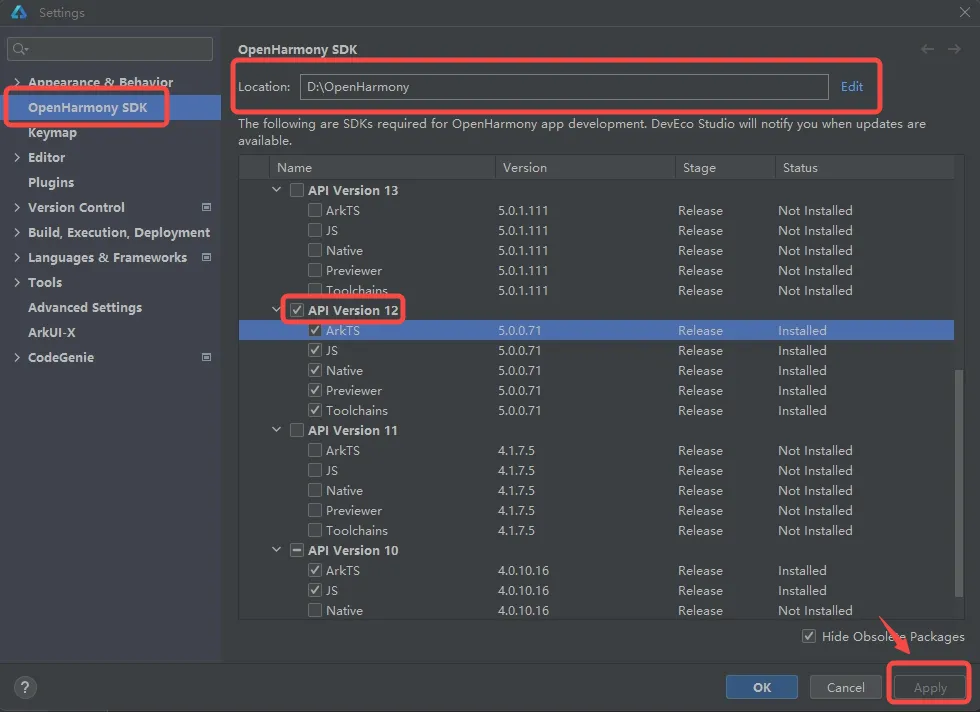
- Enter the Settings window, select OpenHarmony SDK, select the SDK installation location, then check API Version 12 to download all the related content of API Version 12, and click [Apply] to download.
Because we have already downloaded API Version 12, we use API Version 11 as an example.
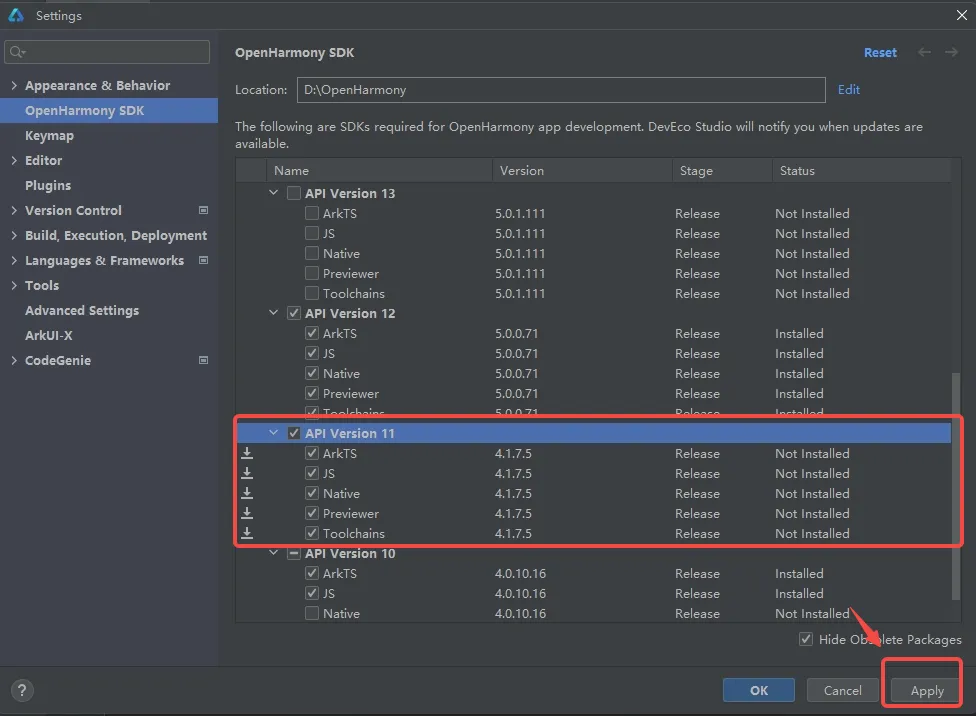
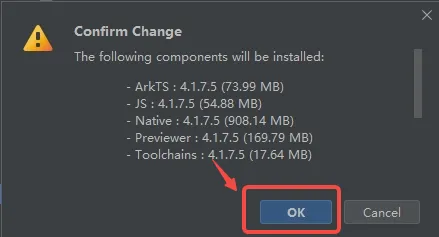
- After clicking [Apply], a Confirm Change popup will appear. Click [OK].
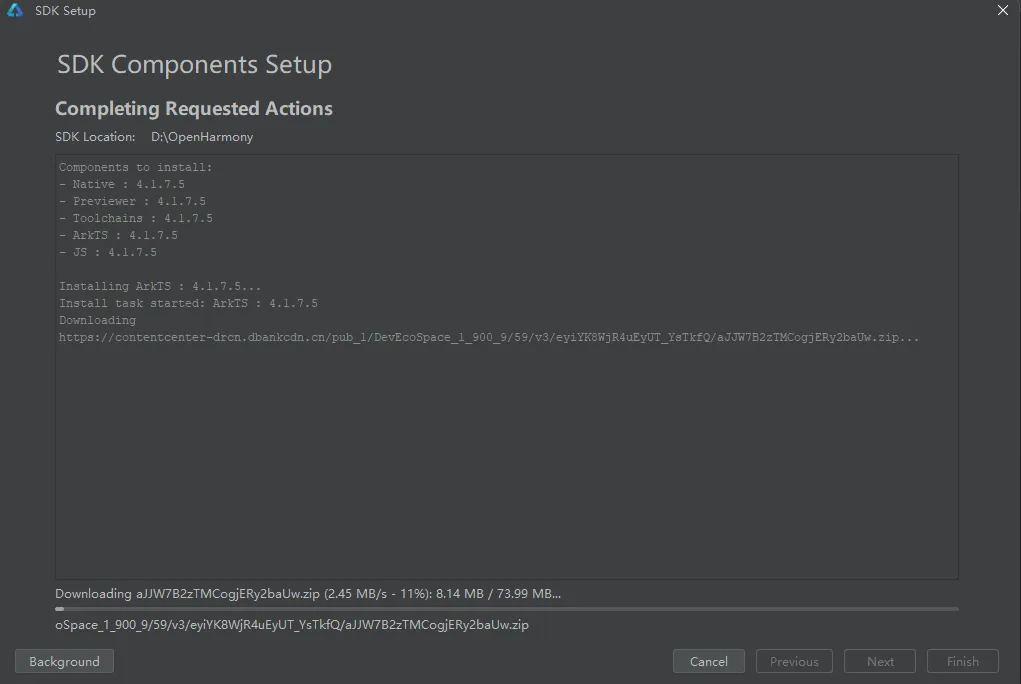
- Wait for the SDK download to complete.
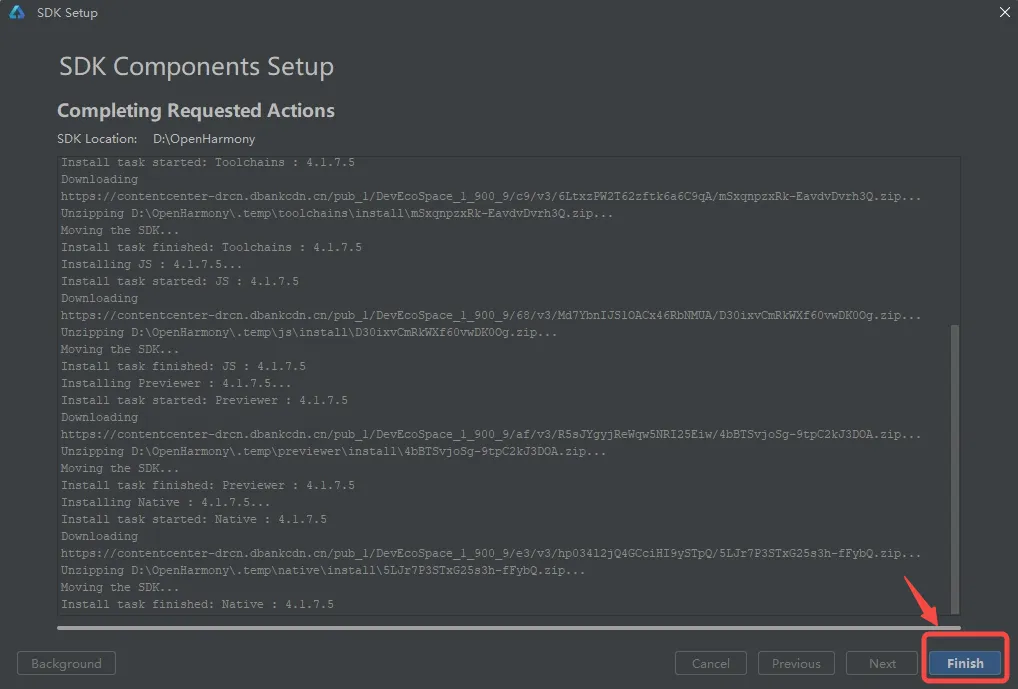
- When [Finish] becomes highlighted, the download is complete. Click [Finish].
5 DevEco Studio Configure Chinese Plugin
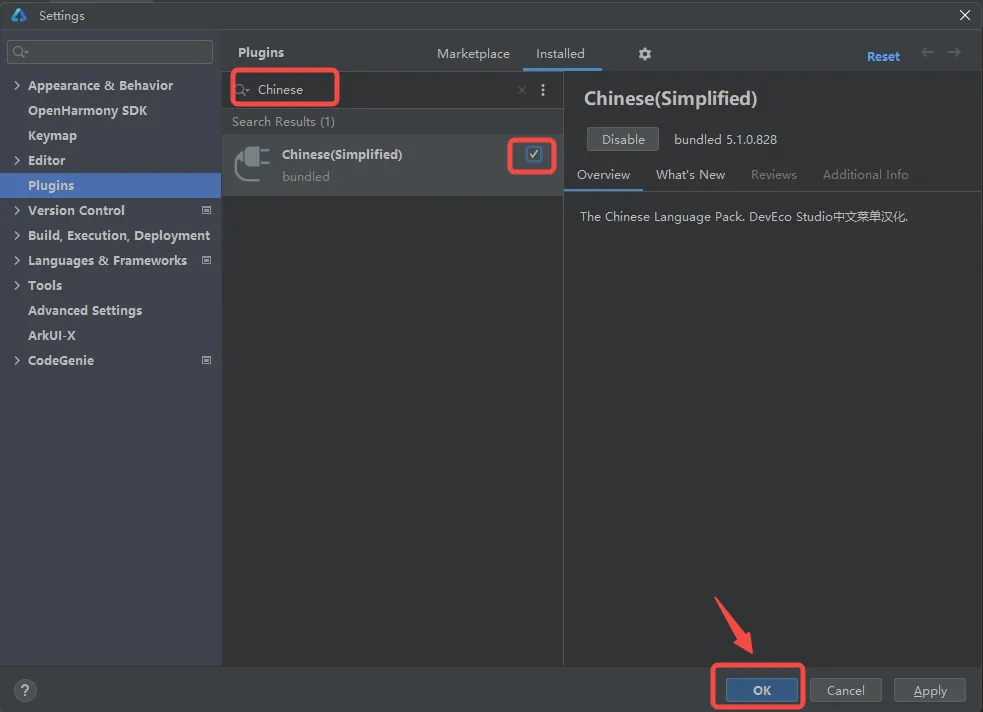
- Select File -> Settings from the menu bar.
- Select Plugins, then select Installed in Plugins.
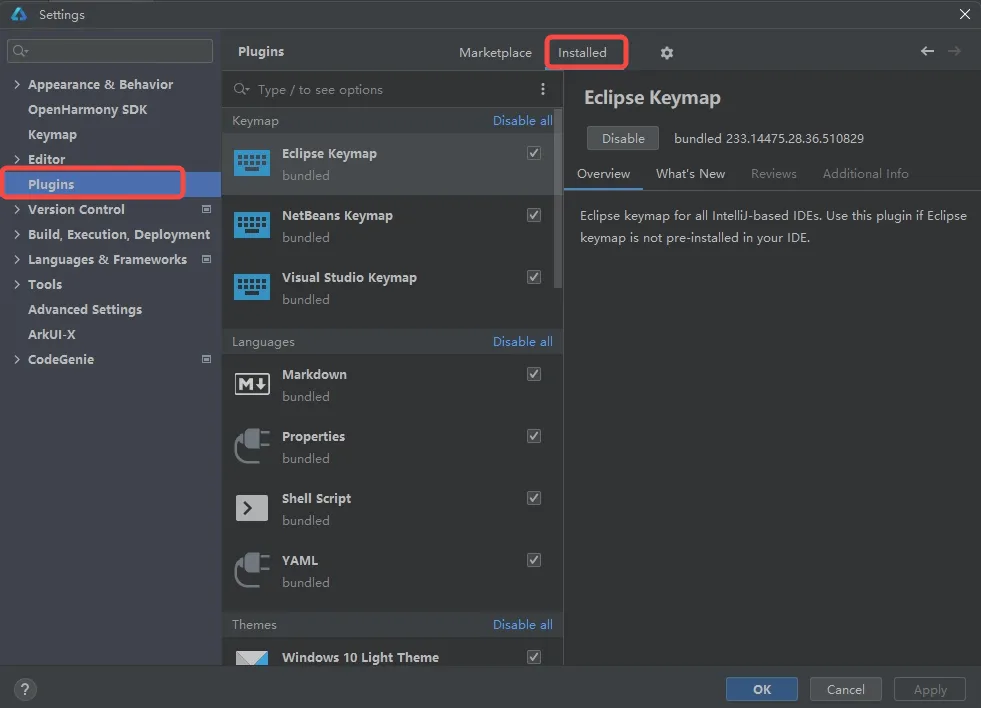
- Type "Chinese" in the search box, then check Chinese(Simplified), then click [OK].
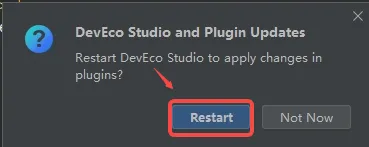
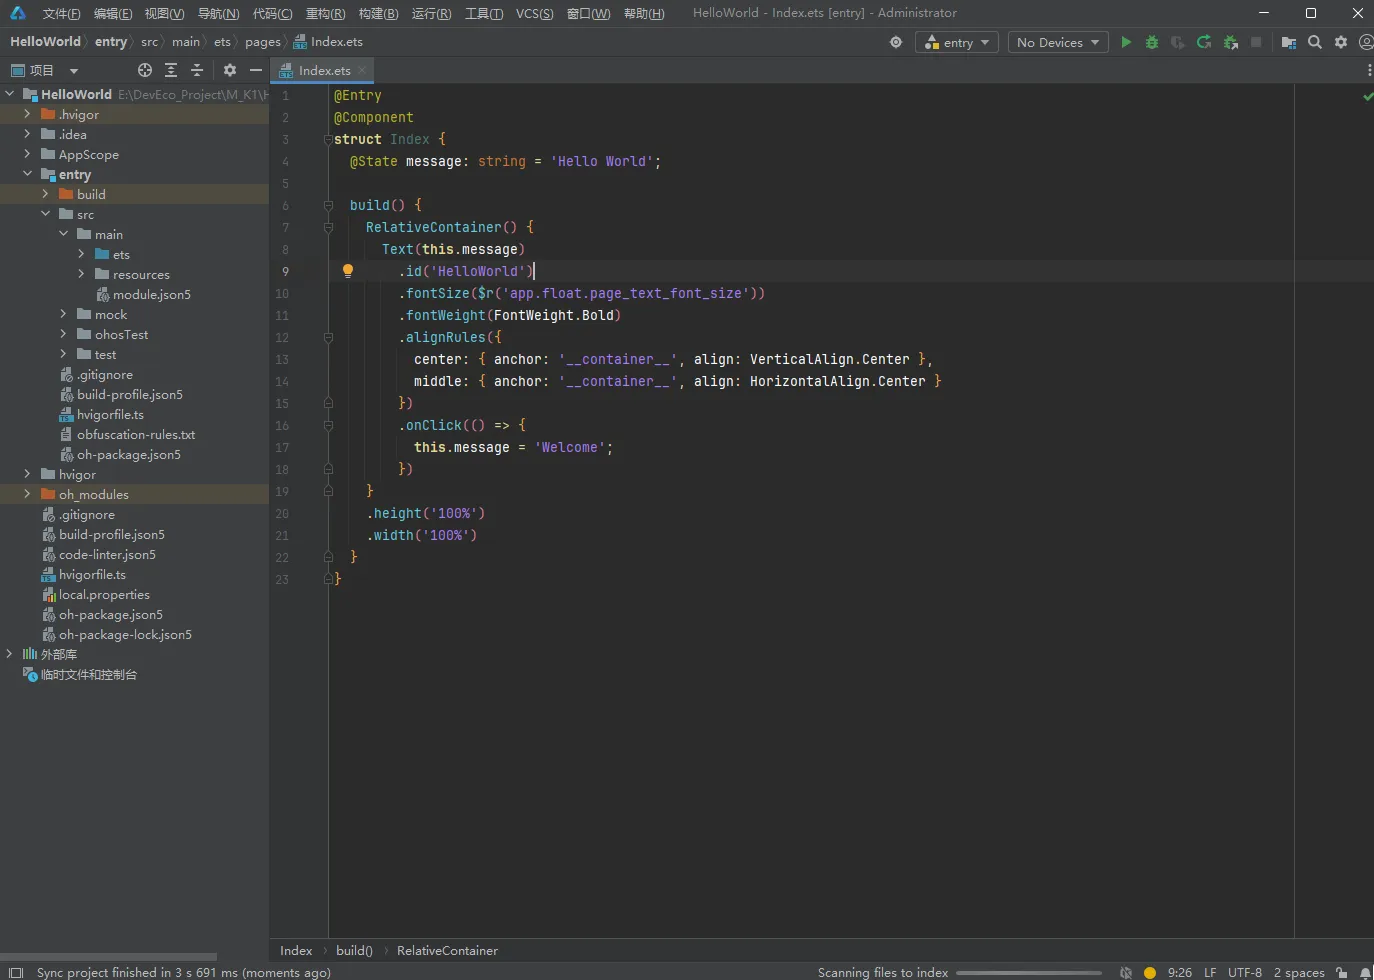
- A DevEco Studio and Plugin Updates popup appears. Click [Restart] to restart the application, and you will see the project interface change to Chinese.
6 Burn the Program to the Board
6.1 Default Program Function Introduction
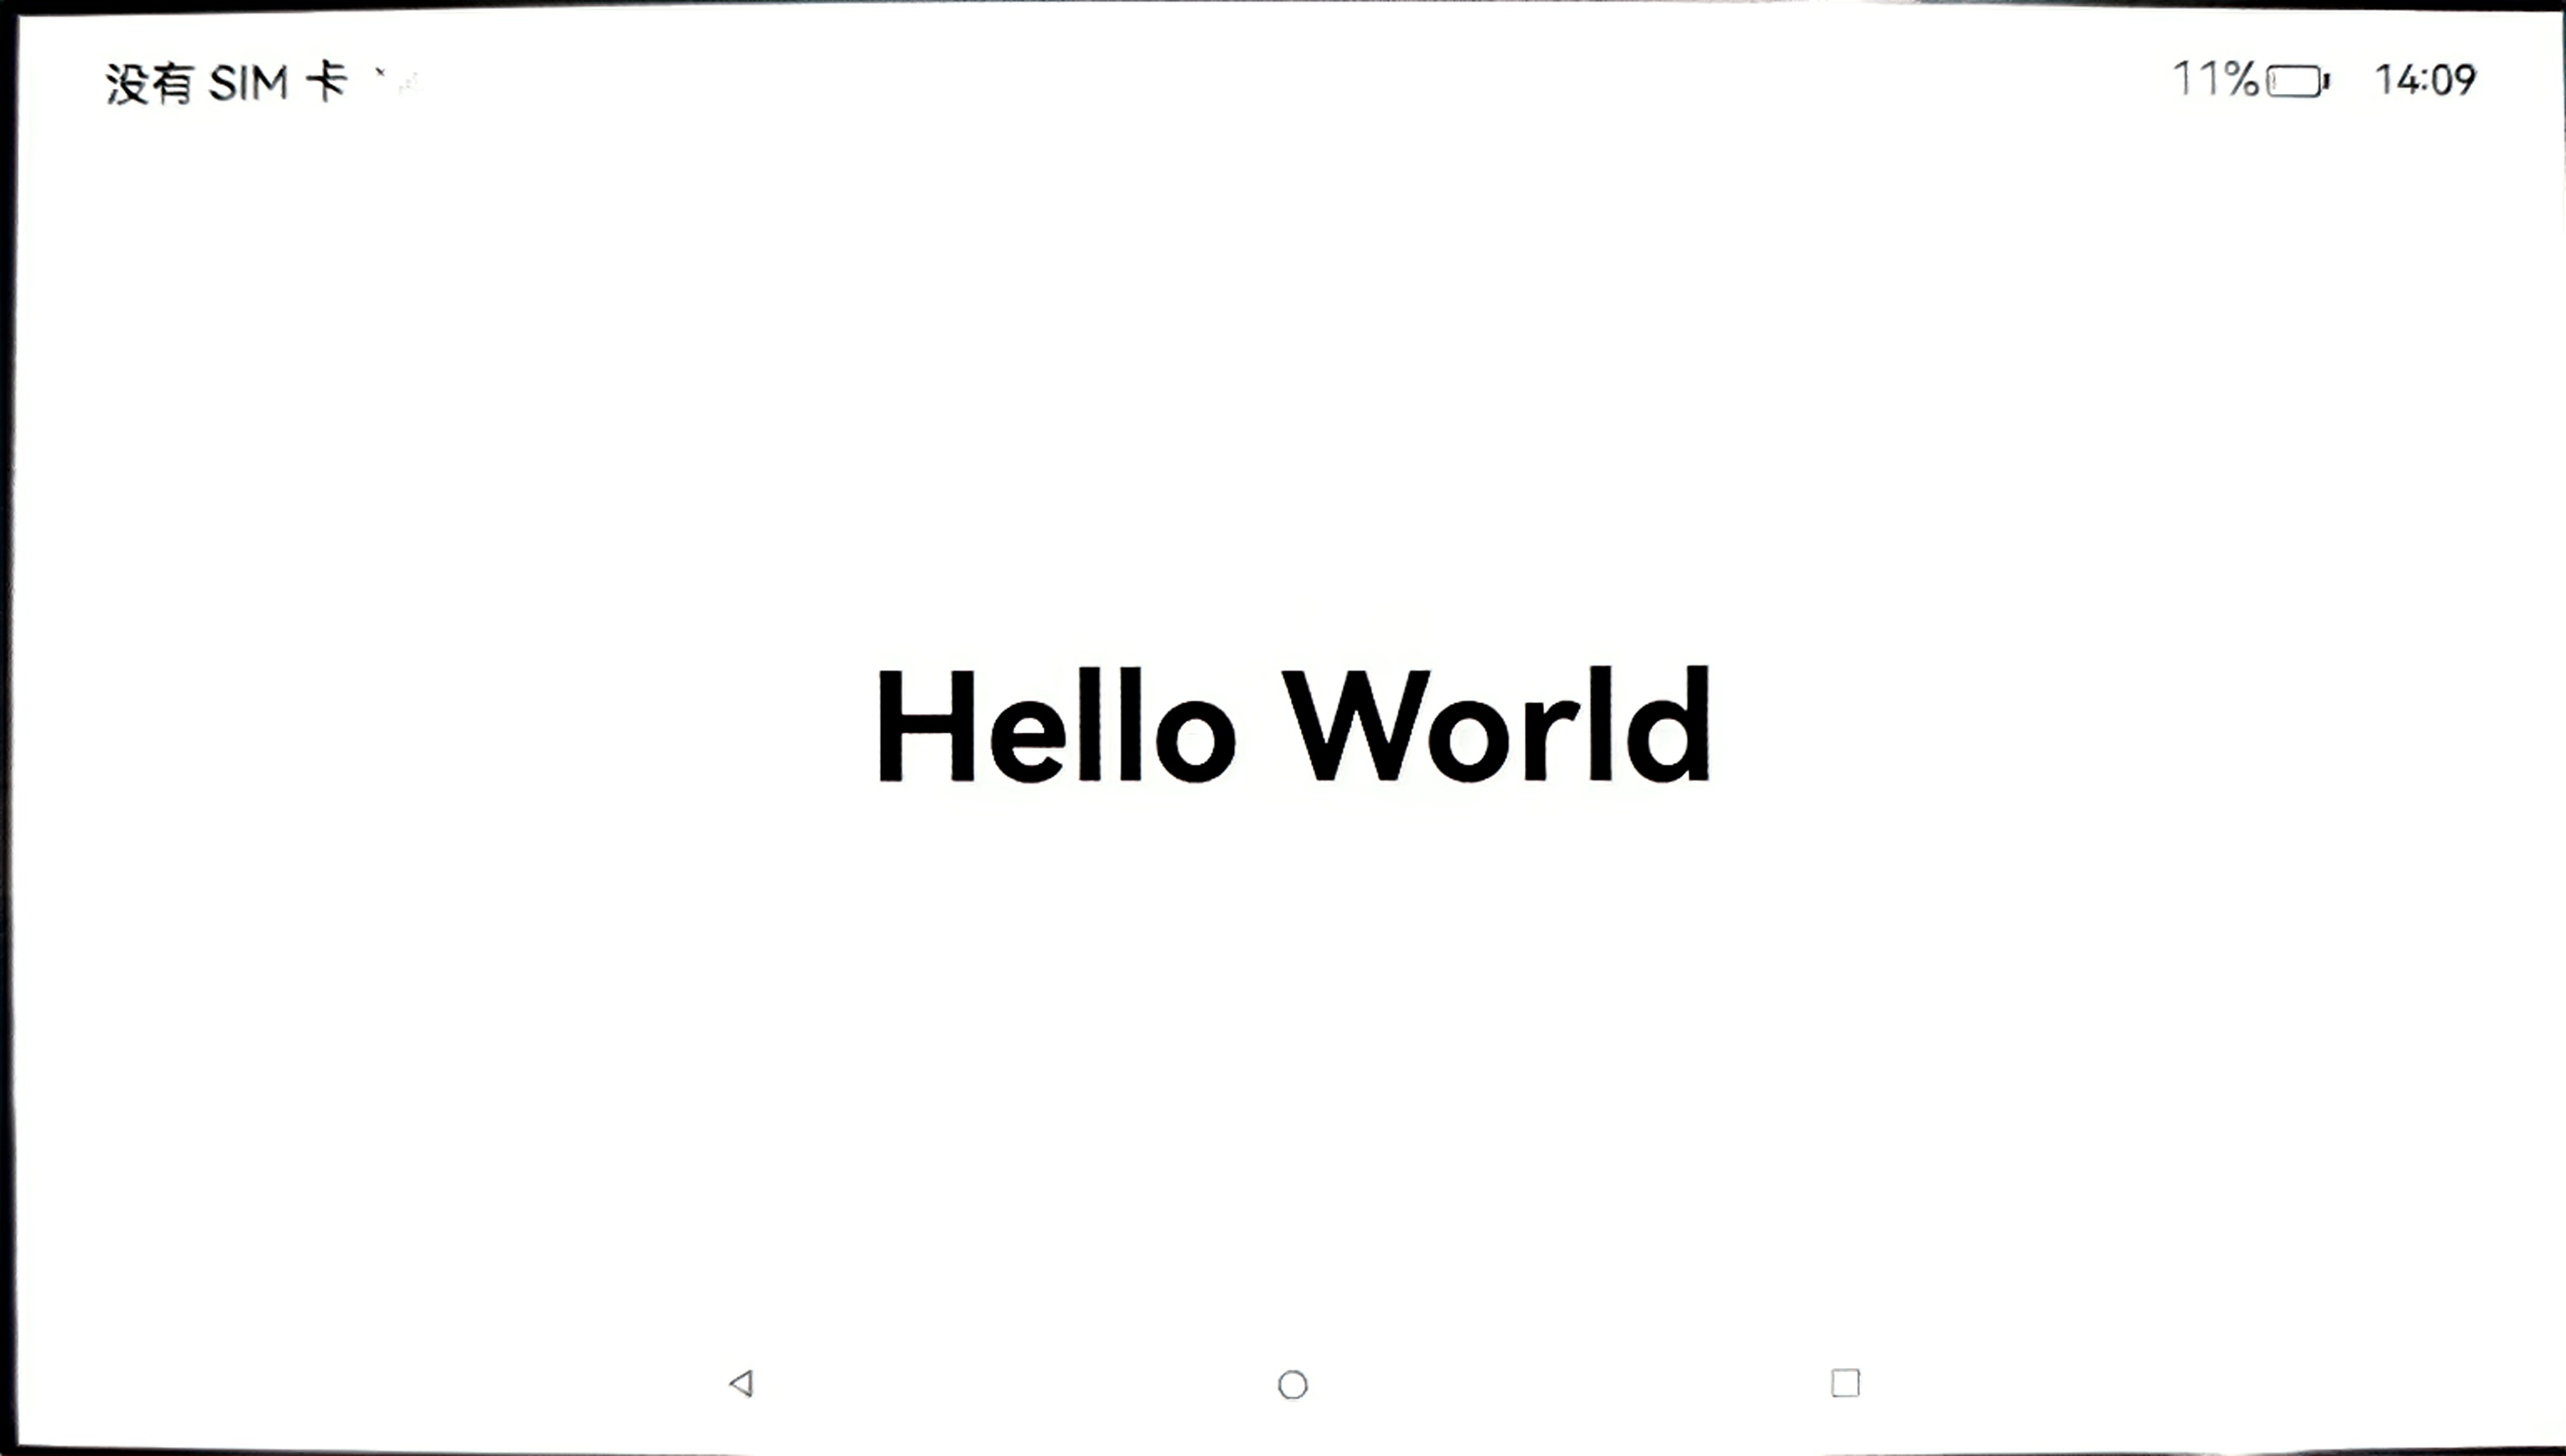
After project synchronization is complete, in the "Project" window, click "entry > src > main > ets > pages" and open the "Index.ets" file. You can see that the default program page of the application project consists of Text components. The function implemented by this application: clicking the Hello World text component switches it to Welcome. The example of the "Index.ets" file is as follows:
@Entry
@Component
struct Index {
  @State message: string = 'Hello World';

  build() {
    RelativeContainer() {
      Text(this.message)
        .id('HelloWorld')
        .fontSize($r('app.float.page_text_font_size'))
        .fontWeight(FontWeight.Bold)
        .alignRules({
          center: { anchor: '__container__', align: VerticalAlign.Center },
          middle: { anchor: '__container__', align: HorizontalAlign.Center }
        })
        .onClick(() => {
          this.message = 'Welcome';
        })
    }
    .height('100%')
    .width('100%')
  }
}
6.2 Signature File Configuration
- Connect the real device M4-R1 running the OpenHarmony system to the PC via a USB-to-Type-C cable through the OTG port (the device defaults to debug mode). Viewing the tool interface will show the serial number of the connected device M4-R1, as shown in the figure below:

- Open the project-level build-profile.json5 and modify the products inside to the following code:
"products": [
	{
		"name": "default",
		"signingConfig": "default",
		"compileSdkVersion": 12,
		"compatibleSdkVersion": 12,
		"targetSdkVersion": 12,
		"runtimeOS": "OpenHarmony",
		"buildOption": {
			"strictMode": {
				"caseSensitiveCheck": true,
				"useNormalizedOHMUrl": true
			}
		}
	}
]
After modification, a blue prompt bar appears below. Click "Sync Now" in the prompt bar to sync the project.
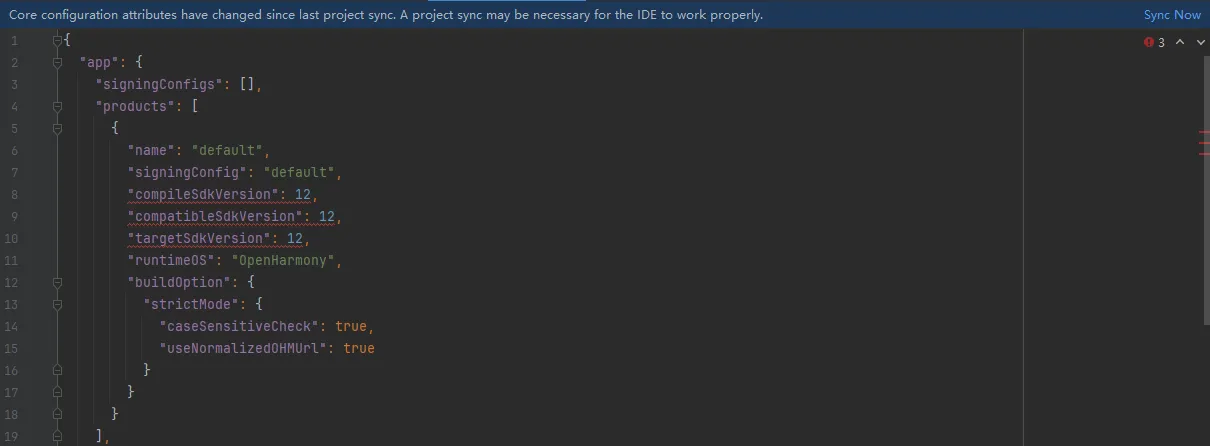
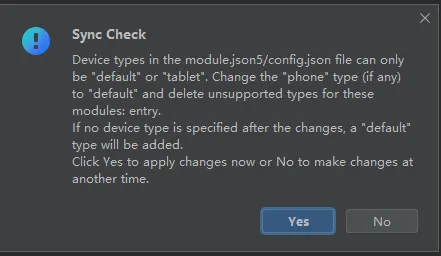
If you encounter the Sync Check popup shown below during synchronization, click Yes.
When Sync Now completes, the Build status bar at the bottom shows the following information.

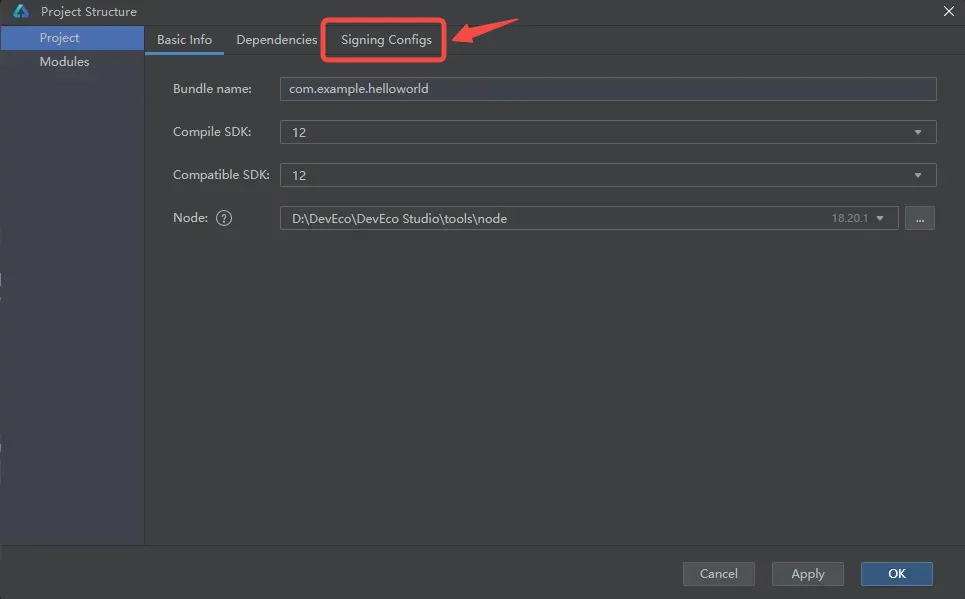
Select File > Project Structure from the menu bar. In the popup window select Signing Configs to perform signing.
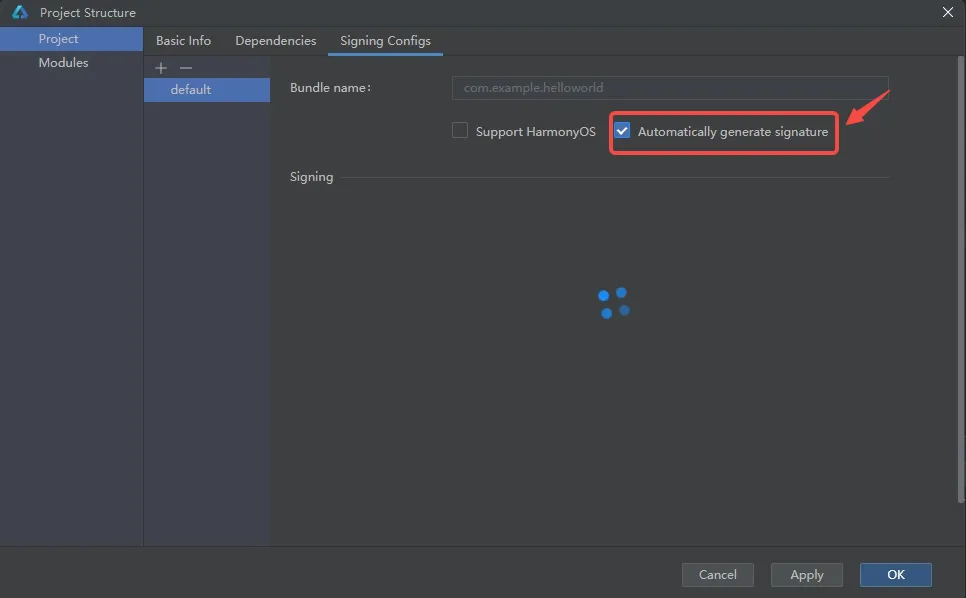
As shown, because the M4-R1 development board runs the OpenHarmony system, check Automatically generate signature and leave Support HarmonyOS unchecked to perform automatic signing.
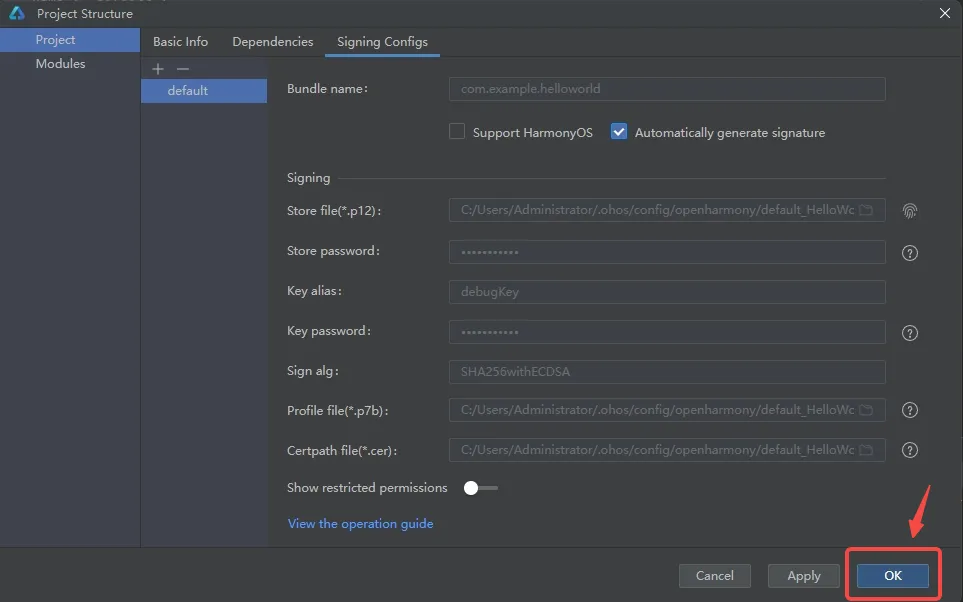
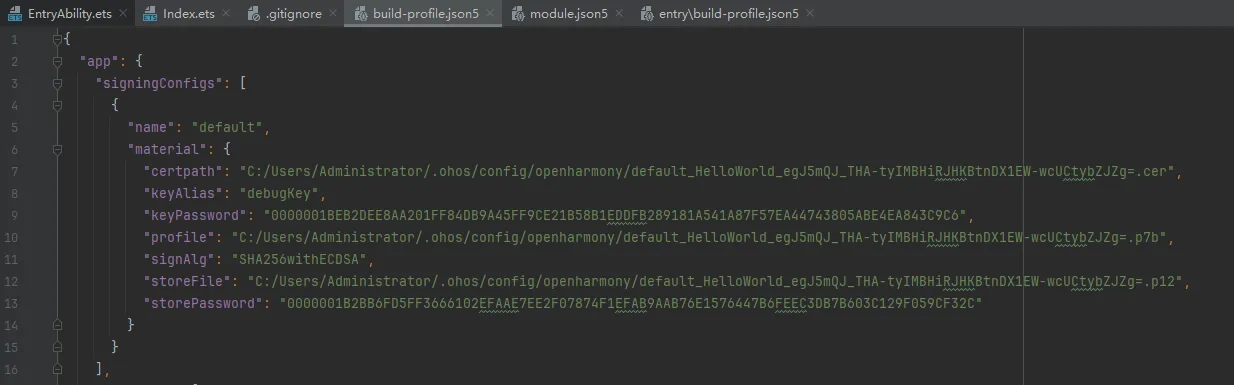
When the signing information appears as shown below, click OK. The signing content signingConfigs will be written into the project-level build-profile.json5.
Wait for synchronization to complete.
6.3 Run the Application
Return to the DevEco Studio project interface, click Run 'entry' on the toolbar to run the application on the development board.

The real-device effect on M-K1HSE is shown in the figure:
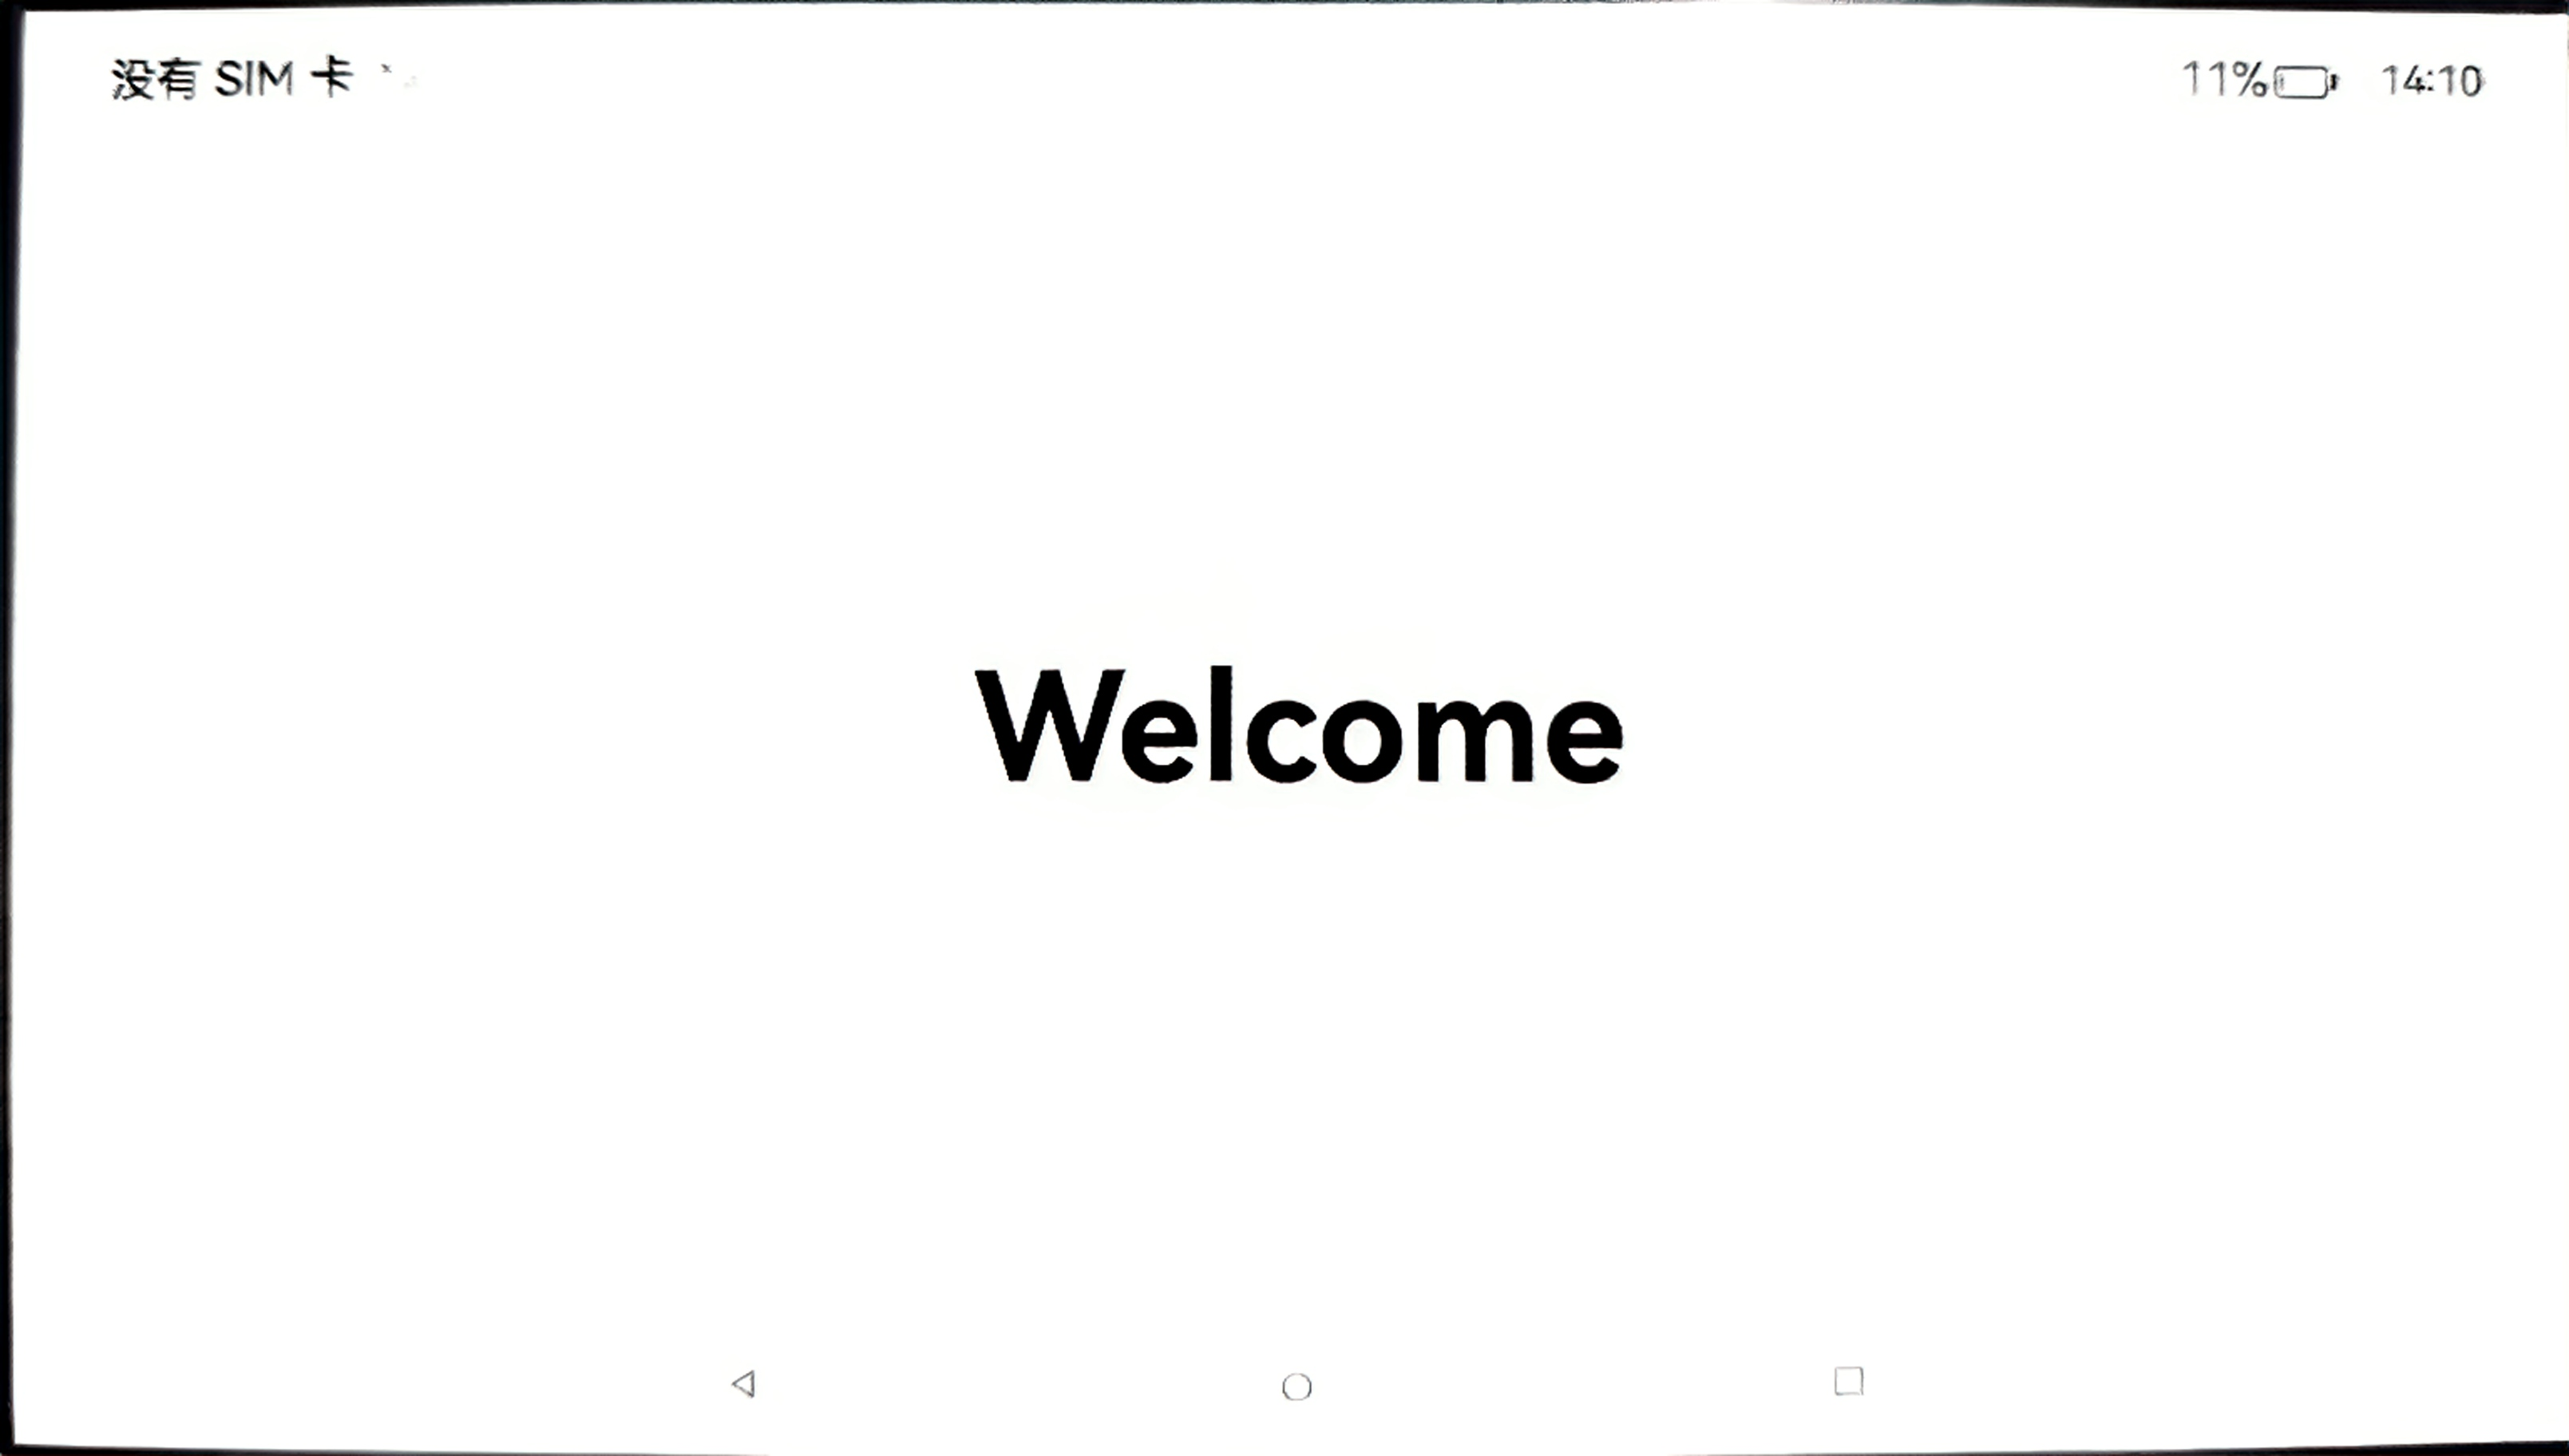
After clicking the Hello World text, the switched effect is shown in the figure: