WIFI&BT
1. WIFI&BT模块介绍
以M4-R1为例,该板卡带有WIFI&蓝牙模块,使用的是RTL8723DS模组(SDIO接口)
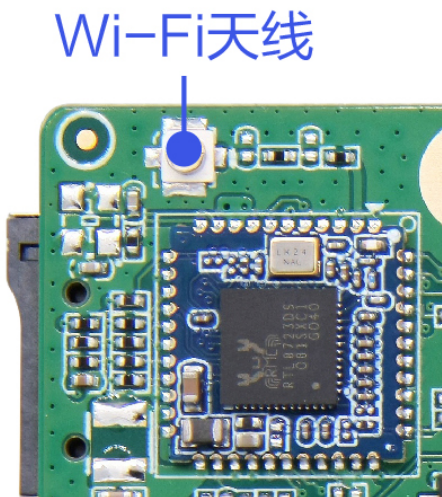
RTL8723DS是一款基于RTL8723DS芯片的SDIO接口单频单通道蓝牙WiFi二合一模块,主要用于智能家居、物联网设备和其他需要蓝牙和WiFi功能的嵌入式系统设计。该模块继承了RTL8723BS蓝牙模块的优秀特性,并进行了升级,符合BT4.2标准,适用于多种无线通信应用场景。
2. WIFI连接测试
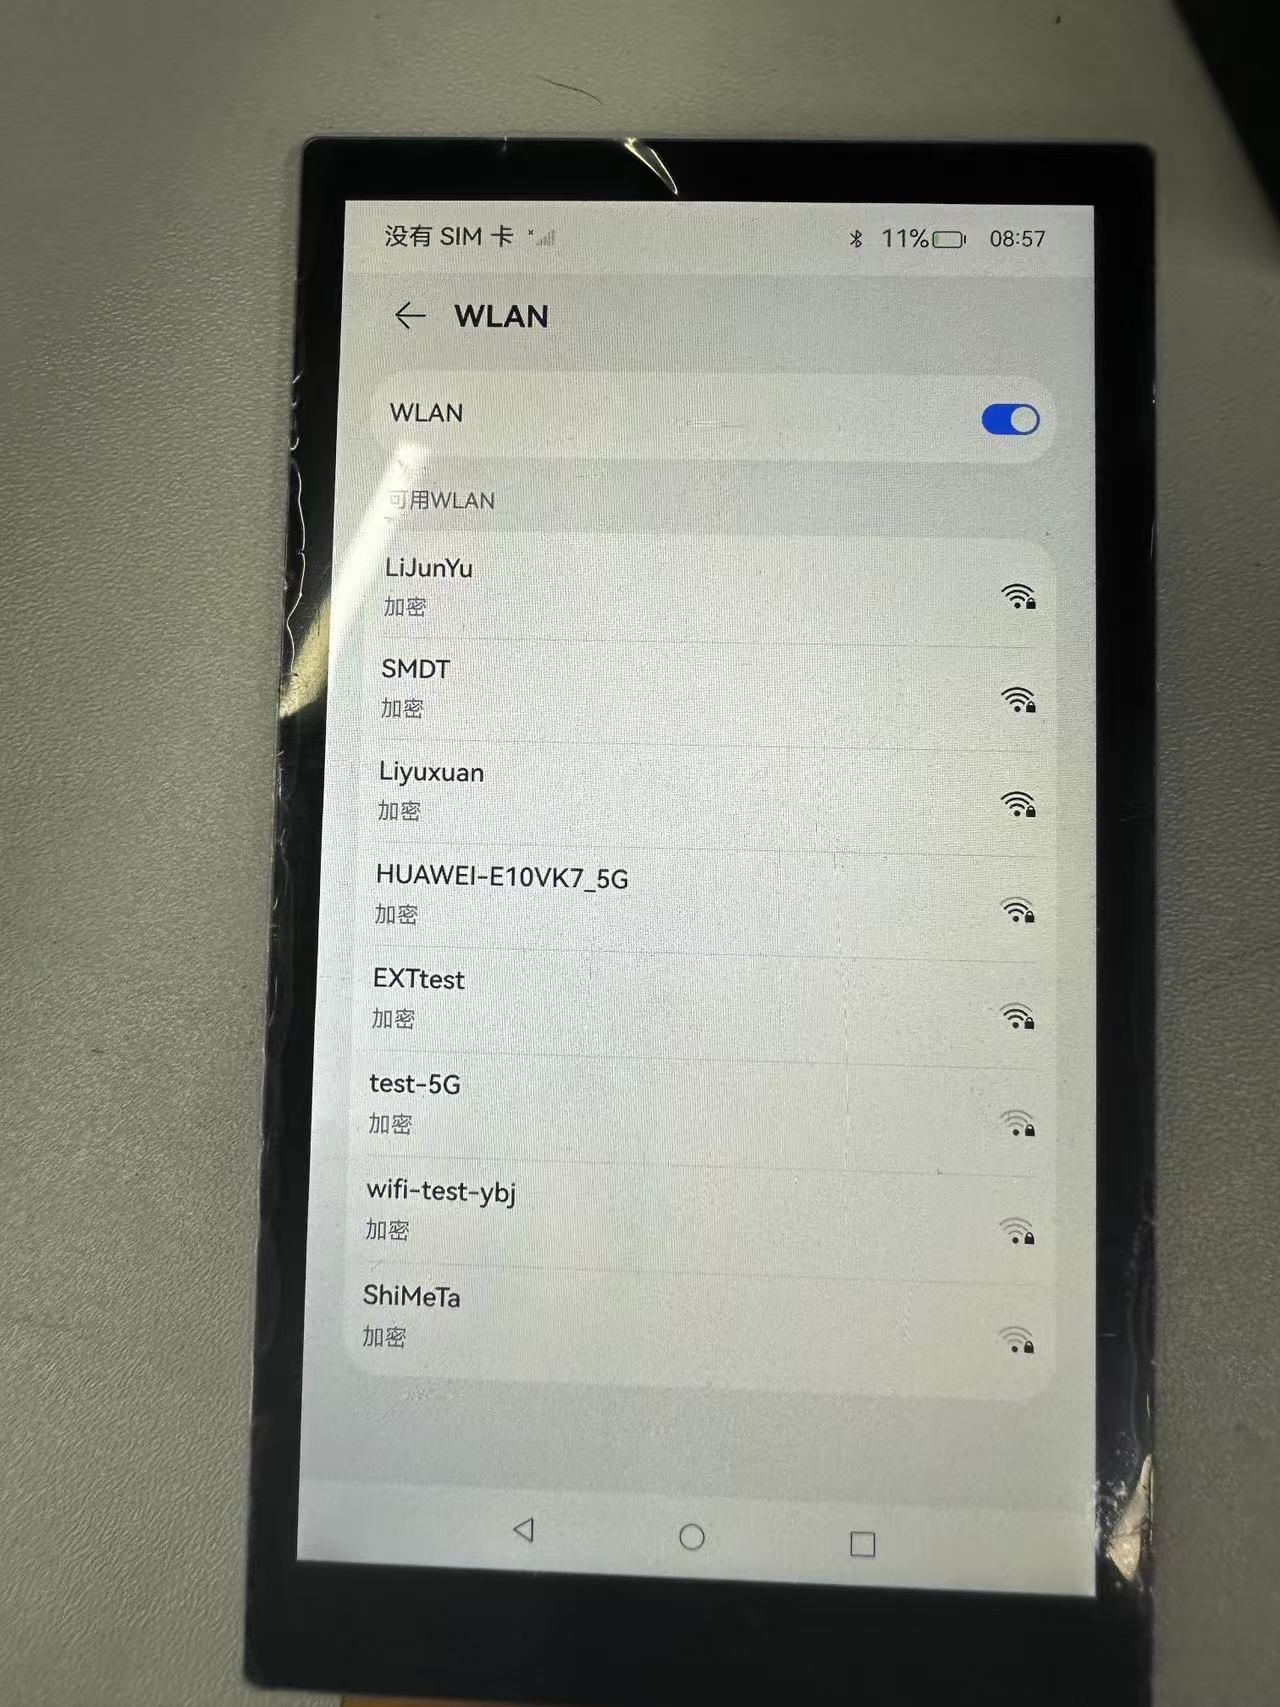
进入系统设置——>WLAN——>打开WIFI
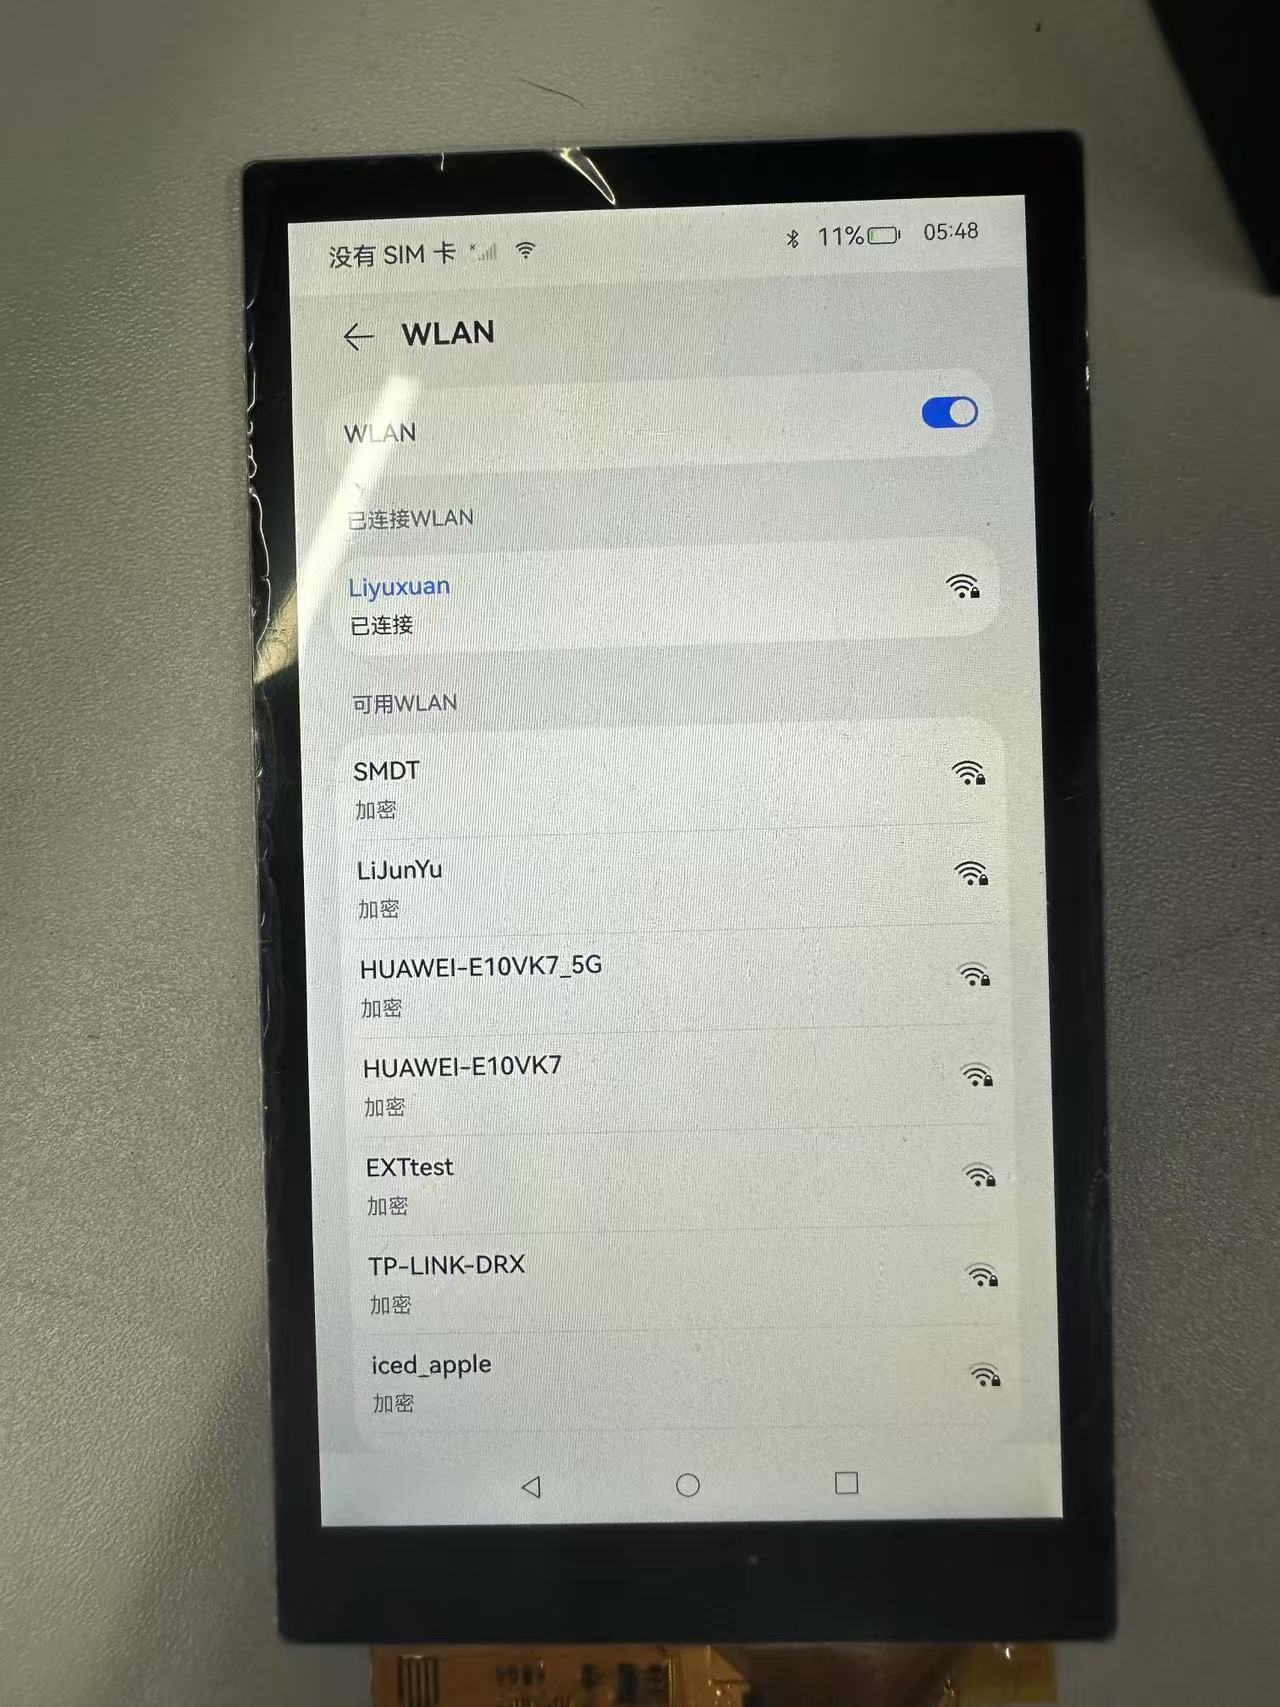
输入密码连接

连接成功
通过命令可以查询WIFI的IP地址等信息
    ~# ifconfig wlan0
    wlan0     Link encap:Ethernet  HWaddr 50:41:1c:0f:1d:e6  Driver bcmsdh_sdmmc
            inet addr:192.168.137.192  Bcast:192.168.137.255  Mask:255.255.255.0
            inet6 addr: fe80::5241:1cff:fe0f:1de6/64 Scope: Link
            UP BROADCAST RUNNING MULTICAST  MTU:1500  Metric:1
            RX packets:106 errors:0 dropped:0 overruns:0 frame:0
            TX packets:121 errors:0 dropped:0 overruns:0 carrier:0
            collisions:0 txqueuelen:1000
            RX bytes:27235 TX bytes:12641
3. 蓝牙连接测试
进入系统设置——>蓝牙——>打开蓝牙
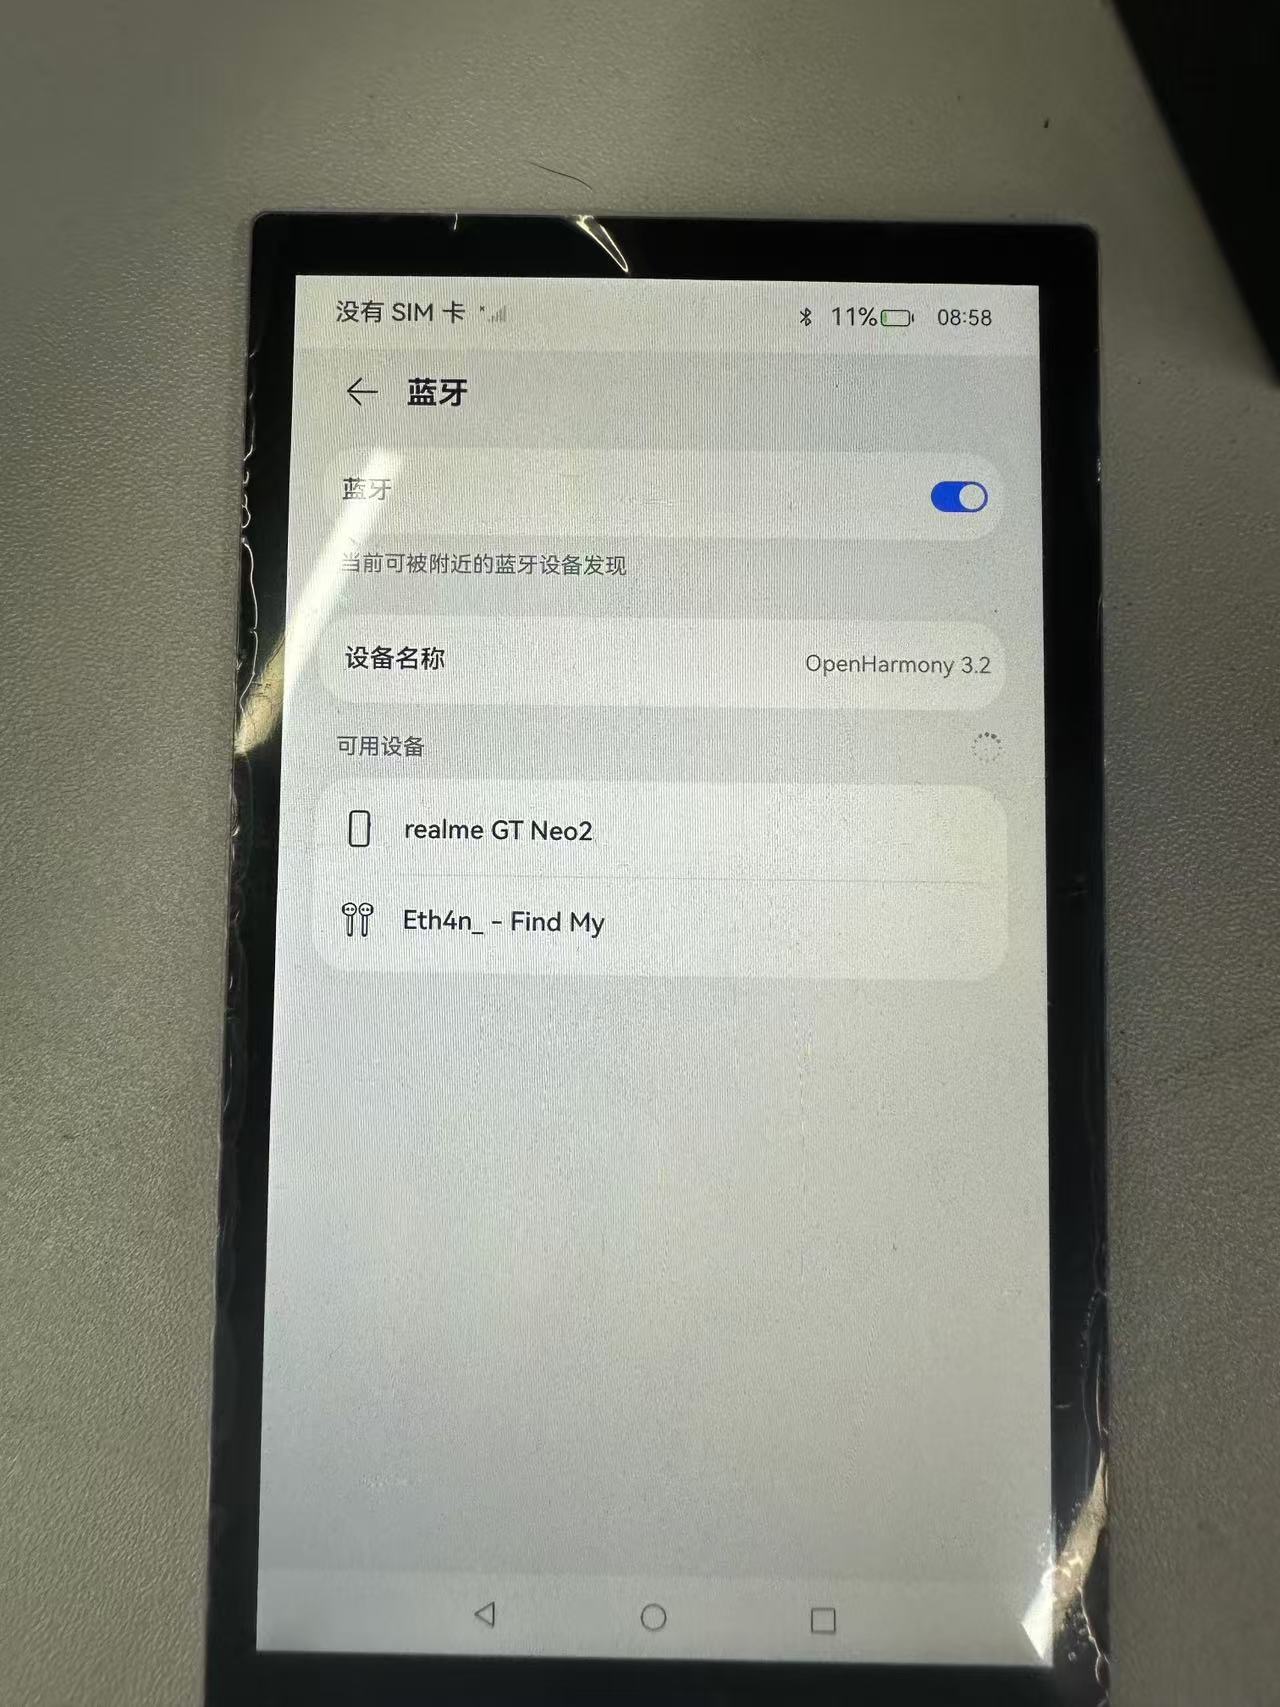
选择配对的设备
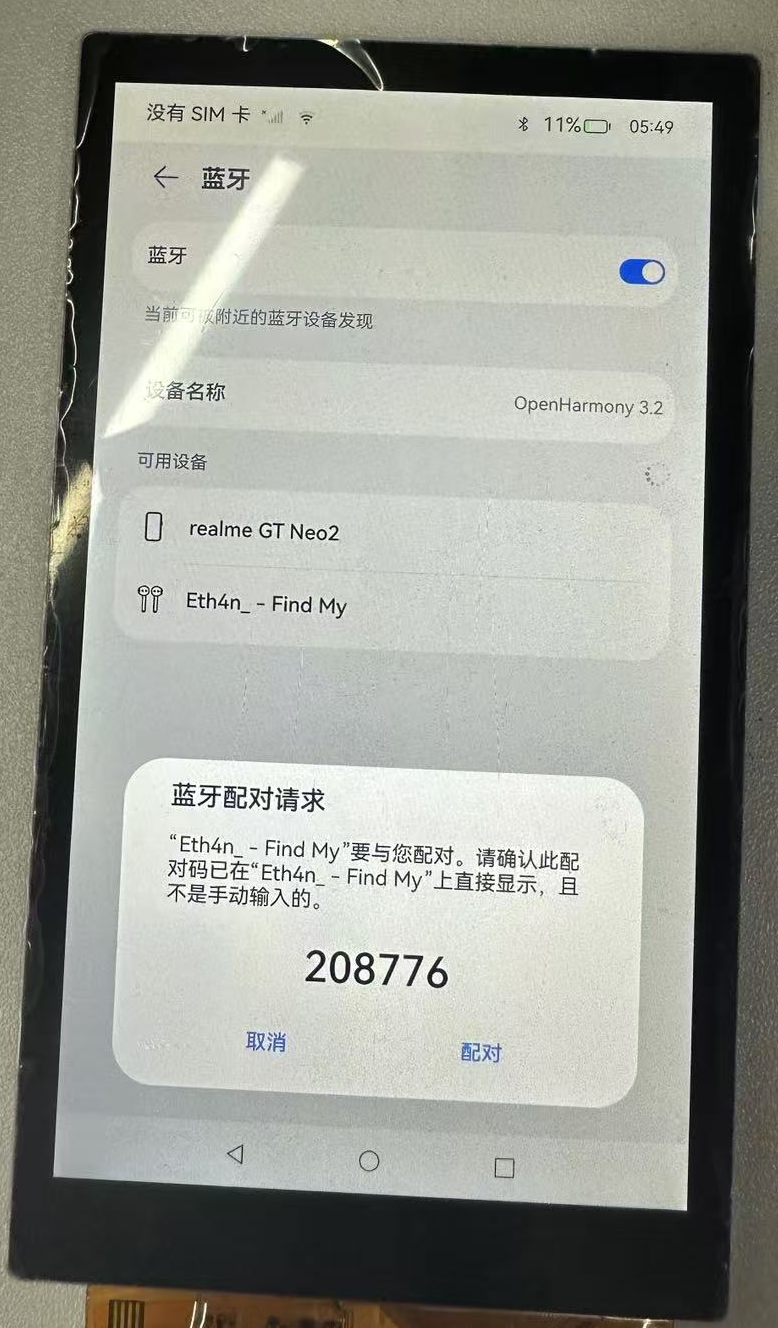
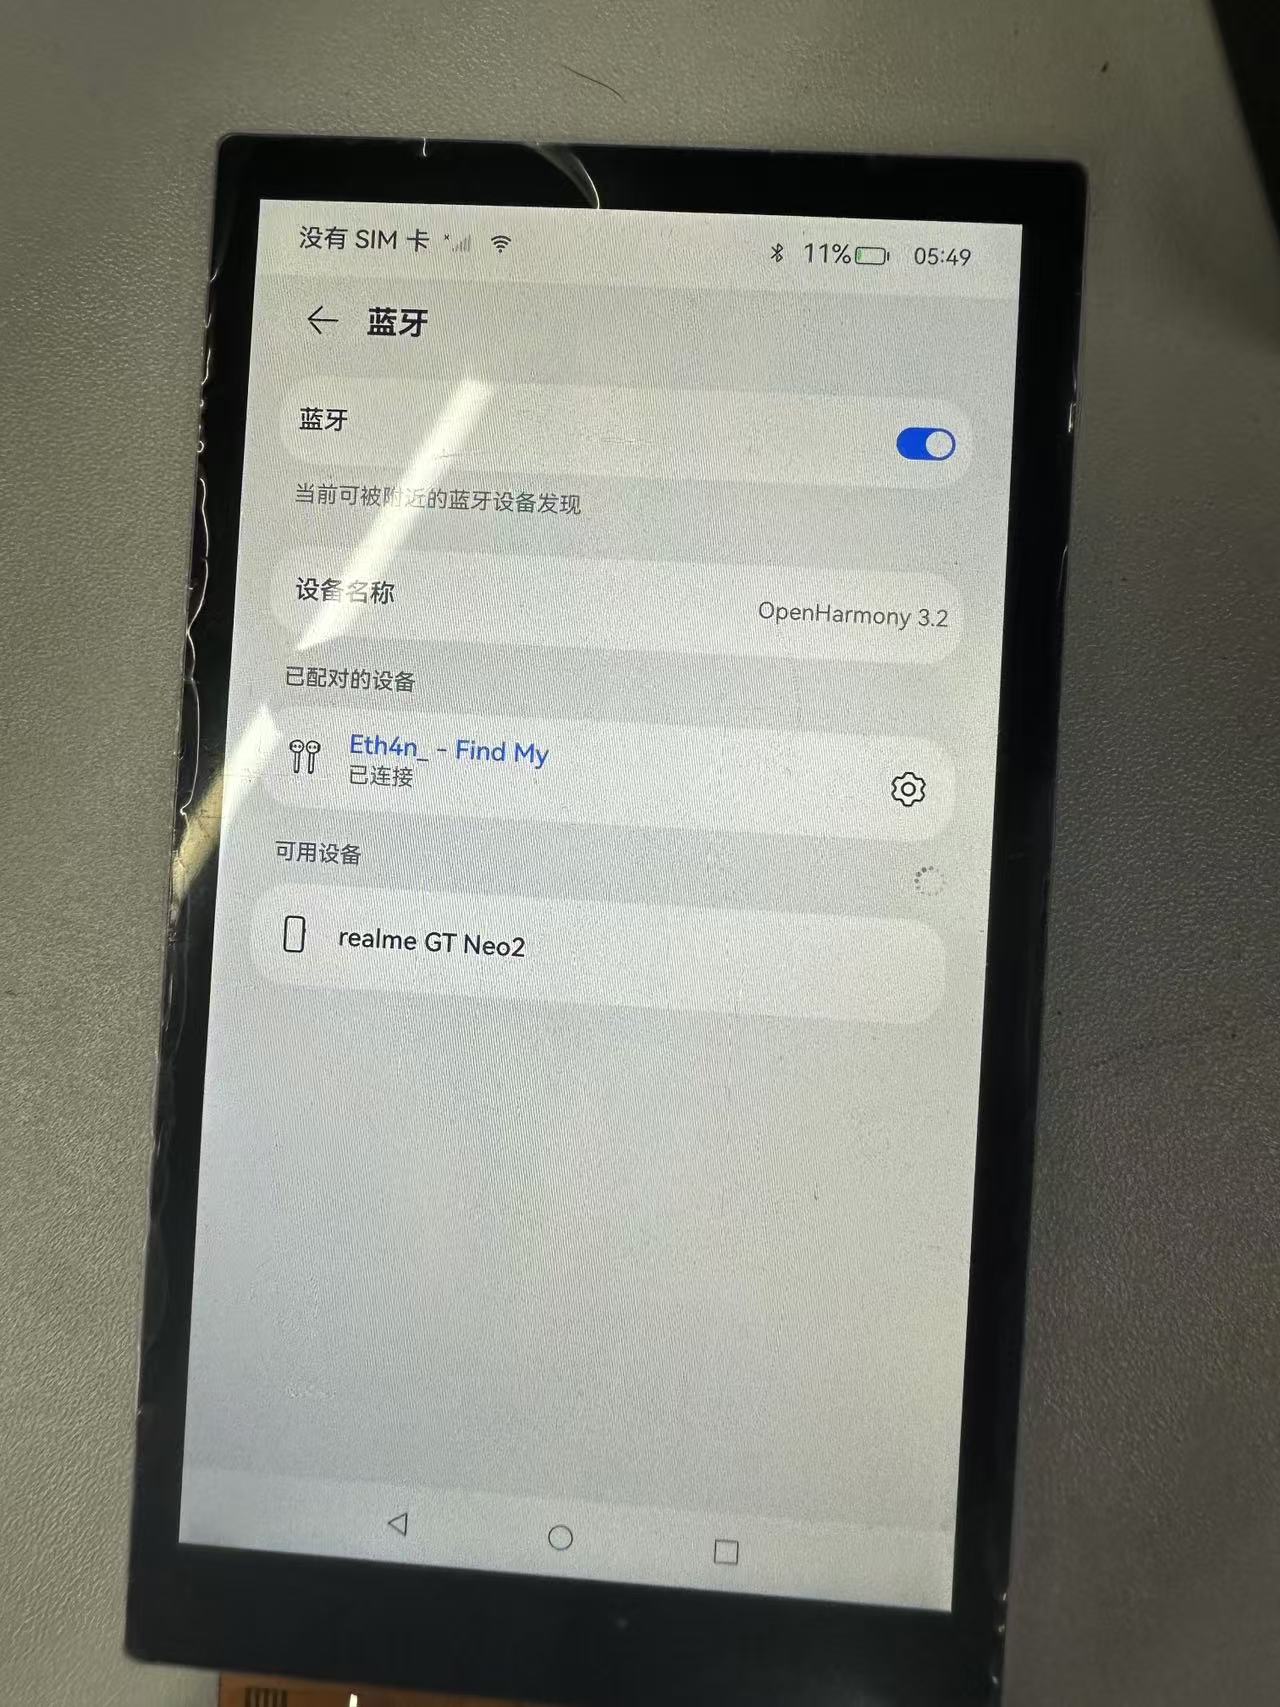
配对成功
4. 蓝牙API使用与实践
4.1 标准API使用方法
备注
本模块提供了对蓝牙操作和管理的方,首批接口从API version 10开始支持。后续版本的新增接口,采用 上角标单独标记接口的起始版本。
- 蓝牙标准接口
使用蓝牙相关API开发时候,需要先了解熟悉第一个open Harmony工程的创建,相关文档: Hello World应用以及部署
在使用一个API时,需要注意以下几点:
API权限说明
API的参数与返回值
API调用错误的时候,参考API错误码和通用错误码
API示例的正确使用
如下图所示,即为标准API文档

- 官方标准开发文档
4.2 社区Demo
- 简介
为了帮助开发者更快速的使用板子开发和学习,我们在gitee上提供了一个蓝牙相关的使用示例,每一个项目都是独立的DevEco Studio工程,开发者可以将工程导入到DevEco Studio中即可,通过浏览代码、编译工程、安装和运行应用示例来了解应用示例中涉及API的使用方法。
Warning
在导入社区Demo工程的时候,需要开发者需要注意本地的开发环境是否与项目的一致,即本地SDK是否与 项目SDK一致。
- 导入模块
在使用蓝牙标准API的时候,最重要的一步是导入蓝牙的模块,才能使用蓝牙相应的API接口。通常模块导入是在文件头导入,导入模块如下:
import blueToothManager from '@ohos.bluetooth.ble'
- API 介绍
社区Demo的实现引用以下API,实现如何打开蓝牙、蓝牙扫描,以及蓝牙的连接的基本实现。
备注
以下介绍均为简单介绍API的系统能力以及对应函数,请结合 gitee蓝牙示例 和 蓝牙官方标准API开发文档 去熟悉开发
- ble.createGattServer(创建GattServer实例)
createGattServer(): GattServer- ble.createGattClientDevice(创建一个可使用的GattClientDevice实例)
createGattClientDevice(deviceId: string): GattClientDevice- ble.getConnectedBLEDevices(获取和当前设备连接的BLE设备)
    getConnectedBLEDevices(): Array<string>
需要权限:ohos.permission.ACCESS_BLUETOOTH- ble.startBLEScan(发起BLE扫描流程)
    startBLEScan(filters: Array<ScanFilter>, options?: ScanOptions): void
需要权限:ohos.permission.ACCESS_BLUETOOTH- ble.stopBLEScan(停止BLE扫描流程)
    stopBLEScan(): void
需要权限:ohos.permission.ACCESS_BLUETOOTH- ble.startAdvertising(开始发送BLE广播)
    startAdvertising(setting: AdvertiseSetting, advData: AdvertiseData, advResponse?: AdvertiseData): void
需要权限:ohos.permission.ACCESS_BLUETOOTH- ble.stopAdvertising(开始发送BLE广播)
    stopAdvertising(): void
	需要权限:ohos.permission.ACCESS_BLUETOOTH
Demo主要实现源码
BT.ets
	import ble from "@ohos.bluetooth.ble"
	import { BusinessError } from '@ohos.base'
	// import access from '@ohos.bluetooth.access';

	const minRssi = -100
	@Entry
	@Component
	struct Index {
	@State message: string = 'Hello BLE'
	@State availableDevices: Array<ble.ScanResult> = [];

	addData(data:ble.ScanResult):void {
	   let bFind = false
	   this.availableDevices.forEach(element => {
		  if (!bFind && element.deviceId == data.deviceId) {
		  console.info('BLE scan update ' + data.deviceId + ' rssi:' + element.rssi +' ==> '+ data.rssi)
		  element.rssi = data.rssi
		  bFind = true
		  }
	   })
	   if (!bFind) {
		  console.info('BLE scan add ' + data.deviceId + ' count:' + this.availableDevices.length)
		  this.availableDevices.push(data)
		  this.message='BLE count:' + this.availableDevices.length
	   }
	}

	dataToString(data:ArrayBuffer) :String {
	   let str = ''
	   let v = new Uint8Array(data);
	   v.forEach(element => {
		  let s = ''
		  s =  element.toString(16)
		  if (s.length == 1) {
		  s = '0'+s
		  }
		  str+=s+' '
	   });
	   return str
	}

	openBle():void {
	   try {
		  ble.on("BLEDeviceFind", (data:Array<ble.ScanResult>) => {
		  // console.info('BLE scan device find result = '+ JSON.stringify(data));
		  let i = 0
		  data.forEach(element => {
			 console.info('BLE scan device[' + i + '] deviceId = '+ element["deviceId"] +
				' name = ' + element["deviceName"]  +
				' rssi = ' + element["rssi"] +
				' data['+element["data"].byteLength+'] = ' +
			 this.dataToString(element["data"]))
			 if (element.rssi > minRssi && element.deviceName != '' ) {
				this.addData(element)
			 }
			 i++
		  });
		  });

		  ble.startBLEScan(
		  null,
		  {
			 interval: 500,
			 dutyMode: ble.ScanDuty.SCAN_MODE_LOW_POWER,
			 matchMode: ble.MatchMode.MATCH_MODE_AGGRESSIVE,
		  }
		  );
	   } catch (err) {
		  console.error("ble errCode:" + (err as BusinessError).code + ",errMessage:" + (err as BusinessError).message);
	   }

	}

	//   onAccessEvent(data: access.BluetoothState):void {
	//   console.info('bluetooth state = '+ JSON.stringify(data));
	//   if (data == access.BluetoothState.STATE_ON) {
	//     this.openBle()
	//   }
	// }

	build() {
	   Row() {
		  Column() {

		  Text(this.message)
			 .fontSize(30)
			 .fontWeight(FontWeight.Bold)

		  // 添加按钮,开启ble扫描
		  Button() {
			 Text('ble start')
				.fontSize(30)
				.fontWeight(FontWeight.Bold)
		  }
		  .type(ButtonType.Capsule)
		  .margin({
			 top: 20
		  })
		  .backgroundColor('#0D9FFB')
		  .width('30%')
		  .height('10%')
		  // 跳转按钮绑定onClick事件,点击时跳转到第二页
		  .onClick(() => {
			 console.info("onClick")
			 try {
				this.openBle()
				// }
			 } catch (err) {
				console.error('ble errCode: ' + (err as BusinessError).code + ', errMessage: ' + (err as BusinessError).message);
			 }
		  })

		  // 添加按钮,停止ble扫描
		  Button() {
			 Text('ble stop')
				.fontSize(30)
				.fontWeight(FontWeight.Bold)
		  }
		  .type(ButtonType.Capsule)
		  .margin({
			 top: 20
		  })
		  .backgroundColor('#0D9FFB')
		  .width('30%')
		  .height('10%')
		  .onClick(() => {
			 this.availableDevices = []
			 this.message = 'Hello BLE'
			 // AppStorage.setOrCreate('bluetoothAvailableDevices', this.availableDevices);
			 try {
				ble.off('BLEDeviceFind')
				ble.stopBLEScan();
			 } catch (err) {
				console.error("ble errCode:" + (err as BusinessError).code + ",errMessage:" + (err as BusinessError).message);
			 }
		  })

		  List({ space: "4vp", initialIndex: 0 }) {
			 ForEach(this.availableDevices, (item: ble.ScanResult, index: number) => {
				ListItemGroup() {
				ListItem() {
				   Text('['+index.toString(10) +"]" + item.deviceId)
					  .textAlign(TextAlign.Center)
					  .fontSize(30)
					  .backgroundColor(Color.Yellow)
					  .width('100%')
				}
				ListItem() {
				   Text('    name:' + item.deviceName)
					  .textAlign(TextAlign.Start)
					  .fontSize(30)
					  .backgroundColor(Color.Orange)
					  .width('100%')
				}

				ListItem() {
				   Text('    rssi:' + item.rssi.toString(10))
					  .textAlign(TextAlign.Start)
					  .fontSize(30)
					  .backgroundColor(Color.Orange)
					  .width('100%')
				}

				ListItem() {
				   Text('    connectable:' + item.connectable)
					  .textAlign(TextAlign.Start)
					  .fontSize(30)
					  .backgroundColor(Color.Orange)
					  .width('100%')
				}

				ListItem() {
				   Text('    data:' + this.dataToString(item.data))
					  .textAlign(TextAlign.Start)
					  .fontSize(30)
					  .backgroundColor(Color.Orange)
					  .width('100%')
				}


				}


			 })
		  }
		  .layoutWeight(10)
		  .backgroundColor(0xDCDCDC)
		  .height('50%')
		  .width('60%')
		  .margin({
			 top: 20
		  })
		  }
		  .width('100%')
	   }
	   .height('100%')
	   }
	}
4.3 代码编译
Tips
代码编译详细流程可见:Hello World应用以及部署 中的第二部分(构建第一个页面部分内容)
4.4 代码运行效果
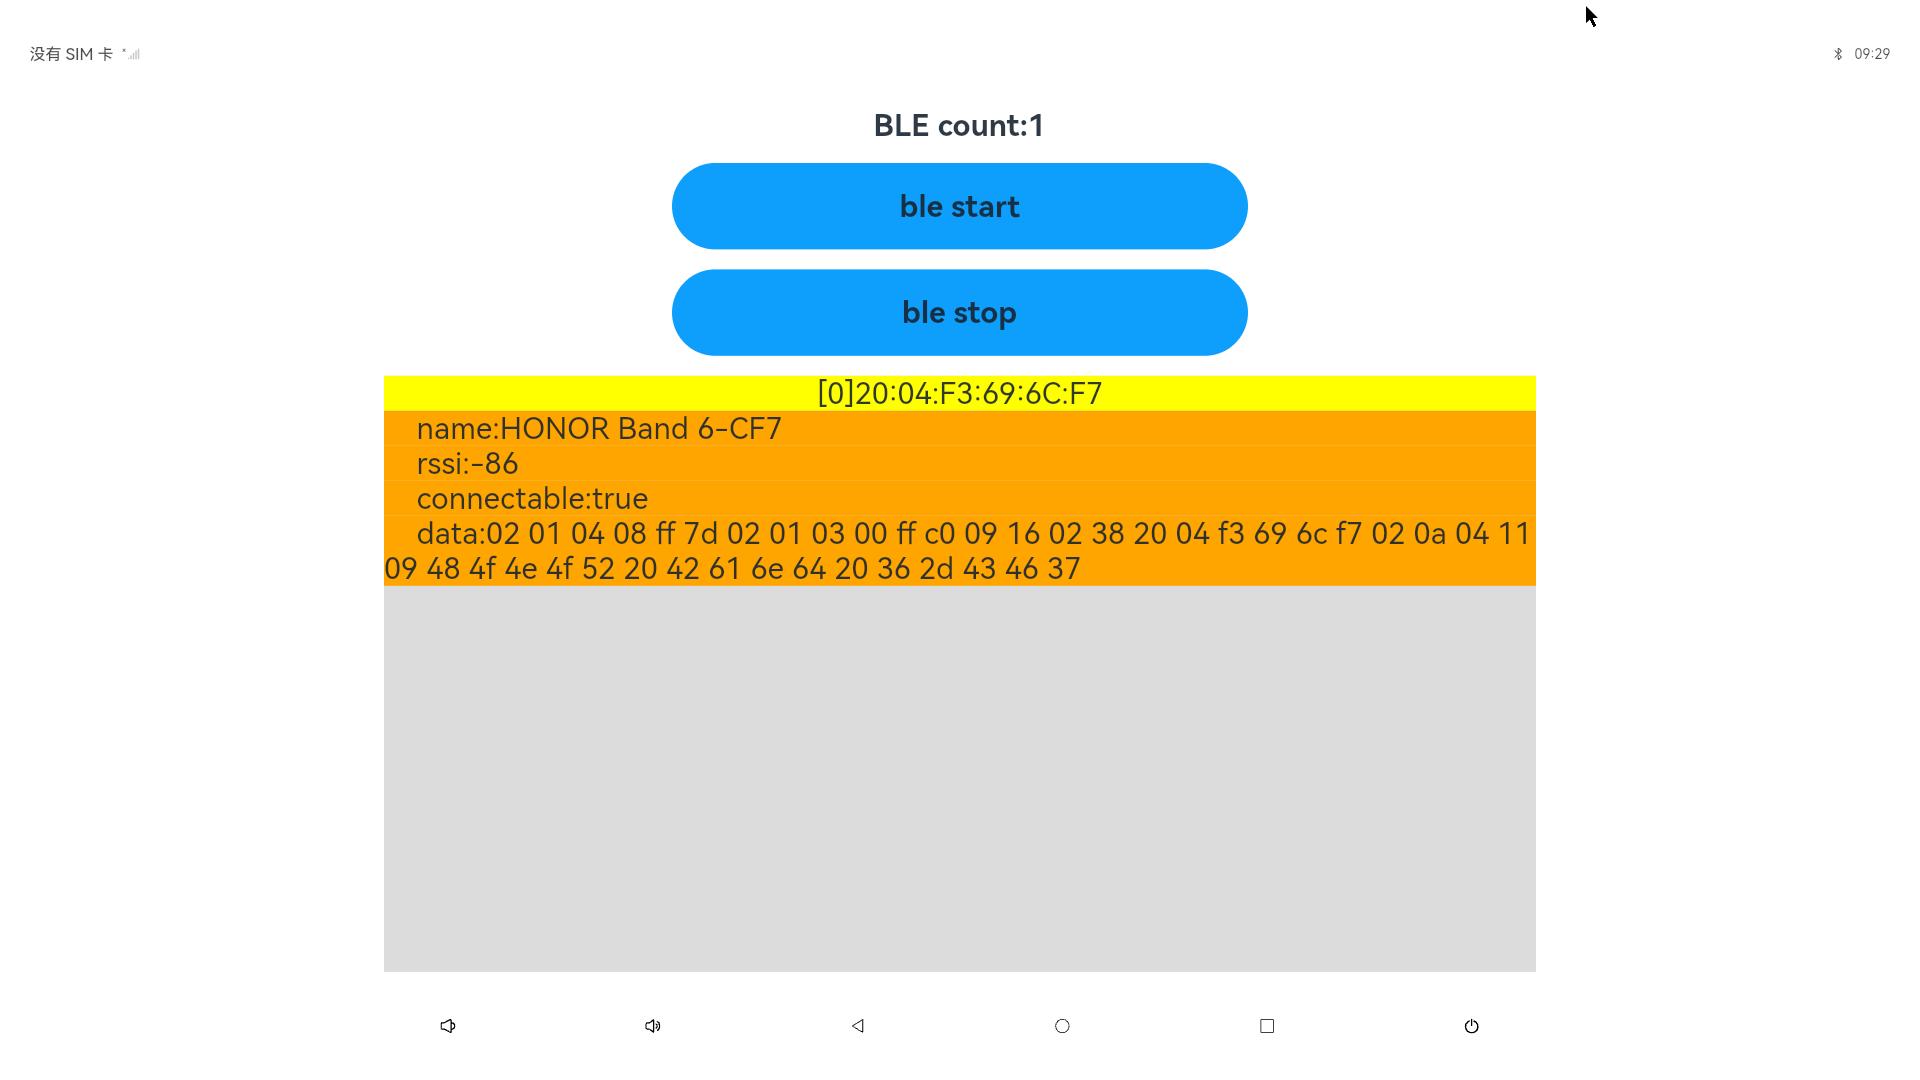
用以上标准API接口实现蓝牙 Demo,如下图所示:
5. WIFI API使用与实践
5.1 HDC相关指令
hdc指令可以用于查询WiFi的信息以及连接状态
hdc shell ifconfig5.2 标准API使用方法
Warning
本模块提供企业设备WiFi管理能力,包括查询WiFi开启状态等。首批接口从API version 10开始支持,接口 仅可在Stage模型下使用。
- WLAN标准接口
@ohos.wifiManager (WLAN)
- API使用说明
使用WIFI相关API开发时候,需要先了解熟悉第一个open Harmony工程的创建,相关文档: Hello World应用以及部署
在使用一个API时,需要注意以下几点:
API权限说明
API的参数与返回值
API调用错误的时候,参考API错误码和通用错误码
API示例的正确使用
如下图所示,即为标准API文档
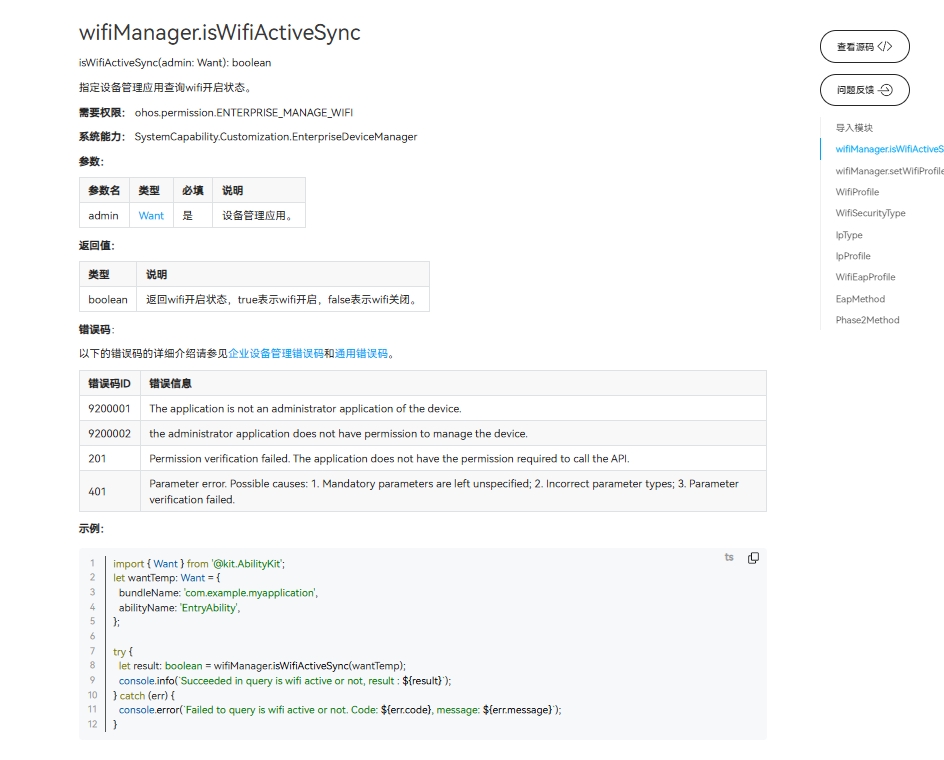
- 官方标准开发文档
5.3 社区Demo
- 简介
为了帮助开发者更快速的使用板子开发和学习,我们在gitee上提供了一个WiFi相关的使用示例,每一个项目都是独立的DevEco Studio工程,开发者可以将工程导入到DevEco Studio中即可,通过浏览代码、编译工程、安装和运行应用示例来了解应用示例中涉及API的使用方法。
giteeWIFI示例
注意事项:
在导入社区Demo工程的时候,需要开发者需要注意本地的开发环境是否与项目的一致,即本地SDK是否与 项目SDK一致。
- 导入模块
在使用WIFI标准API的时候,最重要的一步是导入WIFI的模块,才能使用WIFI相应的API接口。通常模块导入是在文件头导入,导入模块如下:
import wifiManager from '@ohos.wifiManager'
- API 介绍
社区Demo的实现引用以下API,实现如何打开WIFI、WIFI扫描,以及WIFI的连接的基本实现。
备注
以下介绍均以为简单介绍API的系统能力以及对应函数,请结合 giteeWIFI示例 和 WIFI官方标准API开发文档 去熟悉开发
- wifiManager.enableWifi(使能WLAN)
    isWifiActive(): boolean
需要权限: ohos.permission.SET_WIFI_INFO 和 ohos.permission.MANAGE_WIFI_CONNECTION 仅系统应用可用。- wifiManager.disableWifi(去使能WLAN)
    isWifiActive(): boolean
需要权限: ohos.permission.SET_WIFI_INFO 和 ohos.permission.MANAGE_WIFI_CONNECTION 仅系统应用可用。- wifiManager.startScan(启动WLAN扫描)
startScan(): void- wifiManager.getScanInfoList(获取扫描结果)
    getScanInfoList(): Array<WifiScanInfo>
需要权限: ohos.permission.GET_WIFI_INFO- wifiManager.isWifiActive(查询WLAN是否已使能)
    isWifiActive(): boolean
需要权限: ohos.permission.GET_WIFI_INFO- wifiManager.connectToDevice(连接指定网络)
    connectToDevice(config: WifiDeviceConfig): void
	需要权限: ohos.permission.SET_WIFI_INFO 和 ohos.permission.SET_WIFI_CONFIG 和 ohos.permission.MANAGE_WIFI_CONNECTION,仅系统应用可用。
Demo主要实现源码
wifi.ets
	import wifiManager from '@ohos.wifiManager';
	import { MyDivider } from './MyDivider';

	@Entry
	@Component
	struct Index {
	@State message: string = 'WiFi示例'
	private TAG: string = 'ShiMetaWifi'
	@State wifiStatus: string = 'null'
	@State wifiInfoList: string = ''
	@State passWord: string = ''
	@State account: string = ''

	build() {
		Row() {
		Column() {
			Text(this.message)
			.fontSize(50)
			.fontWeight(FontWeight.Bold)


			Row() {
			Text('WIFI开关')
				.fontSize(50)
				.fontWeight(FontWeight.Bold)
			Toggle({ type: ToggleType.Switch, isOn: false })
				.width(50)
				.height(50)
				.selectedColor('#007DFF')
				.switchPointColor('#FFFFFF')
				.onChange((isOn: boolean) => {
				if (isOn) {
					try {
					wifiManager.enableWifi();
					} catch (error) {
					console.error("failed:" + JSON.stringify(error));
					}
				} else {
					try {
					wifiManager.disableWifi();
					} catch (error) {
					console.error("failed:" + JSON.stringify(error));
					}
				}
				})
			}
			.width('100%')
			.justifyContent(FlexAlign.SpaceAround)
			.padding(10)
			MyDivider();


			Row() {
			Button('点击查询WIFI是否打开')
				.onClick(() => {
				let isWifiActive = wifiManager.isWifiActive();
				if (isWifiActive) {
					this.wifiStatus = 'On'
				} else {
					this.wifiStatus = 'Off'
				}
				console.log(this.TAG, 'isWifiActive' + isWifiActive);
				})
			Text(this.wifiStatus)
				.fontSize(50)
				.fontWeight(FontWeight.Bold)
			}
			.width('100%')
			.justifyContent(FlexAlign.SpaceAround)
			.padding(10)
			MyDivider();

			Row() {
			Button('点击开始扫描')
				.onClick(() => {
				wifiManager.startScan()
				})
			}.padding(10)

			Row() {
			Button('点击获取扫面结果')
				.onClick(() => {
				let scanInfoList = wifiManager.getScanInfoList();
				this.wifiInfoList = JSON.stringify(scanInfoList)
				console.info("scanInfoList:" + JSON.stringify(scanInfoList));
				})
			}.padding(10)

			Row() {
			Button('点击清空')
				.onClick(() => {
				this.wifiInfoList = ''
				})
			}.padding(10)

			Text(this.wifiInfoList)
			Column() {
			Row() {
				TextInput({ placeholder: '输入账号' })
				.onChange((value: string) => {
					this.account = value;
					console.log(this.TAG, 'account :' + this.account)
				})
			}.padding(10)

			Row() {
				TextInput({ placeholder: '输入密码' })
				.onChange((value: string) => {
					this.passWord = value;
					console.log(this.TAG, 'passWord :' + this.passWord)
				})
			}.padding(10)

			Button('连接WiFi')
				.onClick(() => {
				try {
					let config: wifiManager.WifiDeviceConfig = {
					ssid: this.account,
					preSharedKey: this.passWord,
					securityType: 3
					}
					wifiManager.connectToDevice(config);
				} catch (error) {
					console.error("failed:" + JSON.stringify(error));
				}
				})

			}.width(500)
		}
		.width('100%')
		}
		.height('100%')
	  }
	}
5.4 代码编译
Tips
代码编译详细流程可见:Hello World应用以及部署 中的第二部分(构建第一个页面部分内容)
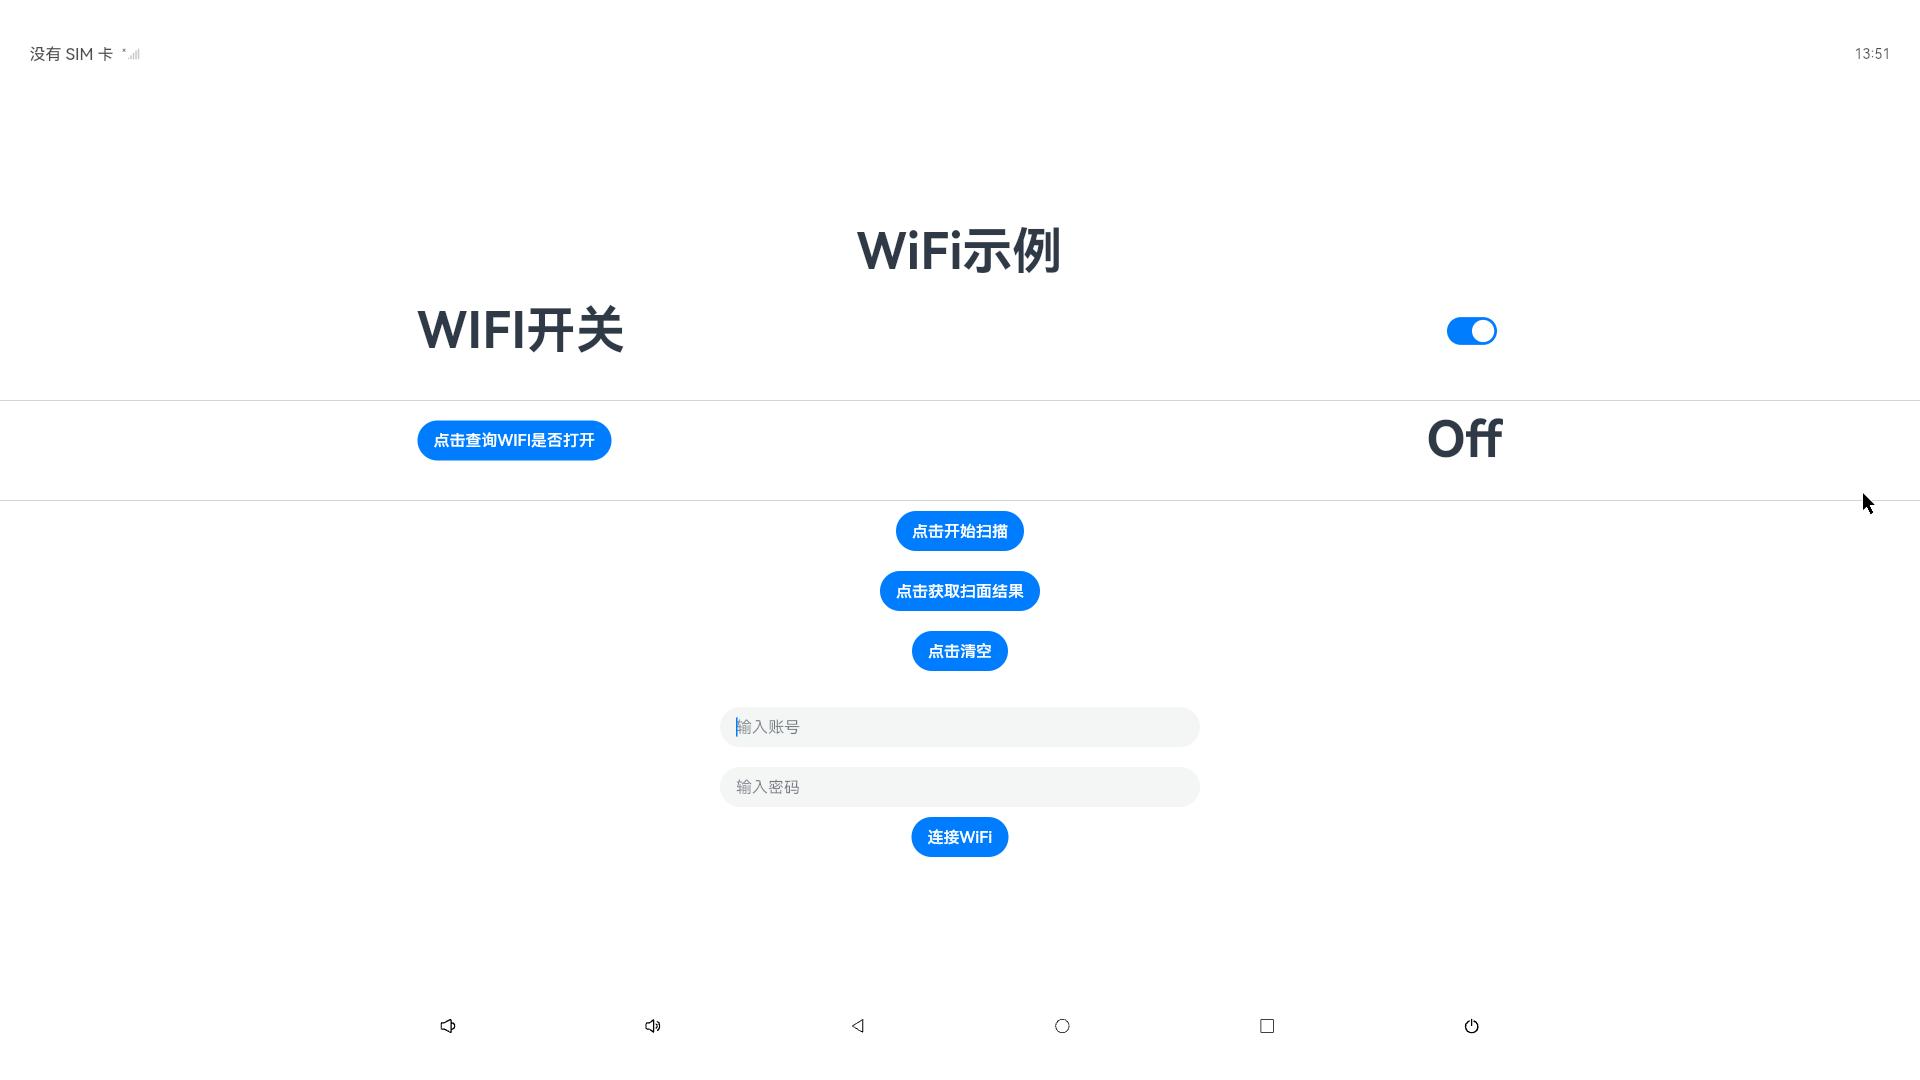
5.5 代码运行效果
用以上标准API接口实现WIFI Demo,如下图所示: