首页
商城
  • English
  • 简体中文
首页
商城
  • English
  • 简体中文
  • 产品系列

    • FPGA+ARM

      • GM-3568JHF

        • 一、简介

          • GM-3568JHF 简介
        • 二、快速开始

          • 00 前言
          • 01 环境搭建
          • 02 编译说明
          • 03 烧录指南
          • 04 调试工具
          • 05 软件更新
          • 06 查看信息
          • 07 测试命令
          • 08 应用编译
          • 09 源码获取
        • 三、外设与接口

          • 01 USB
          • 02 显示与触摸
          • 03 以太网
          • 04 WIFI
          • 05 蓝牙
          • 06 TF-Card
          • 07 音频
          • 08 串口
          • 09 CAN
          • 10 RTC
        • 四、应用开发

          • 01 UART读写案例
          • 02 按键检测案例
          • 03 LED灯闪烁案例
          • 04 MIPI屏幕检测案例
          • 05 读取 USB 设备信息案例
          • 06 FAN 检测案例
          • 07 FPGA FSPI 通信案例
          • 08 FPGA DMA 读写案例
          • 09 GPS调试案例
          • 10 以太网测试案例
          • 11 RS485读写案例
          • 12 FPGA IIC 读写案例
          • 13 PN532 NFC读卡案例
          • 14 TF卡读写案例
        • 五、QT开发

          • 01 ARM64交叉编译器环境搭建
          • 02 QT 程序加入开机自启服务
        • 六、RKNN_NPU开发

          • 01 RK3568 NPU 概述
          • 02 开发环境搭建
          • 运行官方 YOLOv5 示例
        • 七、FPGA开发

          • ARM与FPGA通讯
          • FPGA开发手册
        • 八、其他

          • 01 根目录文件系统的修改
          • 02 系统自启服务
        • 九、资料下载

          • 资料下载
    • ShimetaPi

      • M4-R1

        • 一、简介

          • M4-R1简介
        • 二、快速上手

          • 01 OpenHarmony概述
          • 02 镜像烧录
          • 03 应用开发快速上手
          • 04 设备开发快速上手
        • 三、应用开发

          • 3.1 ArkUI

            • 1 ArkTS语言简介
            • 2 UI 组件-Row 容器介绍
            • 3 UI 组件-Column 容器介绍
            • 4 UI 组件-Text 组件
            • 5 UI 组件-Toggle 组件
            • 6 UI 组件-Slider 组件
            • 7 UI 组件-Animation 组件&Transition 组件
          • 3.2 资料获取

            • 1 OpenHarmony 官方资料
          • 3.3 开发须知

            • 1 Full-SDK替换教程
            • 2 引入和使用三方库
            • 3 HDC调试
            • 4 命令行恢复出厂模式
            • 5 升级App为system权限
          • 3.4 构建第一个应用

            • 1 构建第一个ArkTs应用-HelloWorld
          • 3.5 案例

            • 01 串口调试助手应用案例
            • 02 手写板应用案例
            • 03 数字时钟应用案例
            • 04 WIFI 信息获取应用案例
        • 四、设备开发

          • 4.1 Ubuntu环境开发

            • 01 环境搭建
            • 02 下载源码
            • 03 编译源码
          • 4.2 使用DevEco Device Tool 工具

            • 01 工具简介
            • 02 开发环境的搭建
            • 03 导入SDK
            • 04 HUAWEI DevEco Tool 功能介绍
        • 五、内核外设与接口

          • 5.1 指南
          • 5.2 设备树介绍
          • 5.3 NAPI 入门
          • 5.4 ArkTS入门
          • 5.5 NAPI开发实战演示
          • 5.6 GPIO介绍
          • 5.7 I2C通讯
          • 5.8 SPI通信
          • 5.9 PWM 控制
          • 5.10 串口通讯
          • 5.11 TF卡
          • 5.12 屏幕
          • 5.13 触摸
          • 5.14 Ethernet(以太网)
          • 5.15 M.2 硬盘
          • 5.16 音频
          • 5.17 WIFI & BT
          • 5.18 摄像头
        • 六、资料下载

          • 资料下载
      • M5-R1

        • 一、简介

          • M5-R1 开发文档
        • 二、快速上手

          • 镜像烧录
          • 环境搭建
          • 下载源码
        • 三、外设与接口

          • 3.1 树莓派接口
          • 3.2 GPIO接口
          • 3.3 I2C接口
          • 3.4 SPI通信
          • 3.5 PWM控制
          • 3.6 串口通信
          • 3.7 TF卡插槽
          • 3.8 显示屏
          • 3.9 触摸屏
          • 3.10 音频
          • 3.11 RTC
          • 3.12 以太网
          • 3.13 M.2接口
          • 3.14 MINI PCIE接口
          • 3.15 摄像头
          • 3.16 WIFI蓝牙
        • 四、资料下载

          • 资料下载
    • 开源鸿蒙

      • SC-3568HA

        • 一、简介

          • SC-3568HA简介
        • 二、快速上手

          • OpenHarmony概述
          • 镜像烧录
          • 开发环境准备
          • Hello World应用以及部署
        • 三、应用开发

          • 3.1 ArkUI

            • 第一章 ArkTS语言简介
            • 第二章 UI组件介绍和实际应用(上)
            • 第三章 UI组件介绍和实际应用(中)
            • 第四章 UI组件介绍和实际应用(下)
          • 3.2 拓展

            • 第一章 入门指引
            • 第二章 三方库的引用和使用
            • 第三章 应用编译以及部署
            • 第四章 命令行恢复出厂设置
            • 第五章 系统调试--HDC调试
            • 第六章 APP 稳定性测试
            • 第七章 应用测试
        • 四、设备开发

          • 4.1 环境搭建
          • 4.2 源码下载
          • 4.3 源码编译
        • 五、内核的外设与接口

          • 5.1 树莓派接口
          • 5.2 GPIO 接口
          • 5.3 I2C 接口
          • 5.4 SPI 通信
          • 5.5 PWM 控制
          • 5.6 串口通信
          • 5.7 TF卡插槽
          • 5.8 显示屏
          • 5.9 触摸屏
          • 5.10 音频
          • 5.11 RTC
          • 5.12 以太网
          • 5.13 M.2接口
          • 5.14 MINI PCIE接口
          • 5.15 摄像头
          • 5.16 WIFI蓝牙
          • 5.17 树莓派拓展板
        • 六、资料下载

          • 资料下载
      • M-K1HSE

        • 一、简介

          • 1.1 产品简介
        • 二、快速开始

          • 2.1 调试工具安装
          • 2.2 开发环境搭建
          • 2.3 源码下载
          • 2.4 编译说明
          • 2.5 烧录指南
          • 2.6 APT 更新源
          • 2.7 查看板卡信息
          • 2.8 命令行 LED 和按键测试
          • 2.9 GCC 编译程序
        • 三、应用开发

          • 3.1 基础应用开发

            • 3.1.1 开发环境准备
            • 3.1.2 第一个应用 HelloWorld
            • 3.1.3 开发 HAR 包
          • 3.2 外设应用案例

            • 3.2.1 UART 读写
            • 3.2.2 按键实验
            • 3.2.3 LED 闪烁
        • 四、外设与接口

          • 4.1 标准外设

            • 4.1.1 USB
            • 4.1.2 显示与触摸
            • 4.1.3 以太网
            • 4.1.4 WIFI
            • 4.1.5 蓝牙
            • 4.1.6 TF卡
            • 4.1.7 音频
            • 4.1.8 串口
            • 4.1.9 CAN
            • 4.1.10 RTC
          • 4.2 接口

            • 4.2.1 音频
            • 4.2.2 RS485
            • 4.2.3 显示
            • 4.2.4 触摸
        • 五、系统定制开发

          • 5.1 系统移植
          • 5.2 系统定制
          • 5.3 驱动开发
          • 5.4 系统调试
          • 5.5 OTA 升级
        • 六、资料下载

          • 6.1 资料下载
    • EVS相机

      • CF-NRS1

        • 一、简介

          • 1.1 关于 CF-NRS1
          • 1.2 基于事件的概念
          • 1.3 快速开始
          • 1.4 资源
        • 二、开发

          • 2.1 开发概览

            • 2.1.1 Shimetapi 混合相机 SDK 简介
          • 2.2 环境与API

            • 2.2.1 环境说明
            • 2.2.2 开发 API 说明
          • 2.3 Linux开发

            • 2.3.1 Linux SDK 简介
            • 2.3.2 Linux SDK API
            • 2.3.3 Linux 算法
            • 2.3.4 Linux 算法 API
          • 2.4 服务与Web

            • 2.4.1 EVS 服务器
            • 2.4.2 时间服务器
            • 2.4.3 EVS Web
        • 三、资料下载

          • 3.1 资料下载
        • 四、常见问题

          • 4.1 常见问题
      • CF-CRA2

        • 一、简介

          • 1.1 关于 CF-CRA2
        • 二、资料下载

          • 2.1 资料下载
      • EVS模块

        • 一、相关概念
        • 二、硬件准备与环境配置
        • 三、示例程序使用指南
        • 资料下载
    • AI硬件

      • 1684XB-32T

        • 一、简介

          • AIBOX-1684XB-32简介
        • 二、快速上手

          • 初次使用
          • 网络配置
          • 磁盘使用
          • 内存分配
          • 风扇策略
          • 固件升级
          • 交叉编译
          • 模型量化
        • 三、应用开发

          • 3.1 开发简介

            • Sophgo SDK开发
            • SOPHON-DEMO简介
          • 3.2 大语言模型

            • 部署Llama3示例
            • Sophon LLM_api_server开发
            • 部署MiniCPM-V-2_6
            • Qwen-2-5-VL图片视频识别DEMO
            • Qwen3-chat-DEMO
            • Qwen3-Qwen Agent-MCP开发
            • Qwen3-langchain-AI Agent
          • 3.3 深度学习

            • ResNet(图像分类)
            • LPRNet(车牌识别)
            • SAM(通用图像分割基础模型)
            • YOLOv5(目标检测)
            • OpenPose(人体关键点检测)
            • PP-OCR(光学字符识别)
        • 四、资料下载

          • 资料下载
      • 1684X-416T

        • 一、简介

          • 1.1 产品简介
        • 二、Demo简单操作指引

          • 2.1 智慧监控Demo使用说明
      • RDK-X5

        • 一、简介

          • RDK-X5 硬件简介
        • 二、快速开始

          • RDK-X5 快速开始
        • 三、应用开发

          • 3.1 AI在线模型开发

            • 实验01-接入火山引擎豆包 AI
            • 实验02-图片分析
            • 实验03-多模态视觉分析定位
            • 实验04-多模态图文比较分析
            • 实验05-多模态文档表格分析
            • 实验06-摄像头运用-AI视觉分析
          • 3.2 大语言模型

            • 实验01-语音识别
            • 实验02-语音对话
            • 实验03-多模态图片分析-语音对话
            • 实验04-多模态图片比较-语音对话
            • 实验05-多模态文档分析-语音对话
            • 实验06-多模态视觉运用-语音对话
          • 3.3 40pin-IO开发

            • 实验01-GPIO 输出(LED闪烁)
            • 实验02-GPIO 输入
            • 实验03-按键控制 LED
            • 实验04-PWM 输出
            • 实验05-串口输出
            • 实验06-IIC 实验
            • 实验07-SPI 实验
          • 3.4 USB模块开发使用

            • 实验01-USB 语音模块使用
            • 实验02-声源定位模块使用
          • 3.5 机器视觉技术实战

            • 实验01-打开 USB 摄像头
            • 实验02-颜色识别检测
            • 实验03-手势识别体验
            • 实验04-YOLOv5物体检测
          • 3.6 ROS2基础开发

            • 实验01-搭建环境
            • 实验02-工作包的创建及编译
            • 实验03-运行 ROS2 话题通信节点
            • 实验04-ROS2 相机应用
      • RDK-S100

        • 一、简介

          • 1.1 关于 RDK-S100
        • 二、快速开始

          • 2.1 首次使用
        • 三、应用开发

          • 3.1 AI在线模型开发

            • 3.1.1 接入火山引擎豆包 AI
            • 3.1.2 图片分析
            • 3.1.3 多模态视觉分析定位
            • 3.1.4 多模态图文比较分析
            • 3.1.5 多模态文档表格分析
            • 3.1.6 摄像头运用-AI视觉分析
          • 3.2 大语言模型

            • 3.2.1 语音识别
            • 3.2.2 语音对话
            • 3.2.3 多模态图片分析-语音对话
            • 3.2.4 多模态图片比较-语音对话
            • 3.2.5 多模态文档分析-语音对话
            • 3.2.6 多模态视觉运用-语音对话
          • 3.3 40pin-IO开发

            • 3.3.1 GPIO 输出(LED闪烁)
            • 3.3.2 GPIO 输入
            • 3.3.3 按键控制 LED
            • 3.3.4 PWM 输出
            • 3.3.5 串口输出
            • 3.3.6 IIC 实验
            • 3.3.7 SPI 实验
          • 3.4 USB模块开发使用

            • 3.4.1 USB 语音模块使用
            • 3.4.2 声源定位模块使用
          • 3.5 机器视觉技术实战

            • 3.5.1 打开 USB 摄像头
            • 3.5.2 图像处理基础
            • 3.5.3 目标检测
            • 3.5.4 图像分割
          • 3.6 ROS2基础开发

            • 3.6.1 搭建环境
            • 3.6.2 工作包的创建及编译
            • 3.6.3 运行 ROS2 话题通信节点
            • 3.6.4 ROS2 相机应用
    • 核心板

      • C-3568BQ

        • 一、简介

          • C-3568BQ 简介
      • C-3588LQ

        • 一、简介

          • C-3588LQ 简介
      • GC-3568JBAF

        • 一、简介

          • GC-3568JBAF 简介
      • C-K1BA

        • 一、简介

          • C-K1BA 简介

语音LLM应用

实验03-多模态图片分析-语音对话

实验准备:

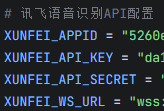
  1. 确保已接入火山引擎豆包AI以及讯飞AI(参考实验01、实验02)
  2. 寻找图片,作为实验素材。图片导入分为相对路径以及绝对路径,相对路径默认设置为AI_online_voice/assets/sample.jpg (功能包中已添加了默认的相对路径图片,可更改相对路劲图片,但命名需为sample.jpg)

实验步骤:(确保语音模块已连接)

  1. cd AI_online_voice #进入主目录
  2. python examples/03_voice_image_dialogue.py #运行示例程序
  3. 进入程序后根据终端提示,先输入y,进入图片选择,可语音选择绝对路径以及相对路径,绝对路径手动输入图片路劲,相对路劲默认设置为assets/sample.jpg 。
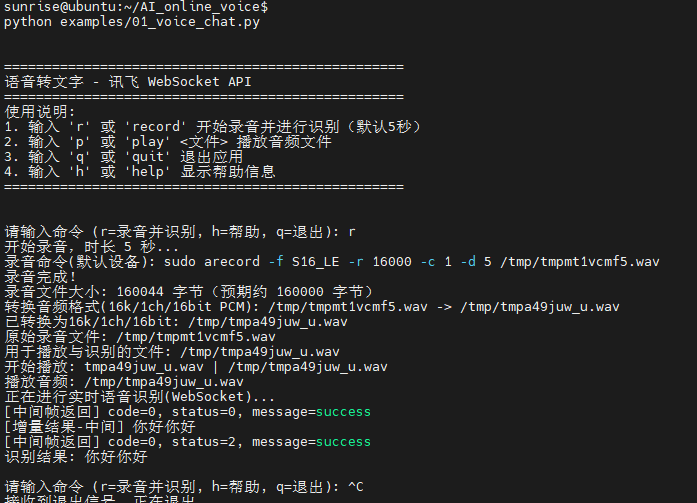
终端运行示例:

相对路径选择:

TOOL

绝对路径选择:

TOOL

图片分析:

TOOL
# -*- coding: utf-8 -*-
"""
03_voice_image_dialogue.py

实验03:语音选择上传图片 + 语音交互分析图片
- 基于 02_voice_dialogue.py:保留录音与讯飞实时识别,新增图像路径选择与图像+文本联合分析
- 路径选择支持语音选择“绝对路径/相对路径”,并以终端输入方式给出实际路径字符串
- 图像仅支持 JPG/JPEG/PNG;相对路径相对于项目根目录(AI_online_voice)解析

使用方法:
- python examples/03_voice_image_dialogue.py
- 交互命令:
  - i:选择并上传图像(语音选择绝对/相对路径)
  - r [秒数]:录音指定秒数,识别,并将结果与已选图片一起发给豆包
  - p:回放最近一次录音(如果存在)
  - h:帮助
  - q:退出
"""

import os
import sys
import json
import base64
import wave
from typing import Optional

CURRENT_DIR = os.path.dirname(os.path.abspath(__file__))
PROJECT_ROOT = os.path.dirname(CURRENT_DIR)
sys.path.append(PROJECT_ROOT)

# 尝试加载根目录 config.py(与 02_voice_dialogue 保持一致)
WORKSPACE_ROOT = os.path.dirname(PROJECT_ROOT)
import importlib.util
ROOT_CONFIG = None
_root_cfg_path = os.path.join(WORKSPACE_ROOT, "config.py")
if os.path.exists(_root_cfg_path):
    try:
        _spec = importlib.util.spec_from_file_location("root_config", _root_cfg_path)
        ROOT_CONFIG = importlib.util.module_from_spec(_spec)
        _spec.loader.exec_module(ROOT_CONFIG)
    except Exception:
        ROOT_CONFIG = None

from utils.audio_processor import AudioProcessor
import config
import requests
from urllib.parse import urlparse, quote
import time, hmac, ssl, hashlib
import email.utils as email_utils

# 参考实验02的实现,内联定义讯飞 WS 客户端与豆包文本客户端
class DoubaoAPIClient:
    """简化版豆包API客户端,内联实现文本聊天以避免导入冲突"""
    def __init__(self):
        cfg = ROOT_CONFIG if ROOT_CONFIG else config
        self.api_key = getattr(cfg, "API_KEY", None)
        self.model_endpoint = getattr(cfg, "MODEL_ENDPOINT", None)
        self.base_url = getattr(cfg, "API_BASE_URL", None)
        self.timeout = getattr(cfg, "REQUEST_TIMEOUT", 30)
        if not self.api_key or not self.model_endpoint or not self.base_url:
            raise ValueError("请在 config.py 中配置 API_KEY / MODEL_ENDPOINT / API_BASE_URL")

    def _make_request(self, messages, **kwargs):
        try:
            base = (self.base_url or "").rstrip('/')
            url = base if base.endswith('chat/completions') else f"{base}/chat/completions"
            headers = {
                "Authorization": f"Bearer {self.api_key}",
                "Content-Type": "application/json",
                "Accept": "application/json",
            }
            data = {
                "model": self.model_endpoint,
                "messages": messages,
                "temperature": kwargs.get("temperature", 0.7),
                "max_tokens": kwargs.get("max_tokens", 1000),
                "top_p": kwargs.get("top_p", 0.9),
                "stream": kwargs.get("stream", False),
            }
            for k, v in kwargs.items():
                if k not in data:
                    data[k] = v
            resp = requests.post(url, json=data, headers=headers, timeout=self.timeout)
            if resp.status_code == 200:
                try:
                    return resp.json()
                except Exception as e:
                    print(f"[豆包] JSON解析失败: {e}")
                    print(f"[豆包] 响应文本片段: {resp.text[:500]}")
                    return None
            else:
                print(f"[豆包] API请求失败: {resp.status_code}")
                print(f"[豆包] 请求URL: {url}")
                print(f"[豆包] 模型: {self.model_endpoint}")
                try:
                    err_json = resp.json()
                    print(f"[豆包] 错误详情(JSON): {json.dumps(err_json, ensure_ascii=False)[:500]}")
                except Exception:
                    print(f"[豆包] 错误详情(Text): {resp.text[:500]}")
                if resp.status_code == 401:
                    print("[豆包] 认证失败,请检查 API_KEY")
                elif resp.status_code == 404:
                    print("[豆包] 接入点不存在,请检查 MODEL_ENDPOINT")
                elif resp.status_code == 429:
                    print("[豆包] 请求频率过高,请稍后重试")
                elif resp.status_code == 500:
                    print("[豆包] 服务器内部错误,请稍后重试")
                return None
        except Exception as e:
            print(f"豆包请求异常: {e}")
            return None

    def chat_text(self, text: str, system_prompt: str = None, **kwargs):
        try:
            messages = []
            if system_prompt:
                messages.append({"role": "system", "content": system_prompt})
            messages.append({"role": "user", "content": text})
            result = self._make_request(messages, **kwargs)
            if result and "choices" in result and result["choices"]:
                return result["choices"][0]["message"]["content"]
            return None
        except Exception as e:
            print(f"文本对话失败: {e}")
            return None

try:
    import websocket
    from websocket import WebSocketTimeoutException
except Exception:  # pragma: no cover
    websocket = None
    WebSocketTimeoutException = Exception


class XunfeiRealtimeSpeechClient:
    """简化版的讯飞实时语音识别客户端(WebSocket)。
    - 复用我们在 01_voice_chat.py 中优化过的健壮性:
      - 安全 JSON 解析
      - 增量文本聚合
      - 超时容错,返回已识别的文本
    """

    def __init__(self):
        self.app_id = getattr(config, "XUNFEI_APPID", "")
        self.api_key = getattr(config, "XUNFEI_API_KEY", "")
        self.api_secret = getattr(config, "XUNFEI_API_SECRET", "")
        self.host_url = getattr(config, "XUNFEI_WS_URL", "")
        self.timeout = getattr(config, "REQUEST_TIMEOUT", 15)

    def _safe_json_loads(self, s):
        try:
            return json.loads(s)
        except Exception:
            return None

    def _build_auth_url(self):
        url = self.host_url
        # 使用标准库解析,兼容不同 websocket-client 版本
        try:
            parsed = urlparse(url)
            host = parsed.netloc or url.split("//")[-1].split("/")[0]
            path = parsed.path or "/v2/iat"
        except Exception:
            host = url.split("//")[-1].split("/")[0]
            path = "/v2/iat"
        # 鉴权:生成签名字符串
        try:
            date = email_utils.formatdate(timeval=None, localtime=False, usegmt=True)
        except Exception:
            # 回退到 RFC 7231 格式
            date = time.strftime("%a, %d %b %Y %H:%M:%S GMT", time.gmtime())
        signature_origin = f"host: {host}\ndate: {date}\nGET {path} HTTP/1.1"
        signature_sha = hmac.new(
            self.api_secret.encode("utf-8"),
            signature_origin.encode("utf-8"),
            digestmod=hashlib.sha256,
        ).digest()
        signature = base64.b64encode(signature_sha).decode("utf-8")
        authorization_origin = (
            f"api_key=\"{self.api_key}\", algorithm=\"hmac-sha256\", headers=\"host date request-line\", signature=\"{signature}\""
        )
        authorization = base64.b64encode(authorization_origin.encode("utf-8")).decode("utf-8")

        auth_url = f"{url}?authorization={quote(authorization)}&date={quote(date)}&host={quote(host)}"
        return auth_url

    def transcribe_audio_ws(self, wav_path):
        if websocket is None:
            print("[错误] 缺少 websocket-client 依赖,请安装后重试:pip install websocket-client")
            return None

        # 读取音频数据
        try:
            with open(wav_path, "rb") as f:
                audio_bytes = f.read()
        except Exception as e:
            print(f"[错误] 读取音频失败: {e}")
            return None

        # 初始化增量聚合
        final_text_parts = []
        saw_final_status = False

        url = self._build_auth_url()
        print(f"[WS] 连接: {url}")
        ws = websocket.create_connection(url, timeout=self.timeout, sslopt={"cert_reqs": ssl.CERT_NONE})

        try:
            # 发送首帧
            init_payload = {
                "common": {"app_id": self.app_id},
                "business": {
                    "language": "zh_cn",
                    "domain": "iat",
                    "accent": "mandarin",
                    "vad_eos": 2000,
                },
                "data": {
                    "status": 0,
                    "format": "audio/L16;rate=16000",
                    "audio": base64.b64encode(audio_bytes[:1200]).decode("utf-8"),
                    "encoding": "raw",
                },
            }
            ws.send(json.dumps(init_payload))
            print("[首帧发送] bytes=", len(audio_bytes[:1200]))

            # 发送中间帧(简单一次性发送余下数据)
            middle_payload = {
                "data": {
                    "status": 1,
                    "format": "audio/L16;rate=16000",
                    "audio": base64.b64encode(audio_bytes[1200:]).decode("utf-8"),
                    "encoding": "raw",
                }
            }
            ws.send(json.dumps(middle_payload))
            print("[中间帧发送] bytes=", len(audio_bytes[1200:]))

            # 发送结束帧
            end_payload = {
                "data": {"status": 2, "format": "audio/L16;rate=16000", "audio": "", "encoding": "raw"}
            }
            ws.send(json.dumps(end_payload))
            print("[结束帧发送]")

            # 接收返回,聚合文本
            while True:
                try:
                    msg = ws.recv()
                except WebSocketTimeoutException:
                    print("[WS] 接收超时,返回已聚合文本")
                    break
                except Exception as e:
                    print(f"[WS] 接收异常: {e}")
                    break

                data = self._safe_json_loads(msg)
                if not data:
                    print("[WS] 非法 JSON,忽略")
                    continue

                code = data.get("code", -1)
                status = data.get("data", {}).get("status")
                message = data.get("message")
                print(f"[WS返回] code={code}, status={status}, message={message}")

                if code != 0:
                    print("[WS] 识别失败: ", data)
                    break

                # 解析增量识别文本
                result = data.get("data", {}).get("result")
                if result and result.get("ws"):
                    # 将分段结果拼接
                    parts = []
                    for ws_seg in result.get("ws", []):
                        for cw in ws_seg.get("cw", []):
                            w = cw.get("w")
                            if w:
                                parts.append(w)
                    if parts:
                        final_text_parts.append("".join(parts))
                        print("[增量结果] ", "".join(parts))

                if status == 2:
                    saw_final_status = True
                    print("[WS] 收到最终状态,结束接收")
                    break
        finally:
            try:
                ws.close()
            except Exception:
                pass

        aggregated = "".join(final_text_parts).strip()
        if aggregated:
            return aggregated
        if saw_final_status:
            return aggregated  # 为空也返回
        return None


class DoubaoImageClient(DoubaoAPIClient):
    """在豆包文本客户端基础上,扩展图像+文本联合对话能力。
    通过 data URI 作为 image_url,将本地图片以 Base64 嵌入消息。
    """
    def chat_with_image_file(self, text: str, image_path: str, system_prompt: str = None, **kwargs) -> Optional[str]:
        try:
            if not image_path or not os.path.exists(image_path):
                print(f"[豆包图像] 文件不存在: {image_path}")
                return None
            ext = os.path.splitext(image_path)[1].lower()
            if ext not in (".jpg", ".jpeg", ".png"):
                print("[豆包图像] 仅支持 JPG/JPEG/PNG 格式")
                return None
            mime = "image/jpeg" if ext in (".jpg", ".jpeg") else "image/png"
            with open(image_path, "rb") as f:
                b64 = base64.b64encode(f.read()).decode("utf-8")
            messages = []
            if system_prompt:
                messages.append({"role": "system", "content": system_prompt})
            content = [
                {"type": "text", "text": text},
                {"type": "image_url", "image_url": {"url": f"data:{mime};base64,{b64}"}},
            ]
            messages.append({"role": "user", "content": content})
            # 复用父类的请求方法
            result = self._make_request(messages, **kwargs)
            if result and "choices" in result and result["choices"]:
                return result["choices"][0]["message"]["content"]
            return None
        except Exception as e:
            print(f"[豆包图像] 发送失败: {e}")
            return None


class VoiceImageDialogueApp:
    def __init__(self):
        self.processor = AudioProcessor()
        self.asr_client = XunfeiRealtimeSpeechClient()
        self.doubao = DoubaoImageClient()
        self.last_audio = None
        self.last_wav = None
        self.image_path = None

    def _resolve_path(self, p: str, is_absolute: bool = False) -> Optional[str]:
        if not p:
            return None
        p = os.path.expanduser(p)
        if os.name != "nt":
            p = p.replace("\\", "/")
        if is_absolute or os.path.isabs(p):
            return os.path.abspath(p)
        # 相对路径相对于项目根目录(AI_online_voice)
        return os.path.abspath(os.path.join(PROJECT_ROOT, p))

    def print_help(self):
        print("\n指令帮助:")
        print("  i        选择并上传图像(绝对路径手动输入;相对路径默认 assets/sample.jpg)")
        print("  r [秒数]  录音指定秒数,识别,并发给豆包进行图像分析")
        print("  p        回放最近一次录音")
        print("  h        查看帮助")
        print("  q        退出\n")

    def handle_image_select(self):
        print("[图片选择] 录音 5 秒选择路径类型(说:绝对路径 或 相对路径;相对路径默认 assets/sample.jpg)")
        audio_file = self.processor.record(5)
        if not audio_file:
            print("[错误] 路径类型录音失败")
            return
        wav_path = self.processor.convert_to_wav(audio_file) or audio_file
        selection_text = None
        try:
            selection_text = self.asr_client.transcribe_audio_ws(wav_path)
        except Exception as e:
            print(f"[识别异常] {e}")
        choice = None
        if selection_text:
            t = selection_text.lower()
            if ("绝对" in t) or ("absolute" in t):
                choice = "abs"
            elif ("相对" in t) or ("relative" in t):
                choice = "rel"
        if not choice:
            print("[提示] 未识别到路径类型。请输入:abs(绝对) 或 rel(相对)")
            try:
                choice = input("路径类型(abs/rel): ").strip().lower()
            except Exception:
                return
        is_abs = choice.startswith("a")
        if is_abs:
            path_input = input("请输入图片绝对路径: ").strip()
            final_path = self._resolve_path(path_input, is_absolute=True)
        else:
            rel_default = "assets/sample.jpg"
            print(f"[使用默认相对路径] {rel_default}")
            final_path = self._resolve_path(rel_default, is_absolute=False)
        if not final_path or not os.path.exists(final_path):
            print(f"[错误] 图像文件不存在: {final_path}")
            print("[示例] 绝对: /home/user/pic.jpg | 相对: assets/sample.jpg")
            return
        ext = os.path.splitext(final_path)[1].lower()
        if ext not in (".jpg", ".jpeg", ".png"):
            print("[错误] 仅支持 JPG/JPEG/PNG 格式")
            return
        self.image_path = final_path
        print(f"[图片已设置] {final_path}")

    def handle_record(self, duration_sec: int):
        print(f"[操作] 开始录音 {duration_sec} 秒…")
        audio_file = self.processor.record(duration_sec)
        if not audio_file:
            print("[错误] 录音失败")
            return
        self.last_audio = audio_file
        try:
            with wave.open(audio_file, "rb") as wf:
                print(f"[原始音频信息] rate={wf.getframerate()}, ch={wf.getnchannels()}, width={wf.getsampwidth()*8}bit, frames={wf.getnframes()}")
        except Exception as e:
            print(f"[原始音频信息读取失败] {e}")
        wav_path = self.processor.convert_to_wav(audio_file)
        if not wav_path:
            print("[错误] 转换 WAV 失败")
            return
        self.last_wav = wav_path
        print(f"[识别] 发送至讯飞实时识别…")
        text = self.asr_client.transcribe_audio_ws(wav_path)
        if not text:
            print("[识别失败] 未获取到文本")
            return
        print(f"[识别结果] {text}")

        print("[豆包] 发送到豆包进行图像分析…")
        try:
            sys_prompt = getattr(ROOT_CONFIG, "SYSTEM_PROMPT", None) if ROOT_CONFIG else None
            if self.image_path:
                reply = self.doubao.chat_with_image_file(text, self.image_path, system_prompt=sys_prompt)
            else:
                # 未设置图片时,退化为纯文本对话
                reply = self.doubao.chat_text(text, system_prompt=sys_prompt)
            if reply:
                print("[豆包回复]", reply)
            else:
                print("[豆包回复] None")
        except Exception as e:
            print("[豆包错误] ", e)

    def handle_play(self):
        if not self.last_audio:
            print("[提示] 尚且有回放的录音。请先使用 r 指令录音。")
            return
        print("[播放] 回放最近一次录音…")
        self.processor.play(self.last_audio)

    def run(self):
        print("\n=== 03 语音选择图片并分析(讯飞 + 豆包)实验 ===")
        print("启动时可先进行图片选择(i),之后用 r 进行语音分析")
        self.print_help()
        # 启动阶段建议先选择图片(可跳过)
        try:
            first = input("是否立即选择图片? (y/n): ").strip().lower()
            if first.startswith("y"):
                self.handle_image_select()
        except Exception:
            pass

        while True:
            try:
                cmd = input("请输入指令 (i/r/p/h/q): ").strip()
            except (EOFError, KeyboardInterrupt):
                print("\n[退出]")
                break
            if not cmd:
                continue
            if cmd == "q":
                print("[退出]")
                break
            if cmd == "h":
                self.print_help()
                continue
            if cmd == "p":
                self.handle_play()
                continue
            if cmd == "i":
                self.handle_image_select()
                continue
            if cmd.startswith("r"):
                parts = cmd.split()
                duration = 5
                if len(parts) >= 2:
                    try:
                        duration = int(parts[1])
                    except Exception:
                        print("[提示] 秒数无效,使用默认 5 秒")
                self.handle_record(duration)
                continue
            print("[提示] 未知指令。输入 h 查看帮助。")


if __name__ == "__main__":
    VoiceImageDialogueApp().run()
在 GitHub 上编辑此页
上次更新:
贡献者: wuziqing
Prev
实验02-语音对话
Next
实验04-多模态图片比较-语音对话