
Environment Setup
To help developers set up their development environment quickly, we provide two methods: building a native development environment and building a cross-compiler Docker image environment. You may choose either one.
Tips
Note: We recommend that developers set up the Docker image environment in order to shorten the time required to build the compilation environment.
1 Development Environment Setup
1.1 Preparing the Development Environment
We recommend compiling on Ubuntu 22.04 or later. Other Linux distributions may require corresponding adjustments to the software packages. Beyond the OS requirement, there are additional hardware and software requirements.
- Hardware requirements: a 64-bit system with at least 8GB of RAM and 100GB of disk space. If you perform multiple builds, you will need more disk space.
- Software requirements: Ubuntu 22.04 or later.
1.2 Installing Libraries and Toolchains
When developing for the device on the command line, you can install the libraries and tools required to compile the SDK with the following steps. Use the following apt-get command to install the libraries and tools needed for the subsequent operations:
sudo apt-get update && sudo apt-get install git ssh make gcc libssl-dev \
liblz4-tool expect expect-dev g++ patchelf chrpath gawk texinfo chrpath \
diffstat binfmt-support qemu-user-static live-build bison flex fakeroot \
cmake gcc-multilib g++-multilib unzip device-tree-compiler ncurses-dev \
libgucharmap-2-90-dev bzip2 expat gpgv2 cpp-aarch64-linux-gnu libgmp-dev \
libmpc-dev bc python-is-python3 python2
Tips
Note: The installation command is intended for Ubuntu 22.04. For other versions, use the corresponding package names. If you encounter errors during compilation, install the corresponding packages according to the error messages. In particular:
- Python: version 3.6 or above is required; Python 3.6 is used here as an example.
- make: version 4.0 or above is required; make 4.2 is used here as an example.
- lz4: version 1.7.3 or above is required.
- Compiling Yocto requires a VPN connection.
i Checking and upgrading the host's Python version
To check and upgrade the host's Python version:
- Check the host Python version
$ python3 --version
Python 3.10.6
If it does not meet the python >= 3.6 requirement, you can upgrade it as follows:
- Upgrade to Python 3.6.15
PYTHON3_VER=3.6.15
echo "wget
https://www.python.org/ftp/python/${PYTHON3_VER}/Python-${PYTHON3_VER}.tgz"
echo "tar xf Python-${PYTHON3_VER}.tgz"
echo "cd Python-${PYTHON3_VER}"
echo "sudo apt-get install libsqlite3-dev"
echo "./configure --enable-optimizations"
echo "sudo make install -j8"
ii Checking and upgrading the host's make version
To check and upgrade the host's make version:
- Check the host make version
$ make -v
GNU Make 4.2
Built for x86_64-pc-linux-gnu- Upgrade to make 4.2
$ sudo apt update && sudo apt install -y autoconf autopoint
git clone https://gitee.com/mirrors/make.git
cd make
git checkout 4.2
git am $BUILDROOT_DIR/package/make/*.patch
autoreconf -f -i
./configure
make make -j8
sudo install -m 0755 make /usr/bin/make
iii Checking and upgrading the host's lz4 version
To check and upgrade the host's lz4 version:
- Check the host lz4 version
$ lz4 -v
*** LZ4 command line interface 64-bits v1.9.3, by Yann Collet ***- Upgrade to a newer lz4 version
git clone https://gitee.com/mirrors/LZ4_old1.git
cd LZ4_old1
make
sudo make install
sudo install -m 0755 lz4 /usr/bin/lz4
2 VM Environment Setup
2.1 Download and extract the archive
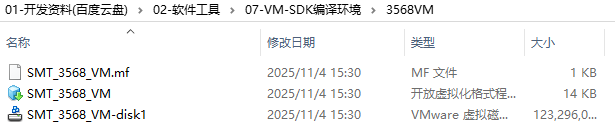
Download the archive from the cloud drive materials and extract it (the archive is about 117GB; be mindful of available disk space).
Tips
The archive is located under 01-Development Materials / 02-Software Tools / 07-VM-SDK Build Environment / 3568VM.
2.2 Importing the file in VMware
Open VMware, click File in the upper-left corner, and click "Open" in the drop-down menu:
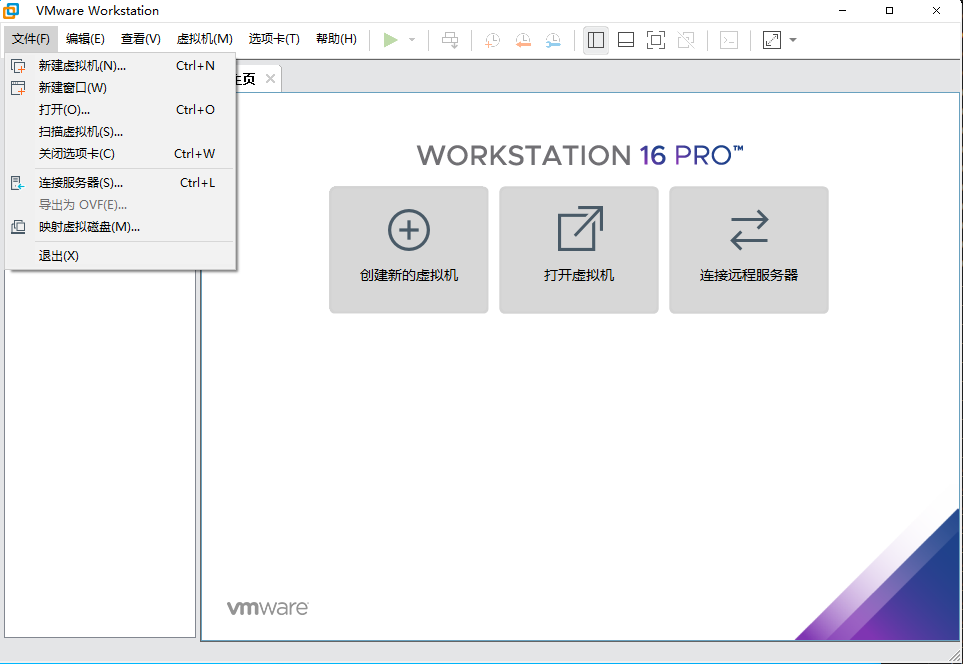
Navigate to the directory where the file is stored and select the SMT_3568_VM file:

2.3 SDK automatic build command
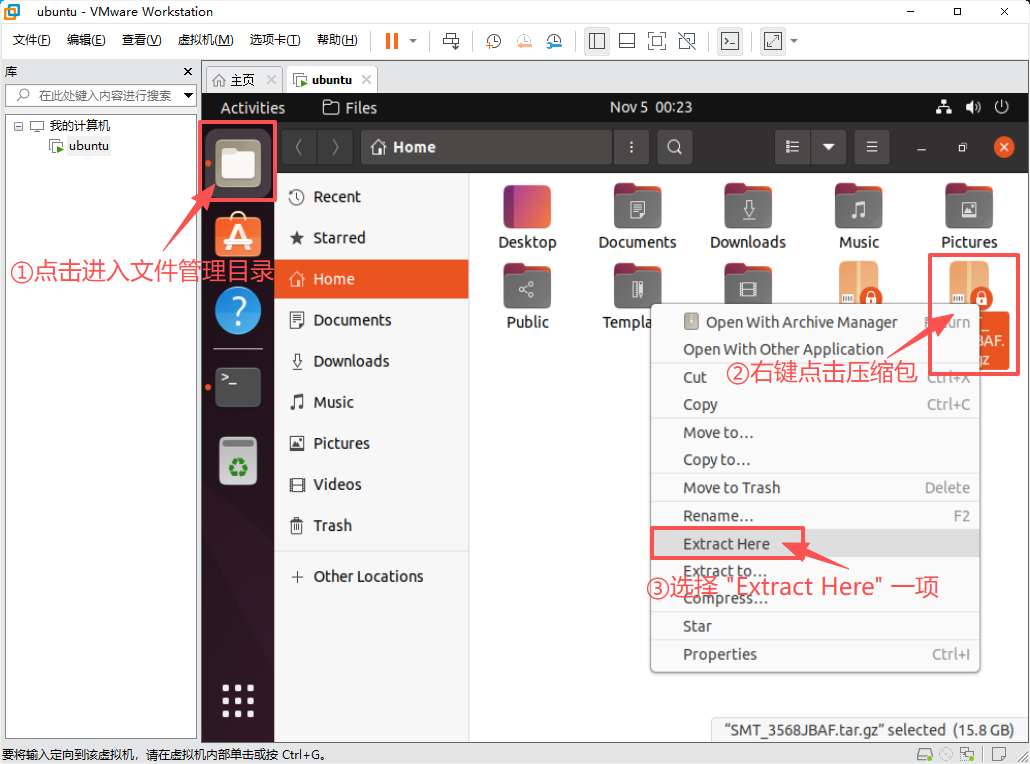
After the import completes (this takes a while, please be patient), start the Ubuntu environment, enter the password "123456" to log in to the virtual machine, then locate the source archive in the file manager, right-click and choose "Extract Here" to extract it into the current directory:
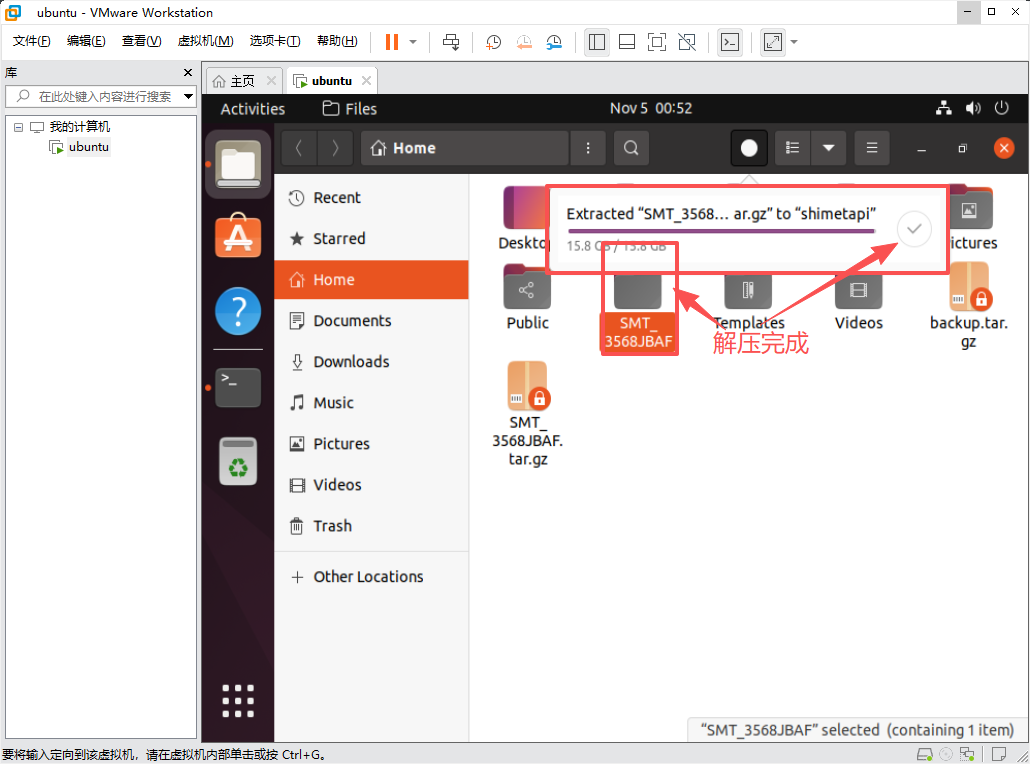
After extraction the interface looks like this:
Once the source is extracted, press "Ctrl + Alt + T" to open the virtual machine terminal, navigate to the extracted directory, and run the "build.sh" script to compile the source:
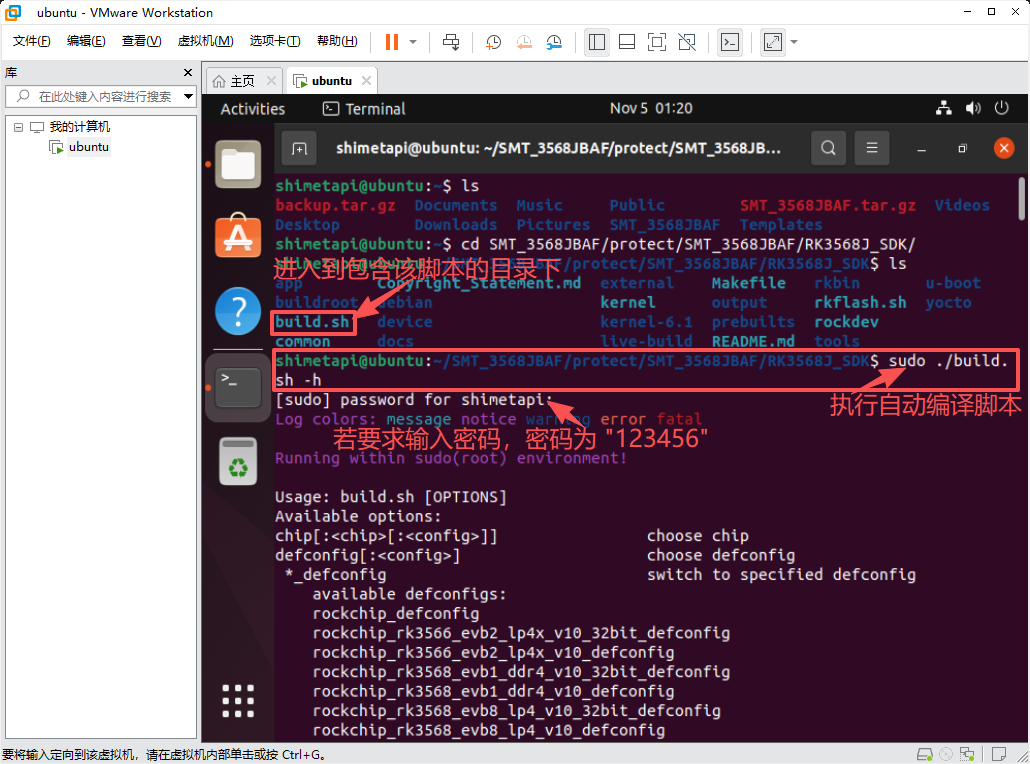
# 查看目录下的文件或目录
ls
# 进入指定目录下
cd

# 查询编译帮助
sudo ./build.sh -h

# 开启多线程(可选)
export MAKEFLAGS="-j4"    #4:线程数

# 指定 Debain 开启自动编译
sudo RK_ROOTFS_SYSTEM=debian ./build.sh
Wait for the compilation to finish.