04 Debugging Tools
1 USB to serial port driver installation
This chapter is about installing the USB to serial port driver for the development board serial port. The driver is suitable for USB to serial port chips such as CH340 and CH341.
Applicable installation environment: Windows 7 64bit, Windows 10 64bit.
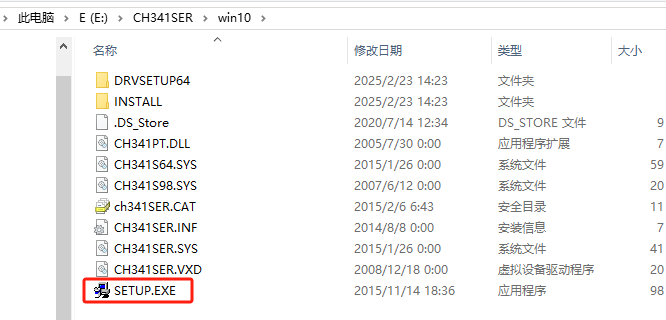
- Unzip the product information "Software Information\Tools\Windows\CH341SER.zip", enter the corresponding directory according to your computer system, and click SETUP.EXE
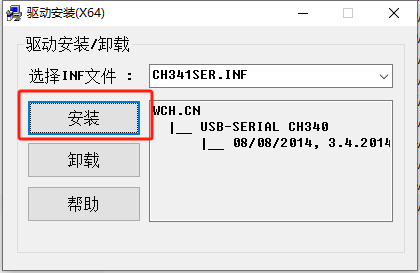
- Click Install
- After the installation is successful, you can view the USB to serial port driver in the PC device manager, as shown in the figure below.

If the installation still fails, you can use third-party software such as Driver Genius or Lu Master to install the USB to serial port driver online. If the driver is normal but the connection still fails, please check whether the USB cable is normal.
2 System debugging tool SecureCRT installation
SecureCRT is a terminal emulation software that supports the SSH protocol. It can view the development board system information and debug the development board system through the serial port or network port.
2.1 Installation Process
Applicable installation environment: Windows 7 64bit, Windows 10 64bit.
- Unzip the compressed package of product information "Software Information\Tools\Windows\VanDyke SecureCRT and SecureFX 9.4.0.3072 x64+x32.rar".
For 64-bit computers, double-click scrt-sfx-x64-bsafe.9.4.0.3072.exe in the installation directory.
For 32-bit computers, double-click scrt-sfx-x86-bsafe.9.4.0.3072.exe in the installation directory.
- After the installation is completed according to the process, you need to enter the license serial number before using it. Please purchase the license yourself.
2.2 Serial port connection settings
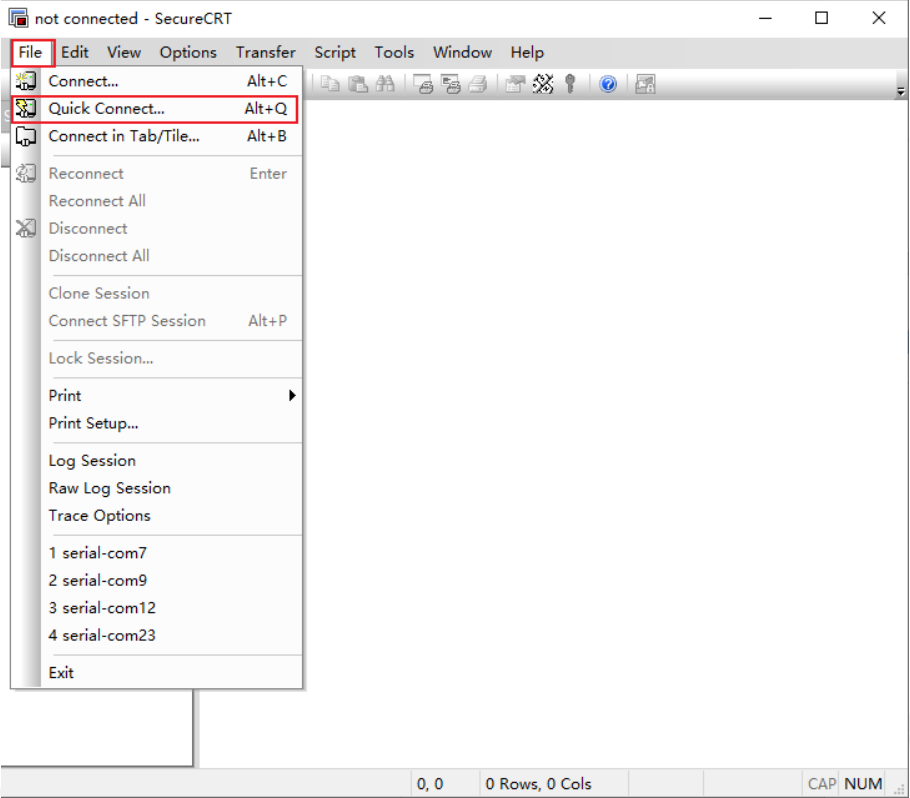
- Open SecureCRT, click "File -> Quick Connect..." to enter the connection configuration interface. Or directly click the "Quick Connect" shortcut button, as shown below.
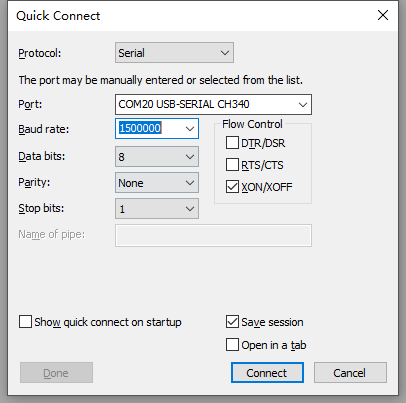
- In the pop-up dialog box, configure the serial port connection mode. Select Serial for Protocol, select the corresponding COM port for Port, manually enter the baud rate as 1500000, and leave other parameters unchanged by default. Finally, click Connect, as shown in the figure below.
2.3 Character encoding settings
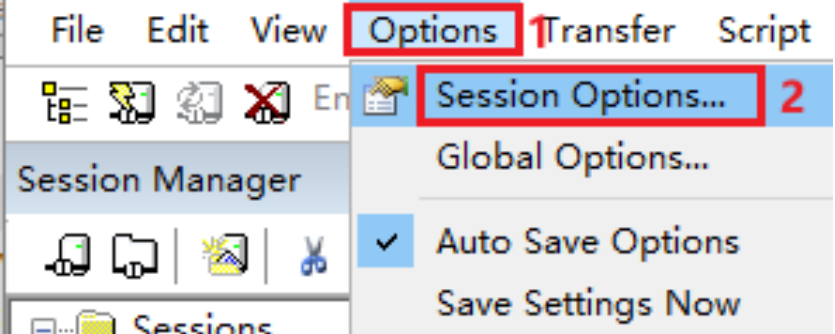
To ensure that the system debugging tool supports Chinese display and avoid Chinese garbled characters, please set the character encoding as follows. Click "Options -> Session Options... -> Appearance" in sequence, select UT F-8 for Character encoding, and click OK to save.

2.4 Save system startup information (Log)
During the debugging process, it is often necessary to save the system startup information (Log).
- After the system debugging tool connection settings are completed, click "File -> Log Session" to enter the Log save configuration interface, select the Log save path and click "Save", as shown in the figure below.

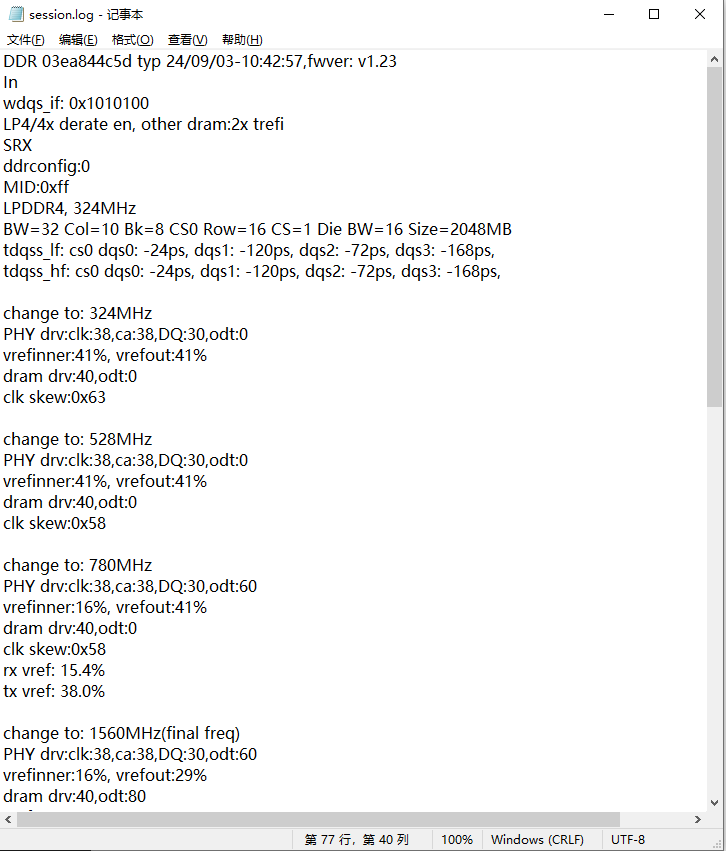
- When the system is started, the log will be automatically saved in the corresponding log file, and the content will be similar to the figure below.

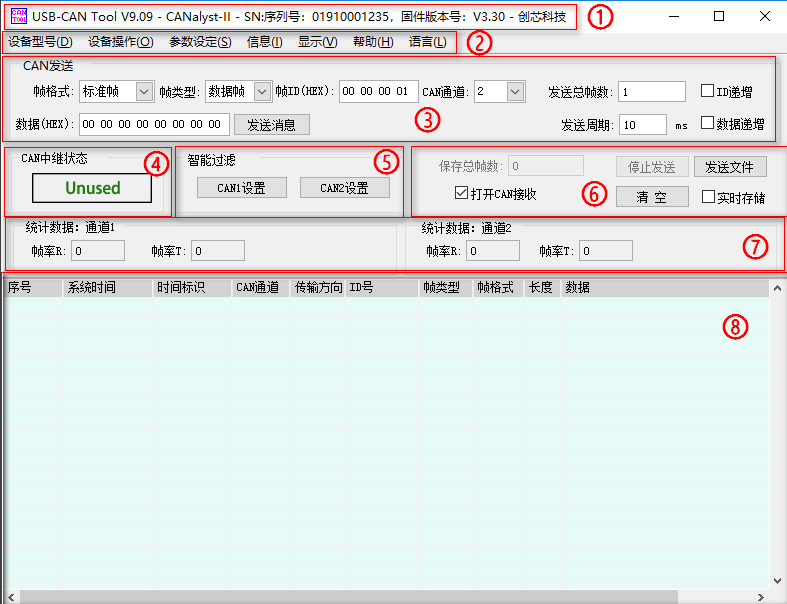
3 CAN debugging tool installation
The CAN debugging tool is a software program based on the CAN analyzer hardware of Chuangxin Technology. It can run on a computer with the CAN analyzer hardware installed, and can process CAN messages in 11-bit identifier mode (CAN2.0A protocol) and 29-bit identifier mode (CAN2.0B protocol).
Go to the "Software Data\Tools\Windows\CAN_TOOL" directory and read "2.USB-CAN Tool Debugging Software Installation and User Manual.pdf" to install it.
The software interface is as follows: