UART读写案例
本案例实现开发板串口读写功能。
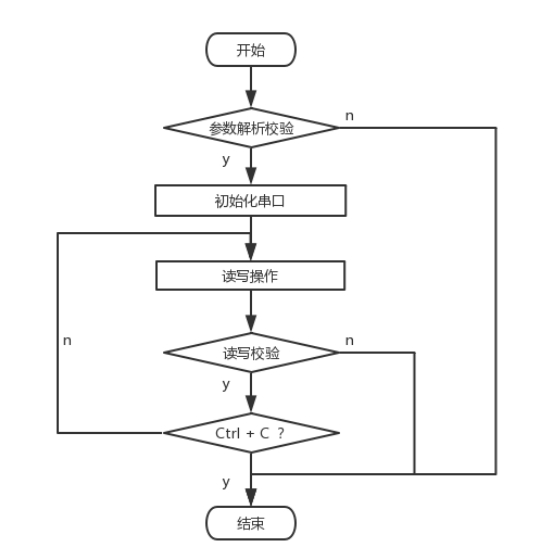
程序流程如下图所示。串口初始化时将设置波特率、模式、数据位、停止位等参数。通过设备文件描述符对串口进行读写操作。
本案例支持的串口以及串口对应设备节点,如下表所示。
| 串口 | 设备节点 |
|---|---|
| RS232 UART0 | ttyS0 |
| TTL UART0 | ttyS4 |
| RS485 UART7 | ttyS7 |
| RS485 UART8 | ttyS8 |
操作流程
TTL UART4串口测试
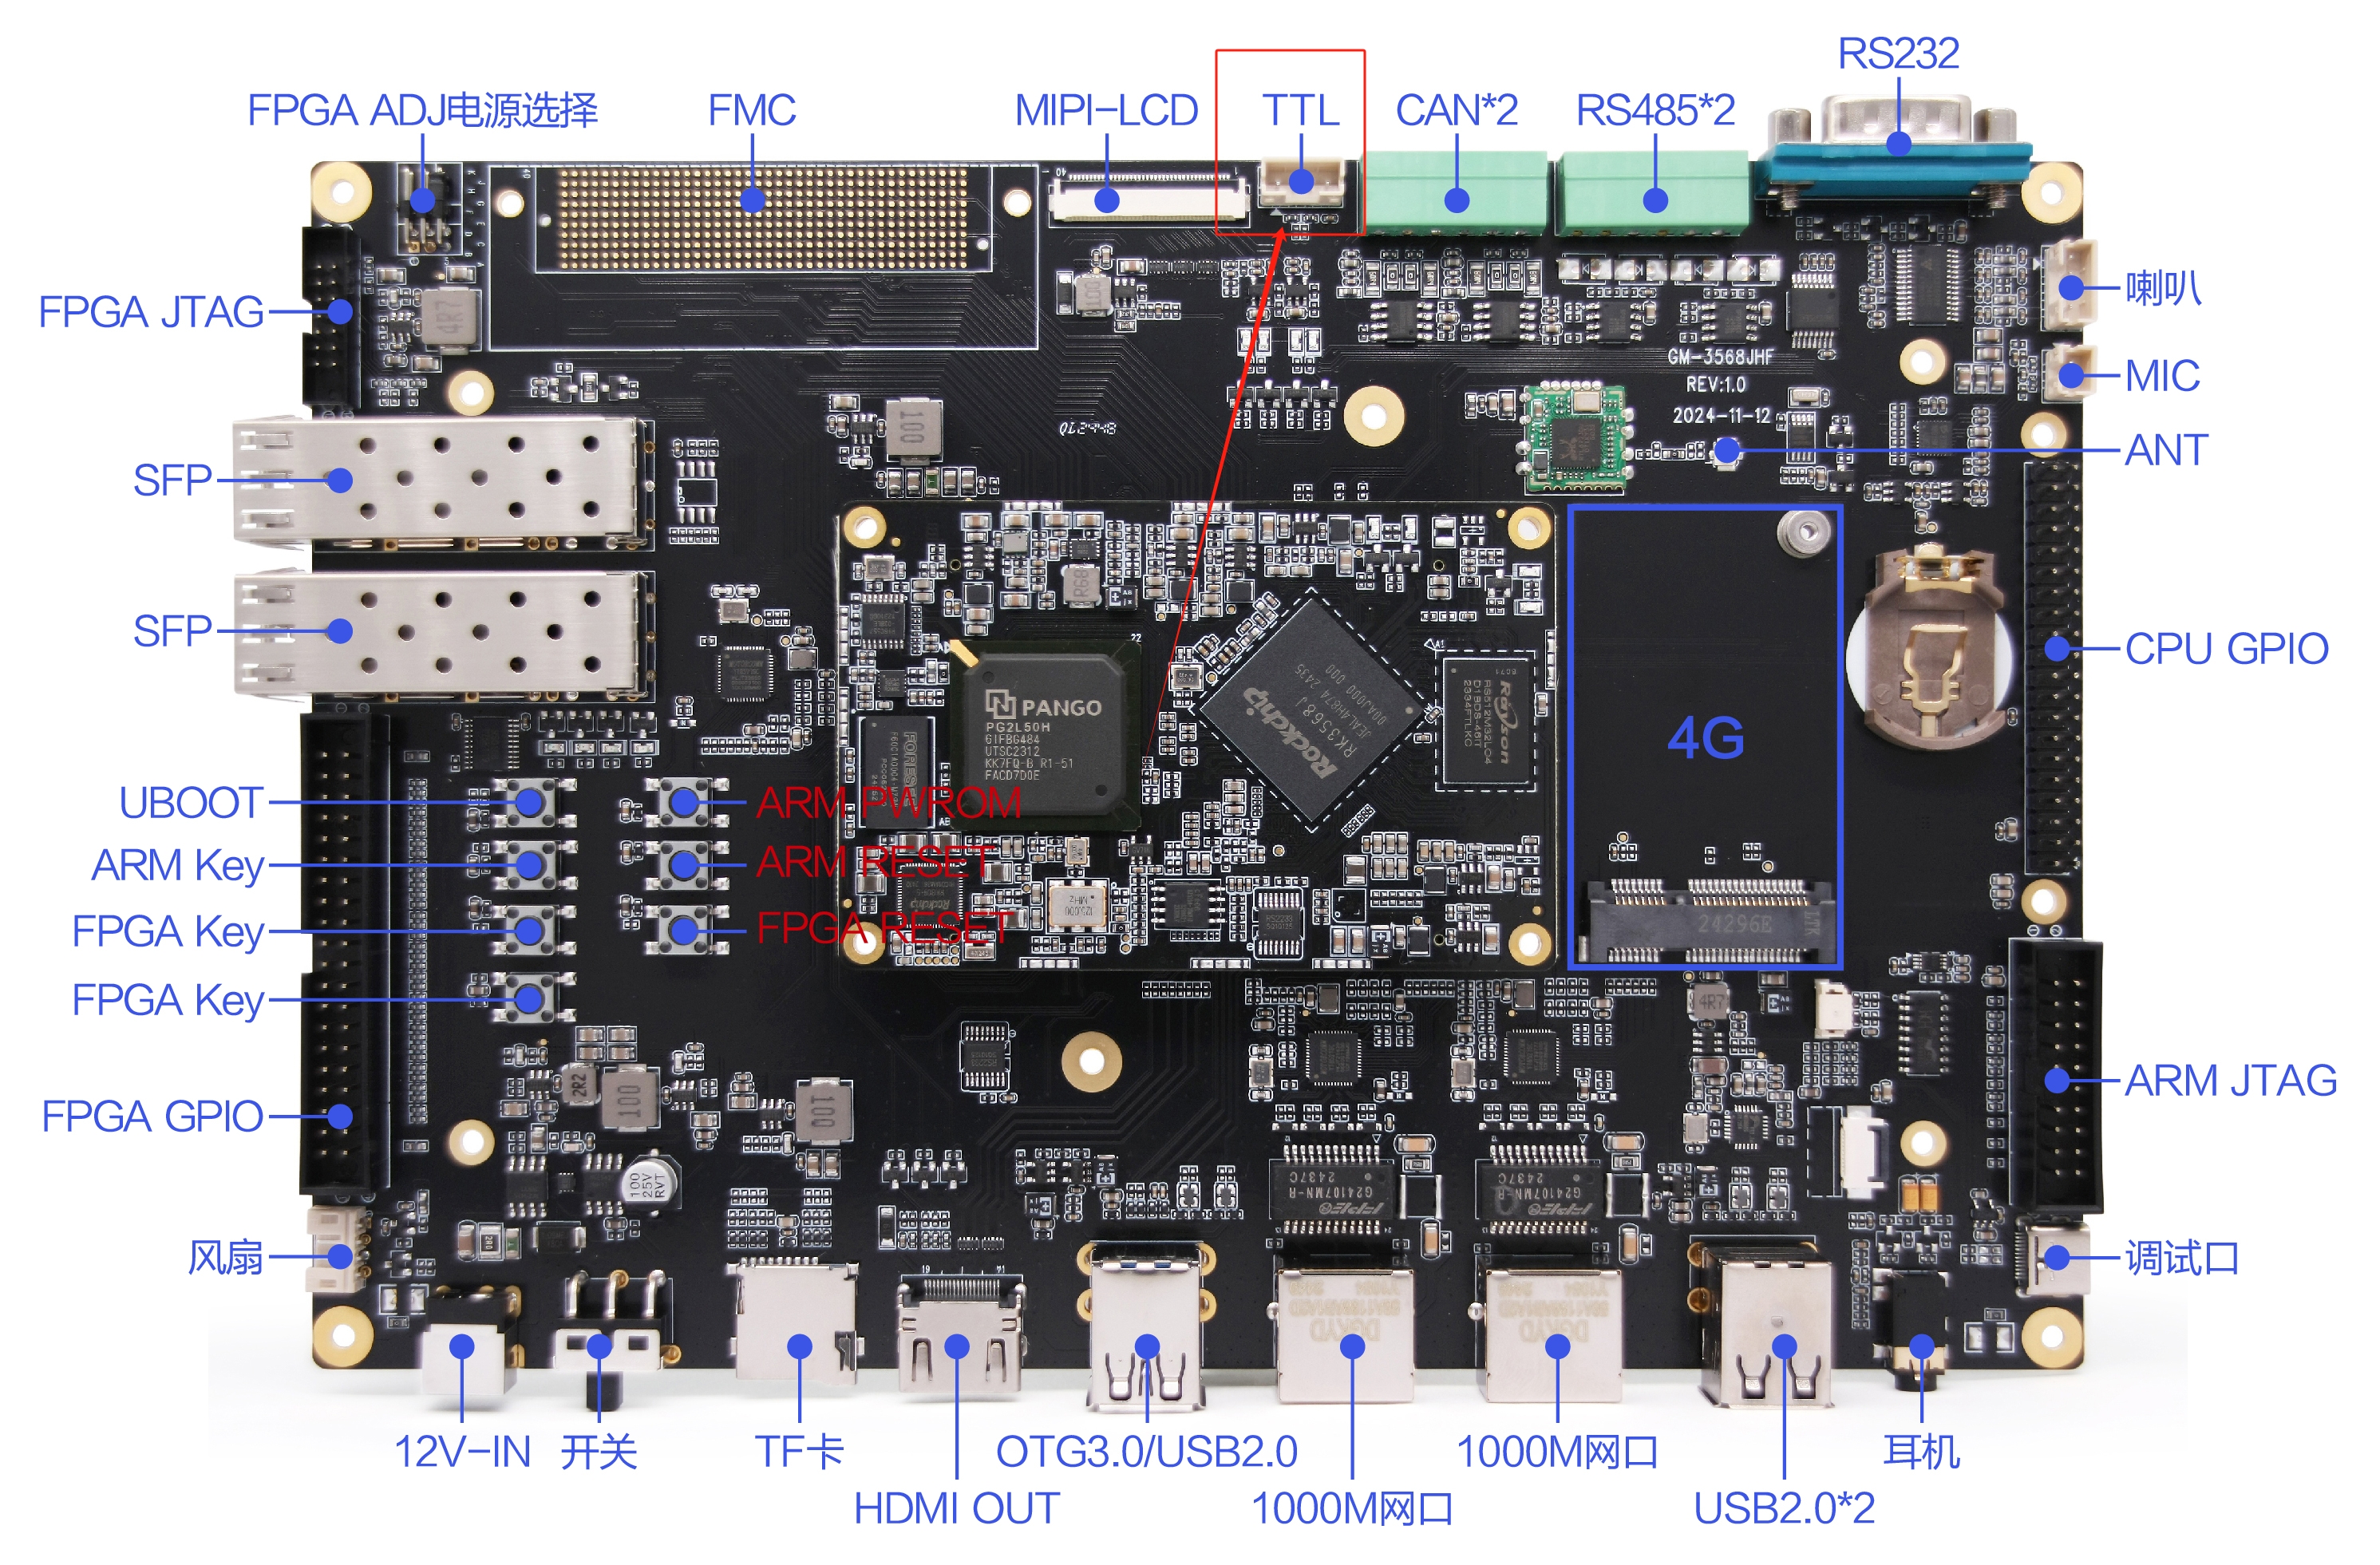
通过USB转TTL串口工具将PC与TTL UART4连接起来,TTL UART4位置如下图所示。
将本案例 bin 目录下(软件资料\demo\uart_rw\bin)的可执行程序 uart_rw 拷贝至开发板文件系统(源码可以src路径下查看),并在该可执行程序所在目录执行如下命令,查看程序参数信息。
./uart_rw -h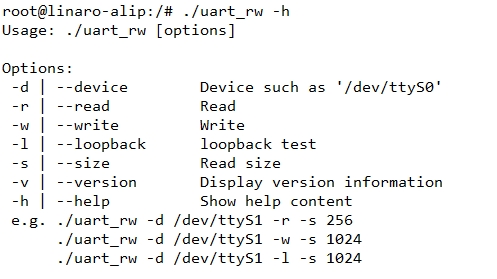
开发板接收
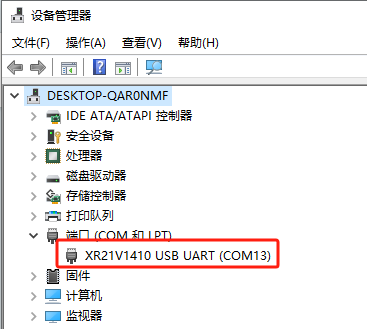
打开设备管理器,本次测试中调试串口 UART4 端口号为 COM13,如下图所示。
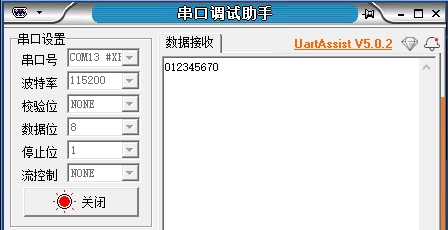
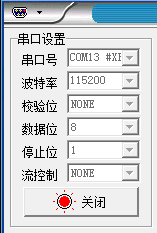
PC上打开串口调试工具,COM13 波特率设为 115200,8N1,无校验位,并建立串口连接。开发板调试串口终端执行如下命令,开发板等待接收上位机发送的数据,如图所示。
Tips
开发板启动后首次执行程序 uart_rw,会出现打印信息"of_dma_request_slave_channel…",不影响正常使用,请忽略。
./uart_rw -d /dev/ttyS4 -r -s 9PC上使用串口调试工具发送"ShimetaPi"。
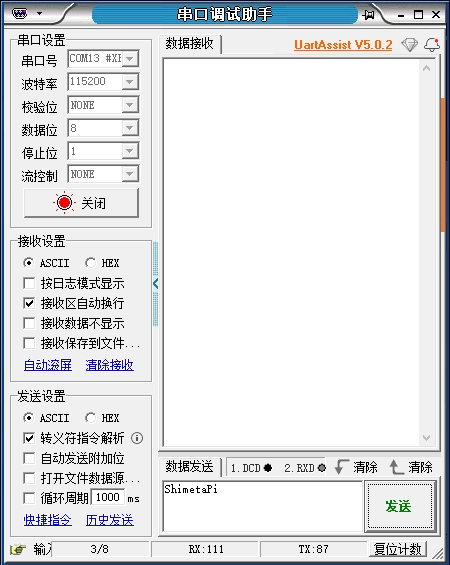
开发板调试串口终端将会打印接收到的数据。

开发板发送
执行如下命令,开发板通过 UART4 串口发送数据至上位机,数据已在程序中定义。
./uart_rw -d /dev/ttyS4 -w -s 9
串口调试工具会收到以下数据。