YOLOv5 (Object Detection)
1. Introduction
YOLOv5 is a one-stage object detection algorithm launched by Ultralytics in 2020. Although it is not created by the original YOLO series author Joseph Redmon, it is based on YOLOv3 and YOLOv4 ideas for improvement and optimization. It is implemented using the PyTorch framework and has the characteristics of simple deployment, fast speed, and high accuracy. Its network structure includes: input end (Mosaic data augmentation, adaptive anchor box calculation, etc.), Backbone (using CSPDarknet53 as the feature extraction network, including CSP structure and residual connections), Neck (using FPN+PAN structure for multi-scale feature fusion), and output end (calculating bounding box loss through GIOU loss function, supporting multi-category object detection). It performs excellently on datasets like COCO.
Project Directory
YOLOV5
│  libsophon_soc_0.5.1-LTS_aarch64.tar.gz	##Cross-compilation required environment
│  sophon-mw-soc_0.12.0_aarch64.tar.gz		##Cross-compilation required environment
│  sophon-sail_3.8.0.tar.gz					##Sail interface required environment
│  stream_dev.tar							##Docker environment with libc 2.31
│
├─cpp	##C++ examples
│  ├─dependencies	##Required libraries
│  │
│  ├─yolov5_bmcv	##bmcv example
│  │      CMakeLists.txt
│  │      main.cpp
│  │      yolov5.cpp
│  │      yolov5.hpp
│  │      yolov5_bmcv.soc	##Provided executable
│  │
│  └─yolov5_sail	##sail example
│          CMakeLists.txt
│          main.cpp
│          yolov5.cpp
│          yolov5.hpp
│          yolov5_sail.soc	##Provided executable
│
├─datasets		##Dataset
│
├─docs			##Related help documentation
│
├─models		##bmodel files
│  └─BM1684X
│          yolov5s_v6.1_3output_fp16_1b.bmodel
│          yolov5s_v6.1_3output_fp32_1b.bmodel
│          yolov5s_v6.1_3output_int8_1b.bmodel
│          yolov5s_v6.1_3output_int8_4b.bmodel
│
├─python		##Python example files
│      postprocess_numpy.py
│      utils.py
│      yolov5_bmcv.py		#Python example using SAIL decoding, SAIL.BMCV preprocessing, SAIL inference
│      yolov5_opencv.py		#Python example using OpenCV decoding, OpenCV preprocessing, SAIL inference
│
├─sophon-sail	##Provided pre-compiled sail library
│
└─tools			#Python scripts for accuracy testing, performance comparison, etc.
        compare_statis.py
        eval_coco.py
2. Running Steps
1. Python Examples
1.1 Configure Python Environment
bmcv Environment (for running yolov5_bmcv.py)
Modify .bashrc file to introduce Sophon's Python environment
sudo vim ~/.bashrcAdd the following at the end of the file
export PYTHONPATH=$PYTHONPATH:/opt/sophon/libsophon-current/lib:/opt/sophon/sophon-opencv-latest/opencv-python/Save and exit with :wq, then reload the terminal
source ~/.bashrcYou can check with echo $PYTHONPATH to see if it corresponds to the field.
opencv Environment (for running yolov5_opencv.py)
pip install opencv-python-headless1.2 Inference Testing
File Parameter Description
The command parameters for yolov5_opencv.py and yolov5_bmcv.py are the same. Taking yolov5_opencv.py inference as an example, the parameters are described as follows:
usage: yolov5_opencv.py [-h] [--input INPUT] [--bmodel BMODEL] [--dev_id DEV_ID] [--conf_thresh CONF_THRESH] [--nms_thresh NMS_THRESH]

optional arguments:
  -h, --help            Print this help message and exit
  --input INPUT         Test data path, can input the path of the entire image folder or video path
  --bmodel BMODEL       bmodel path for inference, default uses stage 0 network for inference
  --dev_id DEV_ID       TPU device id for inference
  --conf_thresh CONF_THRESH
                        Confidence threshold
  --nms_thresh NMS_THRESH
                        NMS threshold
Image Testing
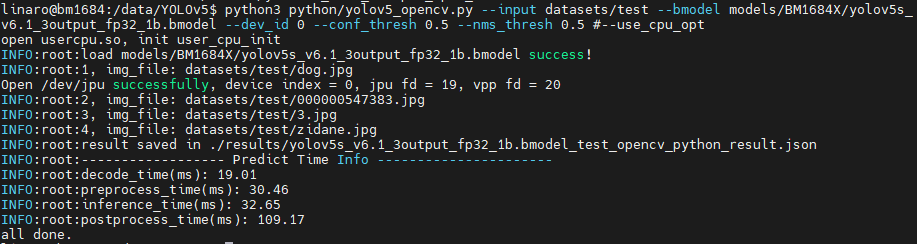
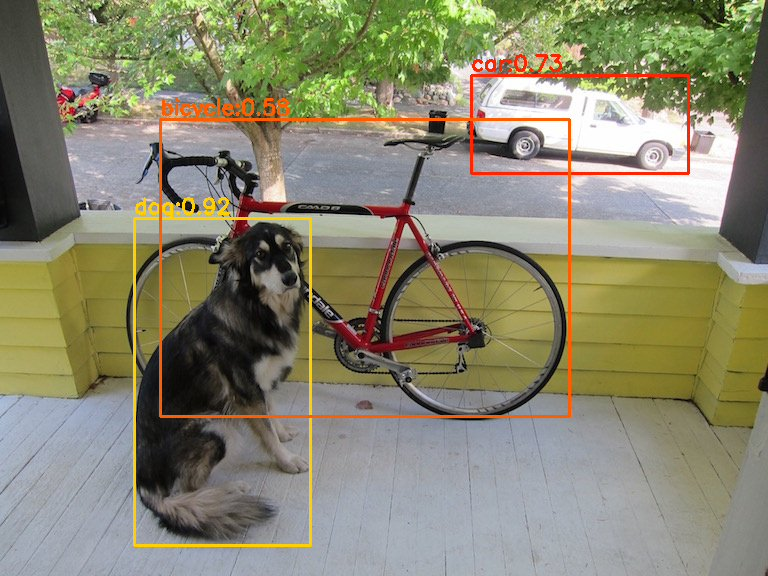
Image testing example is as follows. Supports testing the entire image folder. Enter the corresponding directory, for example: /data/YOLOv5/, then you can debug the required files.
python3 python/yolov5_opencv.py --input datasets/test --bmodel models/BM1684X/yolov5s_v6.1_3output_fp32_1b.bmodel --dev_id 0 --conf_thresh 0.5 --nms_thresh 0.5After testing, predicted images will be saved in results/images, predicted results will be saved in results/yolov5s_v6.1_3output_fp32_1b.bmodel_test_opencv_python_result.json, and predicted results, inference time and other information will be printed. Results are as follows:
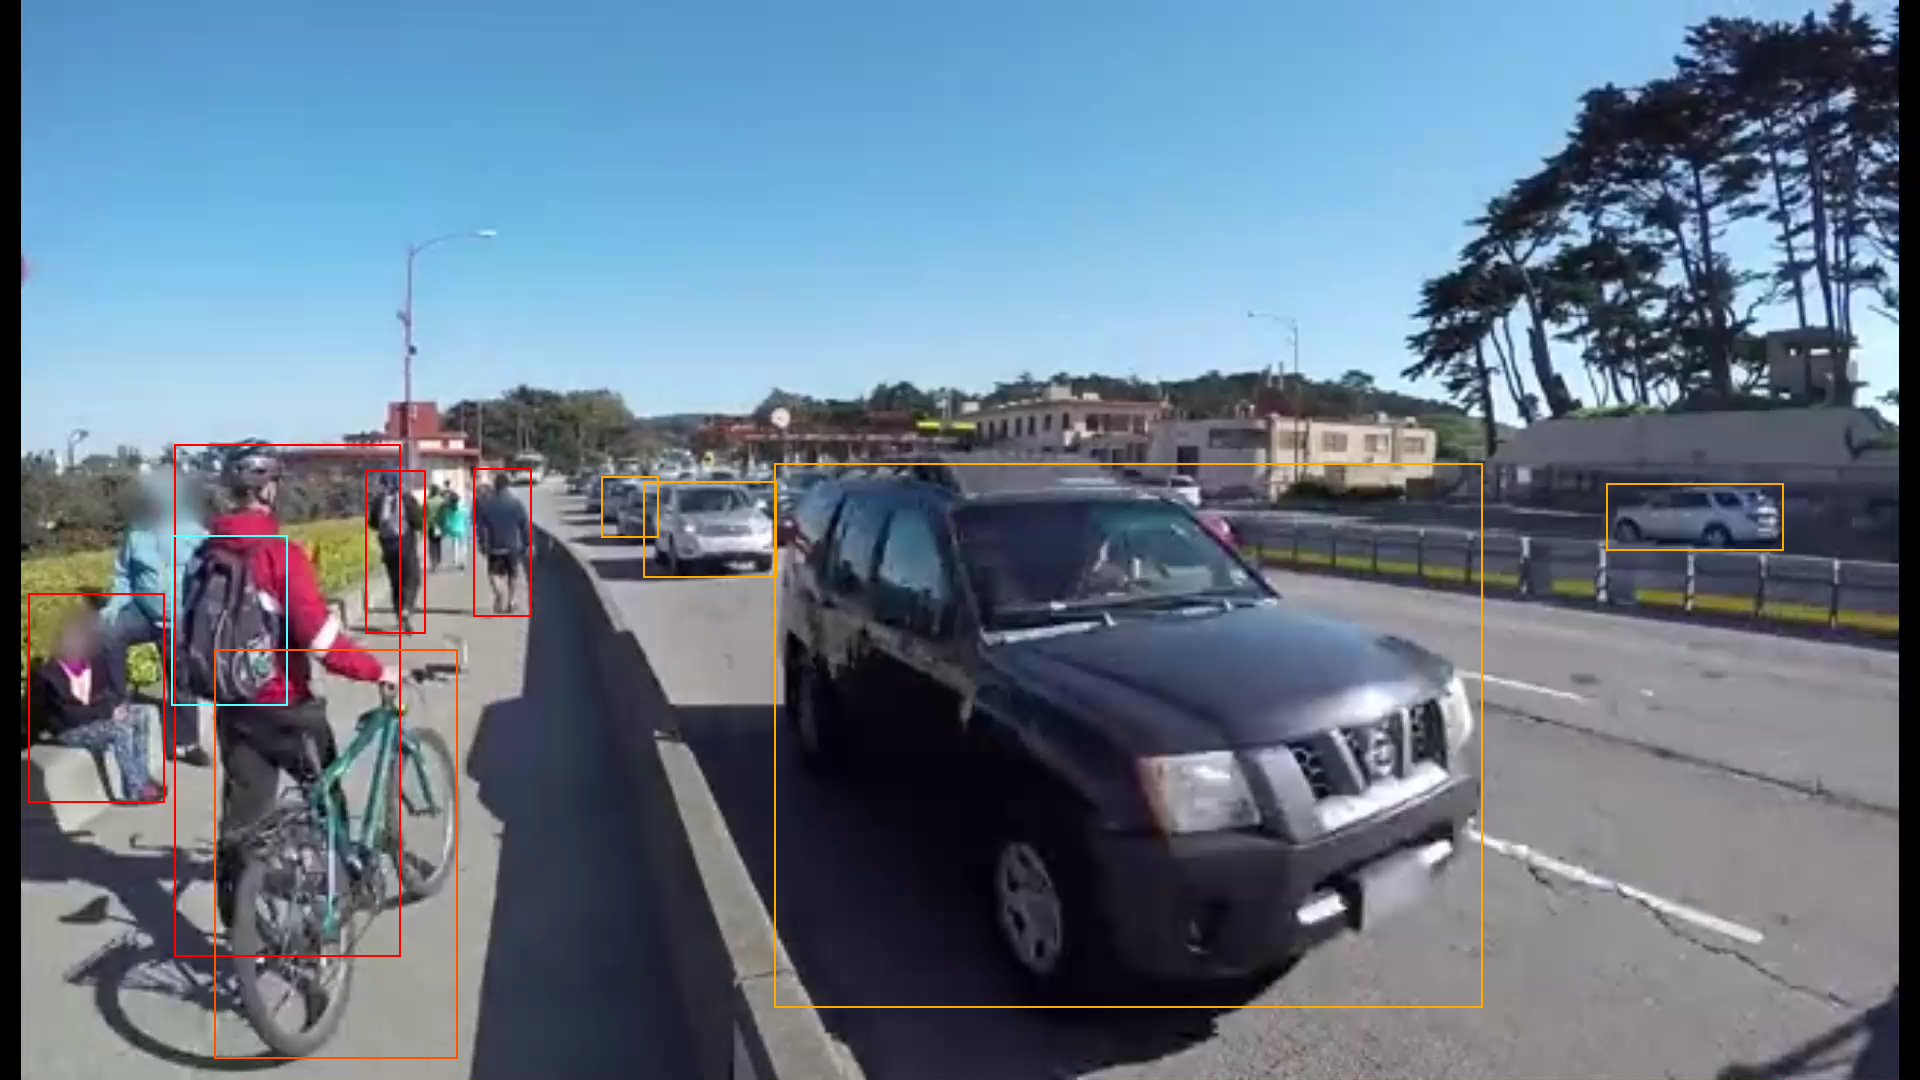
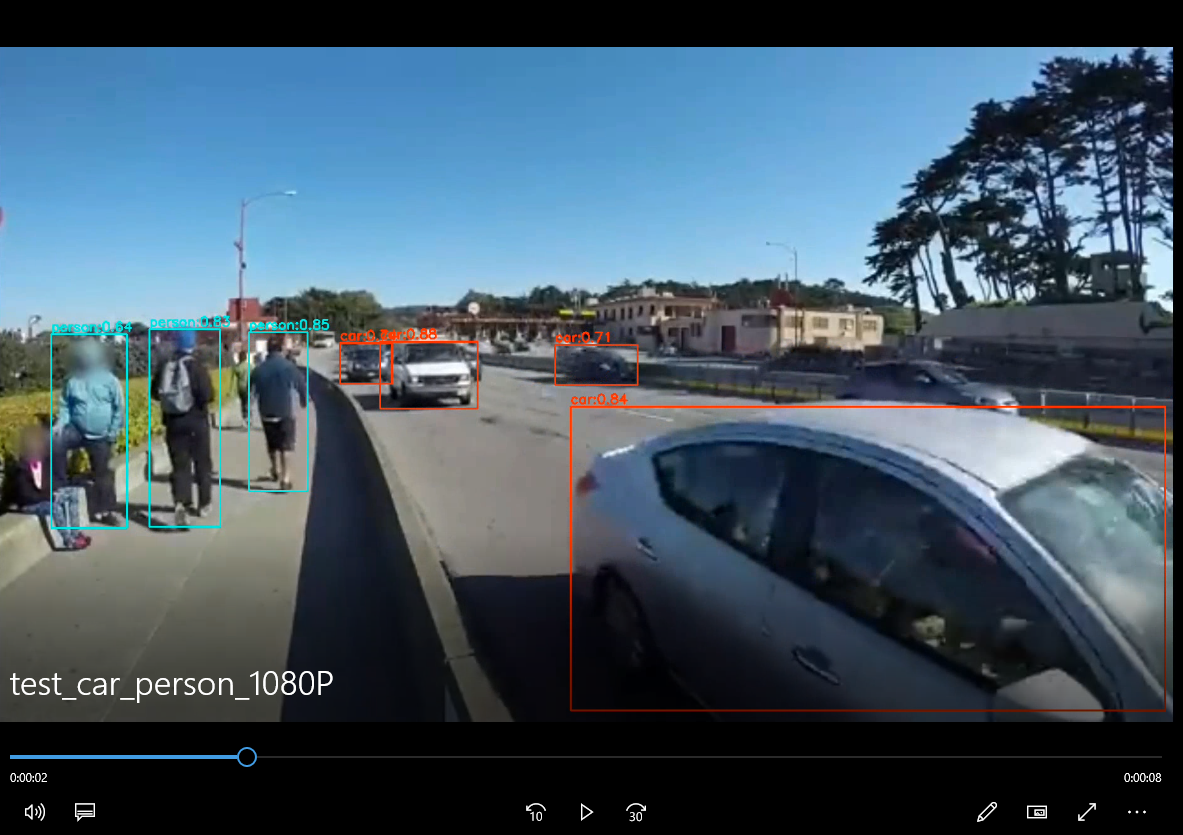
Video Testing
python3 python/yolov5_opencv.py --input datasets/test_car_person_1080P.mp4 --bmodel models/BM1684X/yolov5s_v6.1_3output_fp32_1b.bmodel --dev_id 0 --conf_thresh 0.5 --nms_thresh 0.5After testing, predicted results will be drawn in results/test_car_person_1080P.avi, and predicted results, inference time and other information will be printed.

yolov5_bmcv.py does not save videos, but draws predicted results on images and saves them in results/images, and temporarily does not support printing text on images.
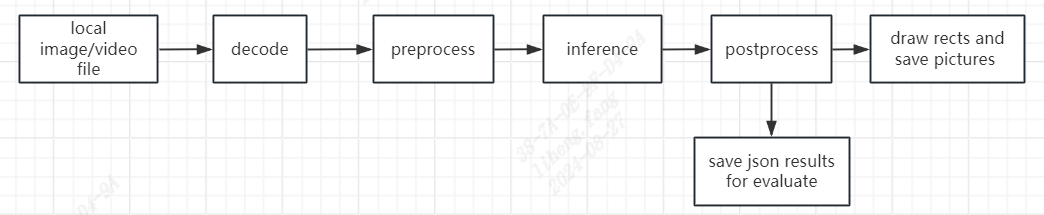
1.3 Flowchart
The processing flow in yolov5_bmcv.py and yolov5_opencv.py both follow this flowchart:
2. C++ Examples
1. Cross-compilation Environment Setup
C++ programs need to compile dependency files to run on the board (you can also use the provided executable files directly). To save pressure on edge devices, we choose to use an X86 Linux environment for cross-compilation.
Setting up cross-compilation environment, two methods provided:
(1) Install cross-compilation toolchain via apt:
If your system and target SoC platform have the same libc version (can be queried via ldd --version command), you can install using the following command:
sudo apt-get install gcc-aarch64-linux-gnu g++-aarch64-linux-gnuUninstall method:
sudo apt remove cpp-*-aarch64-linux-gnuIf your environment does not meet the above requirements, it is recommended to use method (2).
(2) Set up cross-compilation environment via docker:
You can use the provided docker image -- stream_dev.tar as the cross-compilation environment.
If using Docker for the first time, execute the following commands to install and configure (only required for first time):
sudo apt install docker.io
sudo systemctl start docker
sudo systemctl enable docker
sudo groupadd docker
sudo usermod -aG docker $USER
newgrp docker
Load the image in the downloaded image directory
docker load -i stream_dev.tarYou can view loaded images via docker images, default is stream_dev:latest
Create container
docker run --privileged --name stream_dev -v $PWD:/workspace  -it stream_dev:latest
# stream_dev is just an example name, please specify your own container name
#For existing docker containers, open using:
docker run -v $PWD:/workspace  -it stream_dev:latest
The workspace directory in the container will mount to the host directory where you run docker run. You can compile projects in this container. The workspace directory is under root, changes in this directory will map to changes in corresponding files in the local directory.
Note: When creating a container, you need to go to the parent directory of soc-sdk (dependency compilation environment) and above
1.2 Package Dependency Files
Package libsophon
Extract
libsophon_soc_x.y.z_aarch64.tar.gz, where x.y.z is the version number.# Create root directory for dependency files mkdir -p soc-sdk # Extract libsophon_soc_x.y.z_aarch64.tar.gz tar -zxf libsophon_soc_${x.y.z}_aarch64.tar.gz # Copy related library directories and header file directories to the dependency root directory cp -rf libsophon_soc_${x.y.z}_aarch64/opt/sophon/libsophon-${x.y.z}/lib soc-sdk cp -rf libsophon_soc_${x.y.z}_aarch64/opt/sophon/libsophon-${x.y.z}/include soc-sdkPackage sophon-ffmpeg and sophon-opencv
Extract
sophon-mw-soc_x.y.z_aarch64.tar.gz, where x.y.z is the version number.# Extract sophon-mw-soc_x.y.z_aarch64.tar.gz tar -zxf sophon-mw-soc_${x.y.z}_aarch64.tar.gz # Copy ffmpeg and opencv library directories and header file directories to soc-sdk directory cp -rf sophon-mw-soc_${x.y.z}_aarch64/opt/sophon/sophon-ffmpeg_${x.y.z}/lib soc-sdk cp -rf sophon-mw-soc_${x.y.z}_aarch64/opt/sophon/sophon-ffmpeg_${x.y.z}/include soc-sdk cp -rf sophon-mw-soc_${x.y.z}_aarch64/opt/sophon/sophon-opencv_${x.y.z}/lib soc-sdk cp -rf sophon-mw-soc_${x.y.z}_aarch64/opt/sophon/sophon-opencv_${x.y.z}/include soc-sdk
1.3 Perform Cross-compilation
bmcv mode: After setting up the cross-compilation environment, use the cross-compilation toolchain to compile and generate executable files.
cd cpp/yolov5_opencv
mkdir build && cd build
#Please modify -DSDK path according to actual situation, use absolute path.
cmake -DTARGET_ARCH=soc -DSDK=/workspace/soc-sdk/ ..
make
After compilation completes, a .soc file will be generated in the corresponding directory, for example: cpp/yolov5_bmcv/yolov5_bmcv.soc.
sail mode: If you use sophon-sail interface, you need to configure sophon-sail for the soc environment first. Configuration method is as follows:
Through cross-compilation (using WSL in this example), compile SAIL containing bmcv, sophon-ffmpeg, sophon-opencv.
If the libc version of the compilation platform is different from the target, you need to enter the docker environment
docker run -v $PWD:/workspace -it stream_dev:latest#Extract sophon-sail_3.8.0.tar.gz
tar -zvxf sophon-sail_3.8.0.tar.gz
#Go to sophon directory: cd sophon
mkdir build && cd build
cmake -DBUILD_TYPE=soc -DBUILD_PYSAIL=OFF -DCMAKE_TOOLCHAIN_FILE=../cmake/BM168x_SOC/ToolChain_aarch64_linux.cmake -DLIBSOPHON_BASIC_PATH=../../libsophon_soc_0.5.1-LTS_aarch64/opt/sophon/libsophon-0.5.1/ -DFFMPEG_BASIC_PATH=../../sophon-mw-soc_0.12.0_aarch64/opt/sophon/sophon-ffmpeg_0.12.0/ -DOPENCV_BASIC_PATH=../../sophon-mw-soc_0.12.0_aarch64/opt/sophon/sophon-opencv_0.12.0/ ..
make sailInstall SAIL dynamic library and header files. The program will automatically create build_soc in the source directory, and compilation results will be installed under build_soc
make installCopy sophon-sail from build_soc folder to the target SOC's /opt/sophon directory, then you can call it on soc.
After setting up the cross-compilation environment, use the cross-compilation toolchain to compile and generate executable files.
cd cpp/yolov5_sail
mkdir build && cd build
#Please modify -DSDK and -DSAIL_PATH paths according to actual situation, use absolute paths.
cmake -DTARGET_ARCH=soc -DSDK=/path_to_sdk/soc-sdk -DSAIL_PATH=/wrokspace/sophon-sail/build_soc/sophon-sail ..
make
After compilation completes, yolov5_sail.soc will be generated in the yolov5_sail directory.
Since we are moving sophon-sail to the /opt/sophon directory, if using ssh connection for file transfer, you need to log in as root account. The root account has no initial password, you need to use the linaro account to run sudo passwd root to set a password before use.
Generally, Linux systems disable remote root login by default. You need to perform the following operations:
Edit configuration file
sudo vim /etc/ssh/sshd_config
#Add to the file
PermitRootLogin yes
Exit and save, restart ssh
sudo service sshd restartAfter copying sophon-sail library files to the target soc according to the tutorial, you also need to set the following environment variables:
echo 'export LD_LIBRARY_PATH=/opt/sophon/sophon-sail/lib/:$LD_LIBRARY_PATH' >> ~/.bashrc
source ~/.bashrc
2. Inference Testing
You need to copy the executable files generated from cross-compilation and required models and test data to the SoC platform (i.e., BM1684X development board) for testing. It is recommended to enter the /data/YOLOv5/cpp/yolov5_sail directory.
Parameter Description
The executable program has a default set of parameters. Please pass parameters according to actual situation. yolov5_bmcv.soc and yolov5_sail.soc have the same parameters. Specific parameters are as follows:
Usage: yolov5_bmcv.soc [params]

        --bmodel (value:../../models/BM1684/yolov5s_v6.1_3output_fp32_1b.bmodel)
                bmodel file path
        --classnames (value:../../datasets/coco.names)
                class names file path
        --conf_thresh (value:0.001)
                confidence threshold for filter boxes
        --dev_id (value:0)
                TPU device id
        --help (value:true)
                print help information.
        --input (value:../../datasets/test)
                input path, images direction or video file path
        --nms_thresh (value:0.6)
                iou threshold for nms
Image Testing
Image testing example is as follows. Supports testing the entire image folder. Taking yolov5_sail.soc as an example
##First add executable permission to the file
chmod +x yolov5_sail.soc
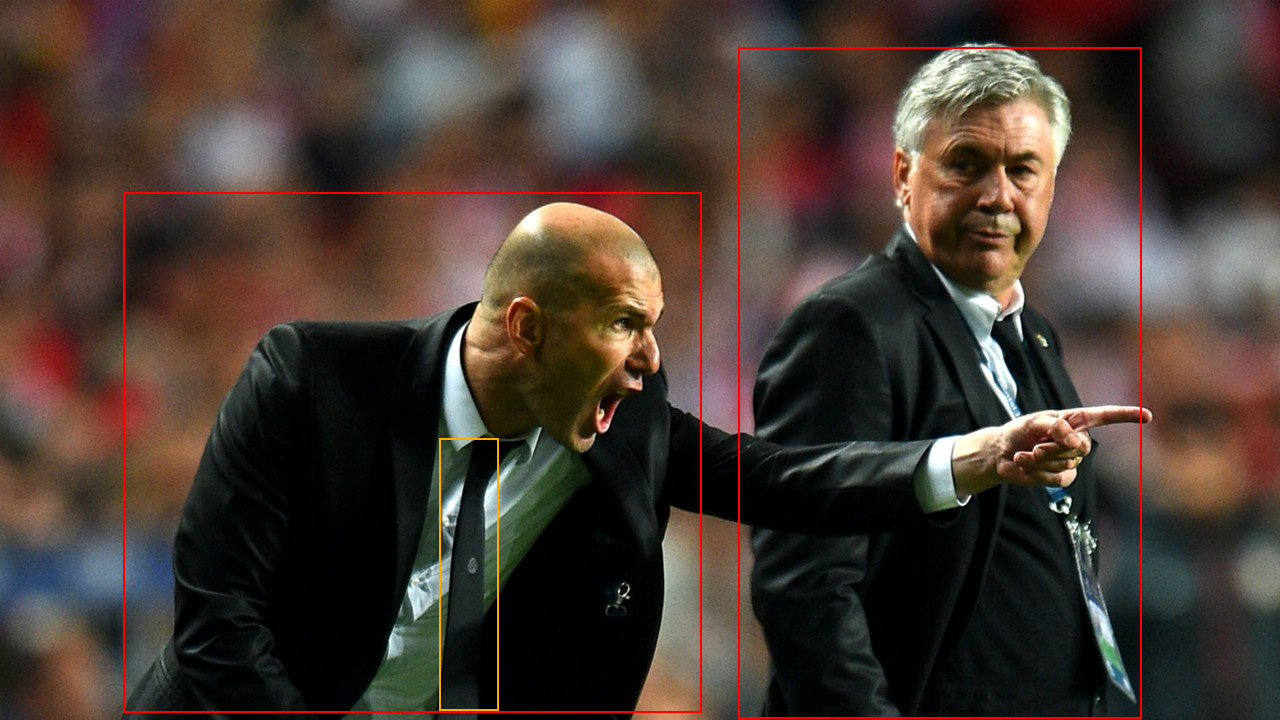
./yolov5_sail.soc --input=../../datasets/test --bmodel=../../models/BM1684X/yolov5s_v6.1_3output_fp32_1b.bmodel --dev_id=0 --conf_thresh=0.5 --nms_thresh=0.5 --classnames=../../datasets/coco.namesAfter testing, predicted images will be saved in results/images, predicted results will be saved in results/yolov5s_v6.1_3output_fp32_1b.bmodel_test_bmcv_cpp_result.json, and predicted results, inference time and other information will be printed.
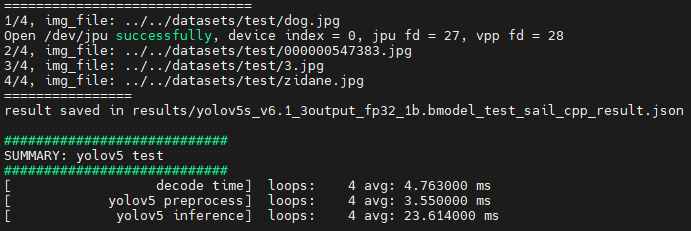
Video Inference
For cpp example, video inference results are saved frame by frame in results/images, predicted results are saved in results/yolov5s_v6.1_3output_fp32_1b.bmodel_test_bmcv_cpp_result.json, and predicted results, inference time and other information will be printed.
./yolov5_sail.soc --input=../../datasets/test_car_person_1080P.mp4 --bmodel=../../models/BM1684X/yolov5s_v6.1_3output_fp32_1b.bmodel --dev_id=0 --conf_thresh=0.5 --nms_thresh=0.5 --classnames=../../datasets/coco.names