03 Importing SDK
1 Using ShiMetaPi M4-R1 Supporting SDK for Development
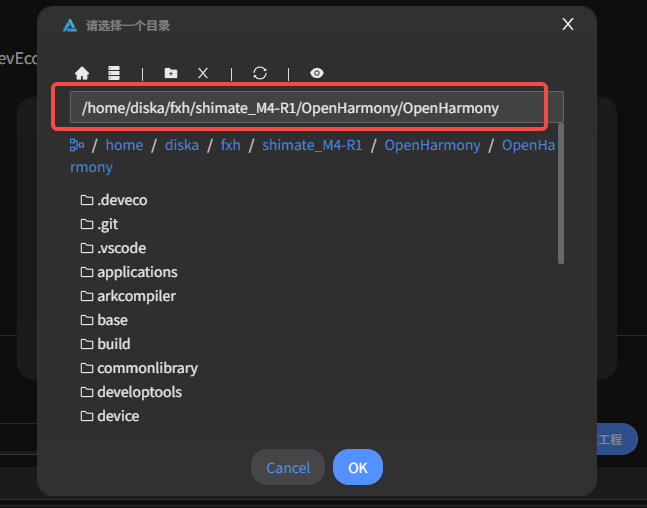
First, you need to save ShiMatePi's OpenHarmony source code to the Ubuntu directory. For example, the SDK path in this example is as follows:

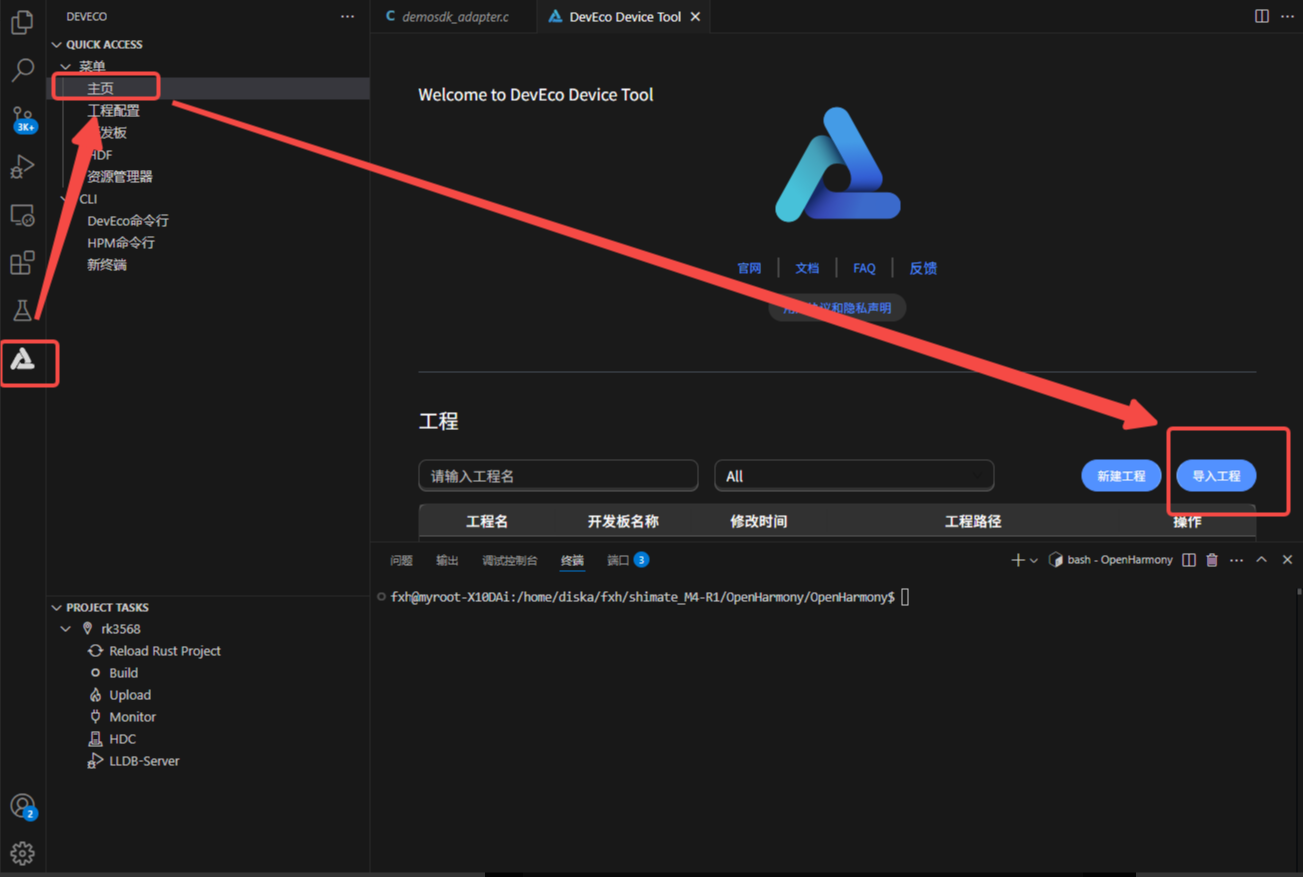
Open VSCode, open DevEco Device Tool, and click Import Project on the home page.
In the pop-up page, select the SDK location under your remote Ubuntu directory and click Import.
At this point, the tool will automatically load scripts for compilation. Just wait for it to complete.
2 Using Official Release Version for Development
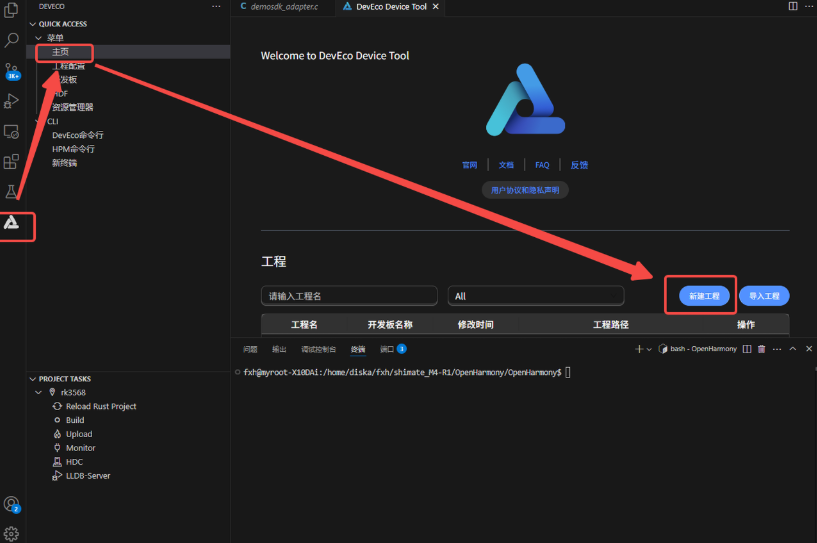
Click New Project on the home page.
We can choose the source code or OpenHarmony samples already prepared in the software for development. Here, we randomly select a development board as an example.
The new project configuration wizard page, configure project-related information, including:
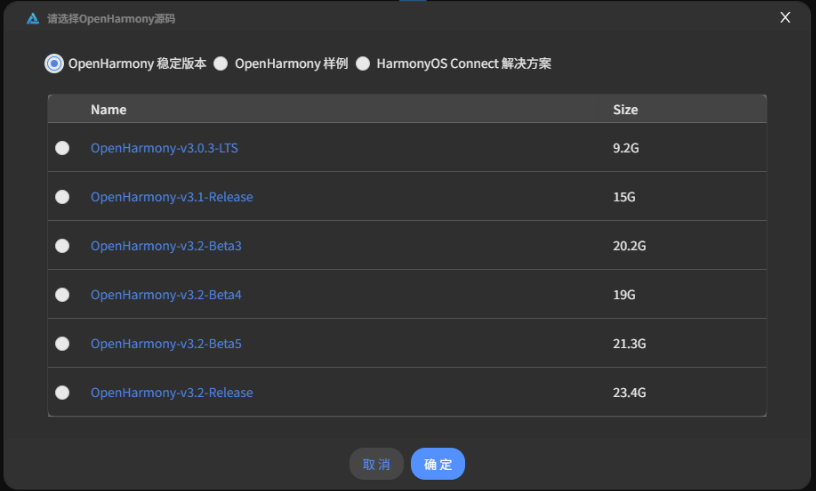
- OpenHarmony Source Code: Select the OpenHarmony source code to download. Please select the source code version under OpenHarmony Stable Version. It supports OpenHarmony-v3.0.3-LTS, OpenHarmony-v3.1-Release, OpenHarmony-v3.2-Beta3, OpenHarmony-v3.2-Beta4, OpenHarmony-v3.2-Beta5, OpenHarmony-v3.2-Release, OpenHarmony-v4.0-Beta1, OpenHarmony-v4.0-Beta2 versions.
- Project Name: Set the project name.
- Project Path: Select the project file storage path.
- SOC: Select the supported chip.
- Board: Select the supported development board.
- Product: Select the product.
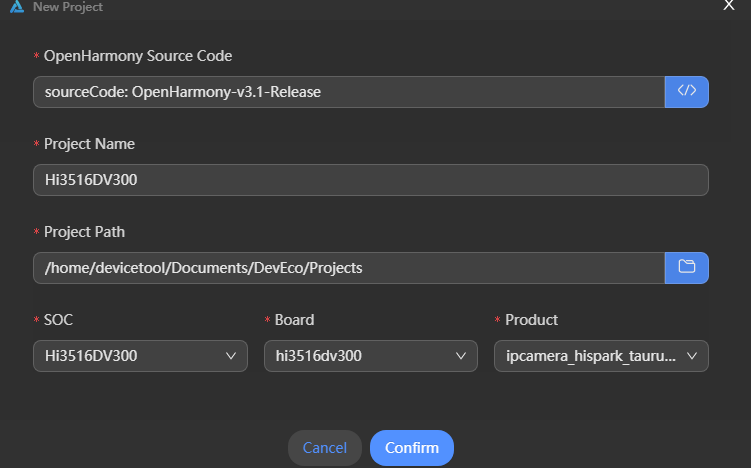
After the project configuration is completed, click Confirm. DevEco Device Tool will automatically start downloading the OpenHarmony source code. Since the OpenHarmony stable version source code package is large, please wait patiently for the source code download to complete. We can see the download progress in the VSCode terminal tool.
