01 First Application - Hello World
1 Creating a Project
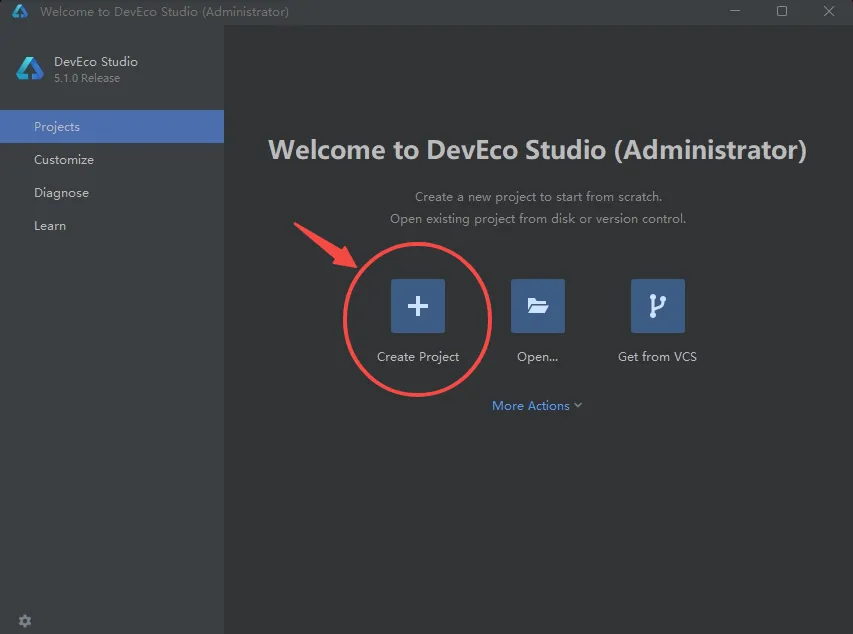
- If this is the first time opening DevEco Studio, please click Create Project to create a project. If you already have a project open, select File > New > Create Project from the menu bar to create a new project.
- Select Application app development (this article uses app development as example, Atomic Service corresponds to atomization service development), select the "Empty Ability" template, click Next for next step configuration.

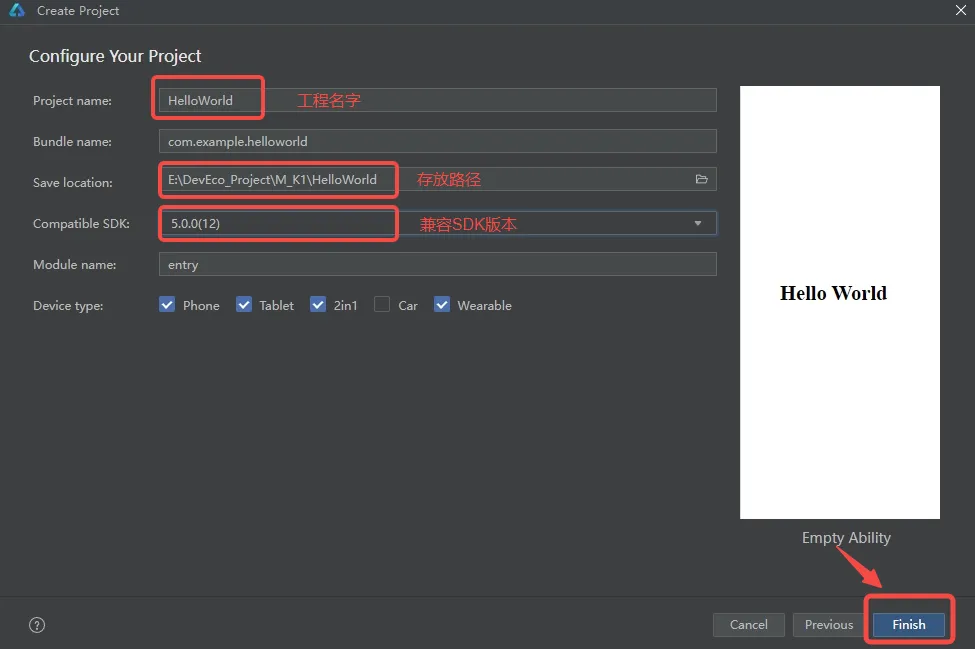
- Enter the project configuration interface, modify the project storage path, project name, and compatible SDK version. Other parameters can keep default settings. Click Finish to create the project.
Note
M-K1 development board's board-side API version is API 12, so select Compatible SDK as 5.0.0(12)
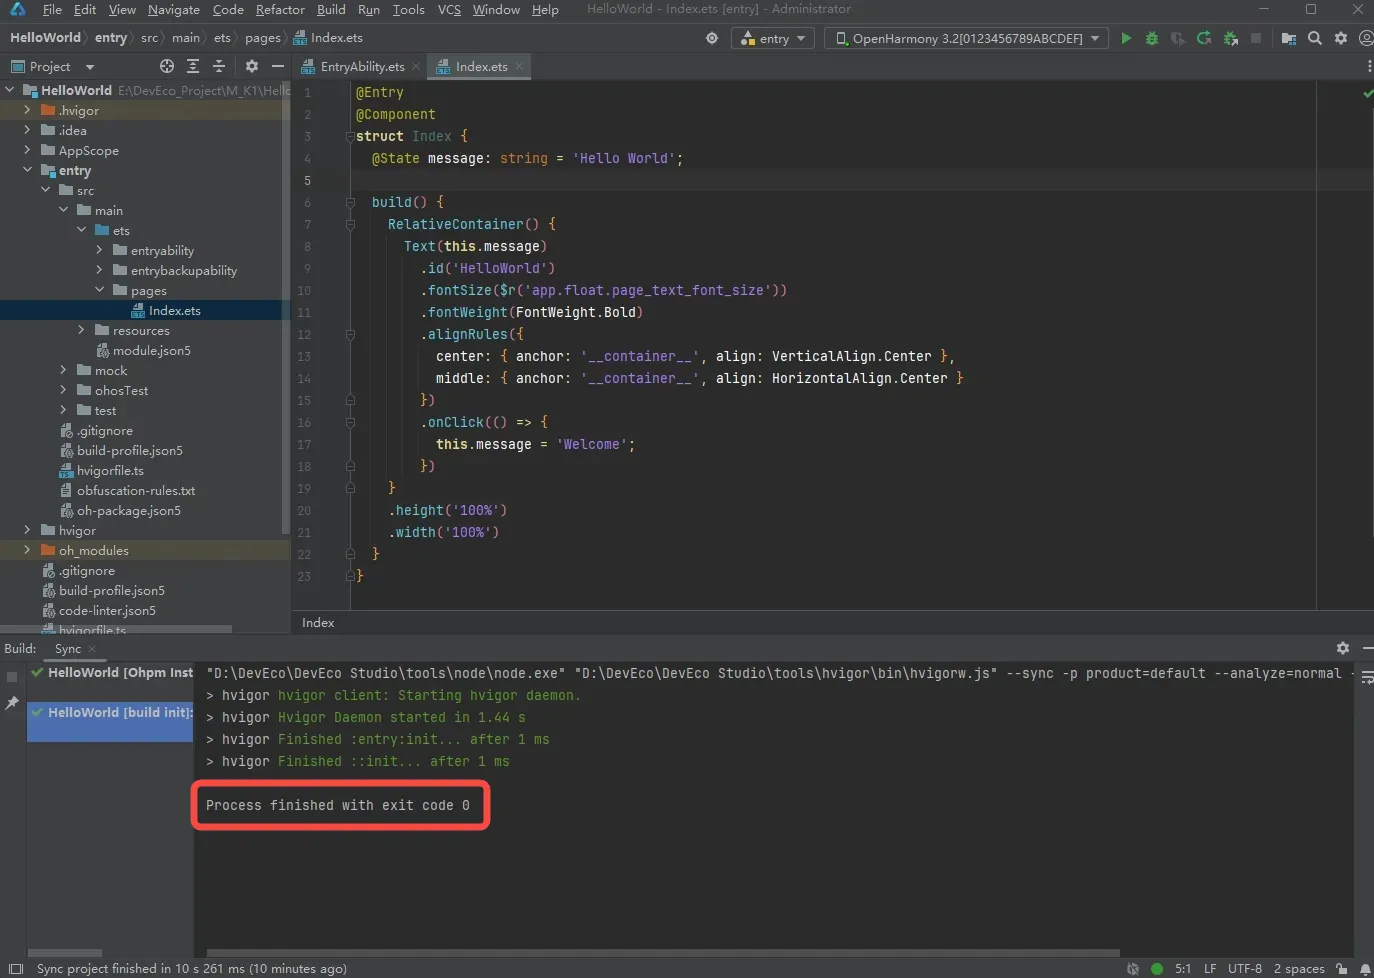
- The project initialization interface is as follows. Wait until the Build status bar outputs the statement within the red box, indicating initialization is complete.
2 Launching the First Application
2.1 Default Program Function Introduction
After project synchronization is complete, in the "Project" window, click "entry > src > main > ets > pages", open the "Index.ets" file. You can see the default program page of the application project consists of Text components.
The function implemented by this application is: clicking the Hello World text component will switch to Welcome.
The example of "Index.ets" file is as follows:
@Entry
@Component
struct Index {
  @State message: string = 'Hello World';

  build() {
    RelativeContainer() {
      Text(this.message)
        .id('HelloWorld')
        .fontSize($r('app.float.page_text_font_size'))
        .fontWeight(FontWeight.Bold)
        .alignRules({
          center: { anchor: '__container__', align: VerticalAlign.Center },
          middle: { anchor: '__container__', align: HorizontalAlign.Center }
        })
        .onClick(() => {
          this.message = 'Welcome';
        })
    }
    .height('100%')
    .width('100%')
  }
}
2.2 Signing File Configuration
- Connect the M-K1HSE running OpenHarmony system to the computer via USB to Type-C cable and OTG port (device is in debug mode by default) The tool interface will display the serial number of the connected M-K1HSE device, as shown in the figure below:

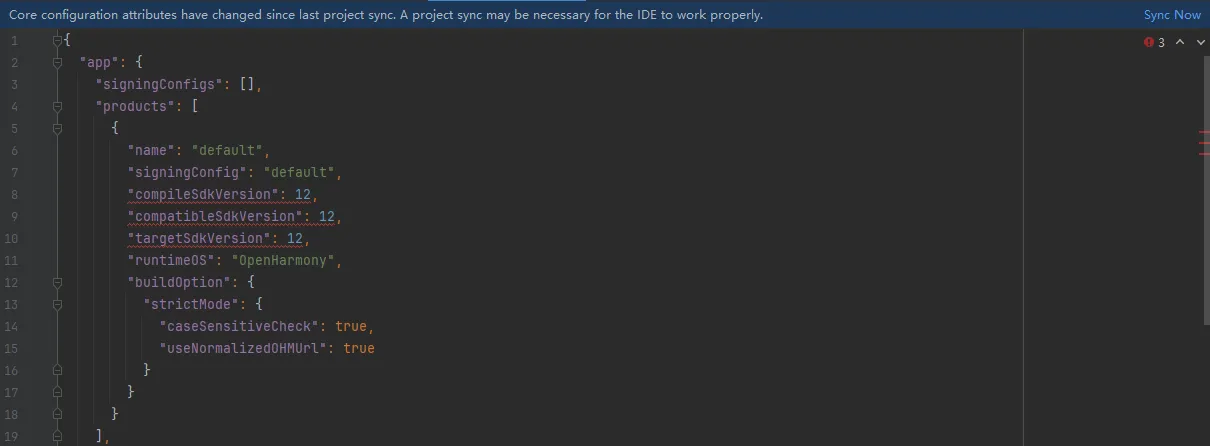
- Open the project-level build-profile.json5 and modify the products to the following code:
"products": [
	{
		"name": "default",
		"signingConfig": "default",
		"compileSdkVersion": 12,
		"compatibleSdkVersion": 12,
		"targetSdkVersion": 12,
		"runtimeOS": "OpenHarmony",
		"buildOption": {
			"strictMode": {
				"caseSensitiveCheck": true,
				"useNormalizedOHMUrl": true
			}
		}
	}
]
After modification, a blue prompt bar appears at the bottom. Click "Sync Now" in the prompt bar to synchronize the project.
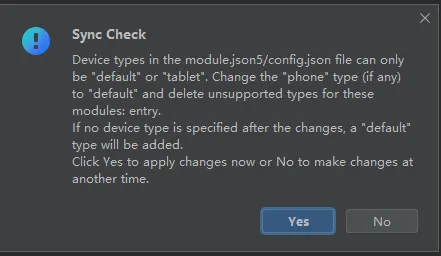
If the Sync Check popup appears as shown below during synchronization, click Yes.
When Sync Now completes, the Build status bar at the bottom displays the information as shown in the figure.

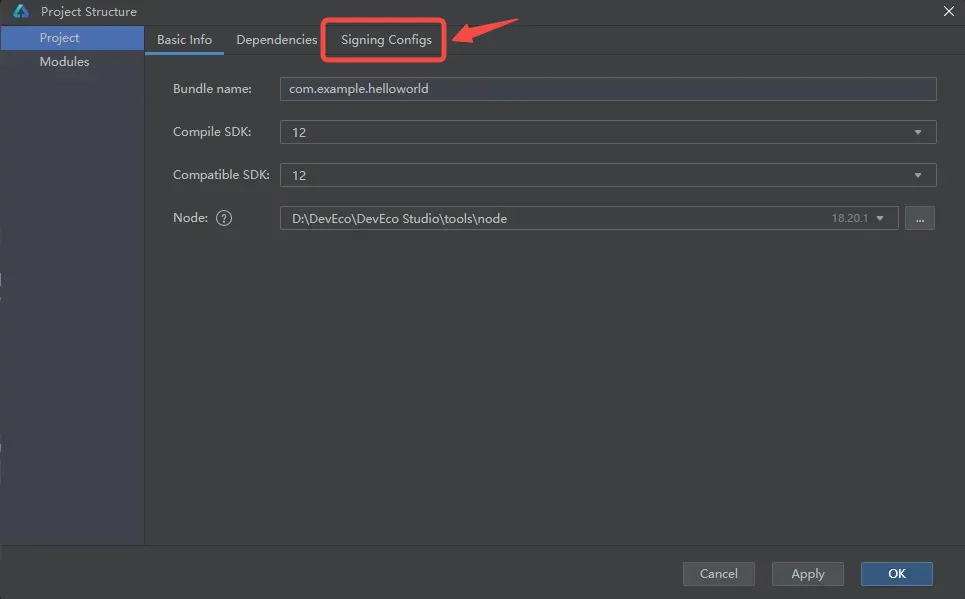
Select File > Project Structure from the menu bar. In the popup window, select Signing Configs for signing.
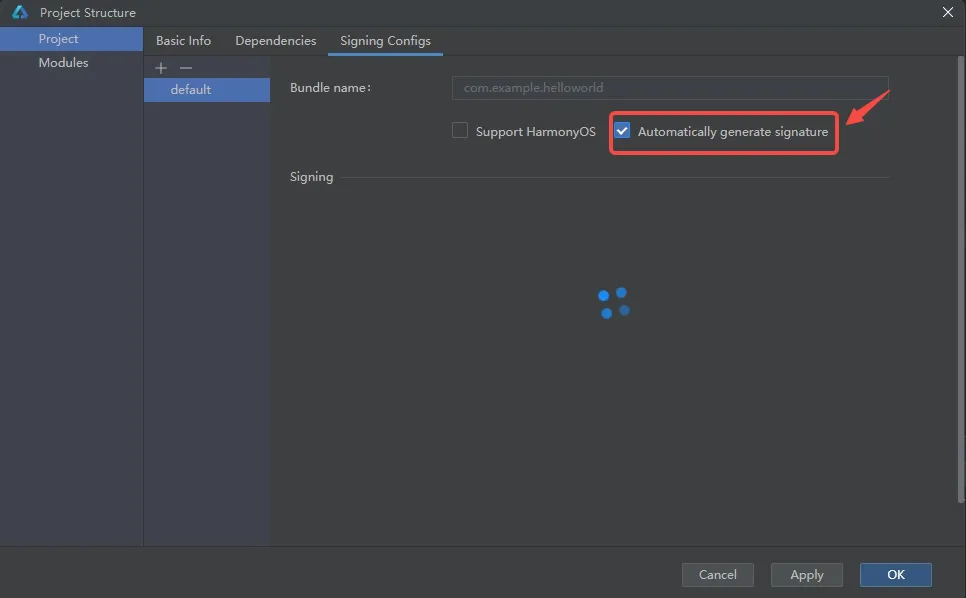
As shown, since M-K1HSE development board uses OpenHarmony system, check "Automatically generate signature", do not check "Support HarmonyOS", for automatic signing.
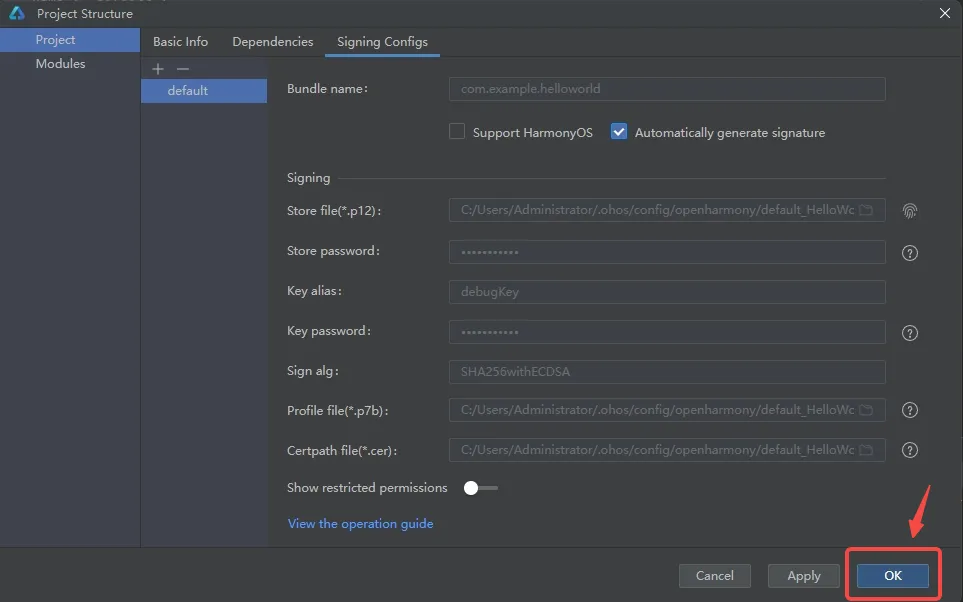
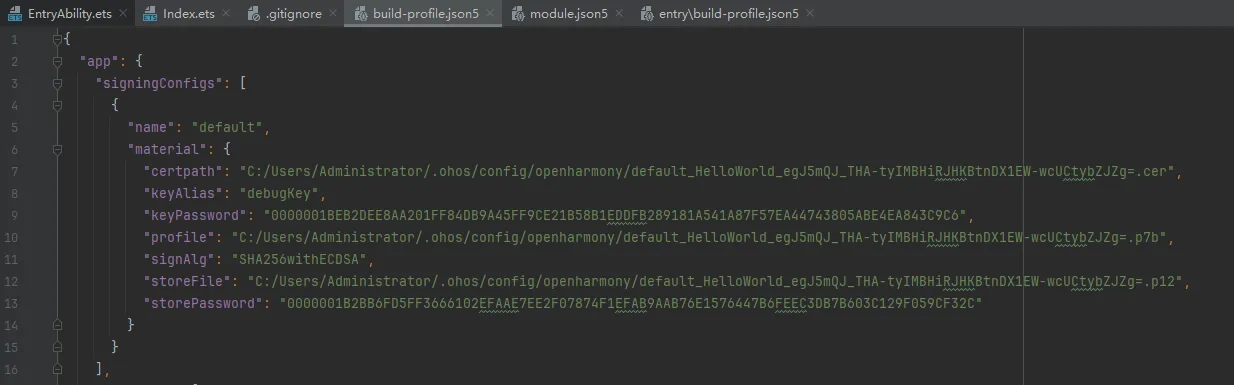
As shown in the figure, after the signature information appears, click OK. The signature content signingConfigs will be written into the project-level build-profile.json5.
Wait for synchronization to complete.
2.3 SysCap Property Adjustment
Tips
Since the current M-K1HSE development board firmware does not yet support the SystemCapability.ArkUi.Graphics3D service, it is necessary to adjust the SysCap properties.
- Select File ->Settings from the menu bar to find the OpenHarmony SDK path.

- Open module.json5 in the DevEco Studio project engineering to view the deviceTypes inside.


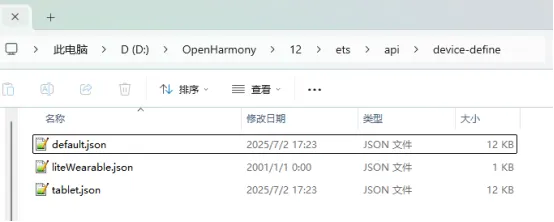
- Under the OpenHarmony SDK path, go to the 12/ets/api/device-define directory. The directory contents are as follows:
- In the 12/ets/api/device-define directory, comment out the information about SystemCapability.ArkUi.Graphics3D in the json files of the devices included in deviceTypes. Based on the picture above, the current application deviceTypes are default and tablet, so modify default.json and tablet.json.
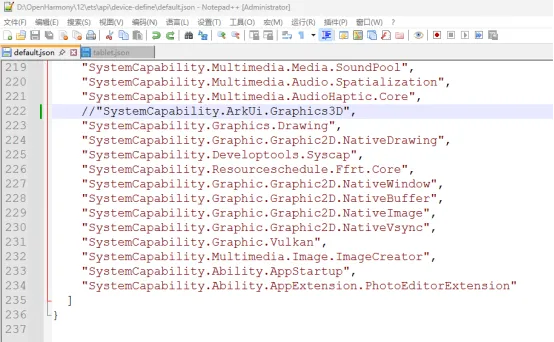
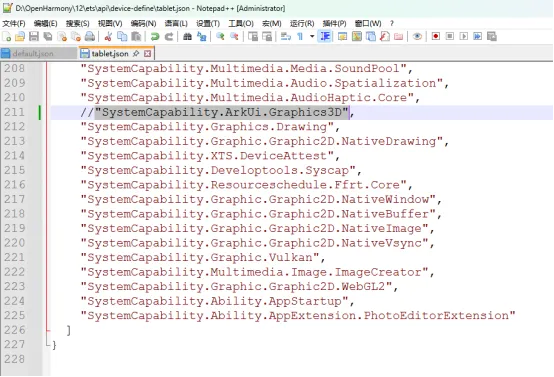
Save and exit after modification is complete.
2.4 Running the Application
Return to the DevEco Studio project engineering interface. Click the toolbar's Run 'entry' to run the application on the development board.

M-K1HSE real device effect is as shown in the figure:

The effect after clicking Hello World text is as shown in the figure:
