05 Bluetooth
GM-3568JHF development board integrates RTL8723DU wireless communication module, which not only provides WIFI function, but also integrates Bluetooth function. The Bluetooth module supports Classic Bluetooth and Bluetooth Low Energy (BLE) protocols, providing rich short-range wireless communication capabilities for the development board.
1 Bluetooth Module Overview
1.1 RTL8723DU Bluetooth Technical Specifications
| Parameter | Specification |
|---|---|
| Chip Model | Realtek RTL8723DU |
| Bluetooth Version | Bluetooth 4.2 |
| Protocol Support | Classic Bluetooth + BLE (Bluetooth Low Energy) |
| Working Frequency | 2.4GHz ISM Band (2.402~2.480GHz) |
| Modulation | FHSS (Frequency Hopping Spread Spectrum) |
| Transmit Power | Class 2 (Max 4dBm) |
| Receive Sensitivity | -90dBm @ 0.1% BER |
| Transmission Distance | 10 meters (Class 2) |
| Data Rate | Max 3Mbps (EDR) |
1.2 Driver and Software Support
Linux Bluetooth Protocol Stack
- BlueZ: Linux standard Bluetooth protocol stack
- Kernel Support: Kernel native driver support
- User Space Tools: bluetoothctl, hciconfig, hcitool, etc.
- D-Bus Interface: Standard D-Bus API interface
Supported Application Scenarios
- Audio Device: Bluetooth headset, speaker connection
- Input Device: Bluetooth keyboard, mouse
- File Transfer: File transfer with mobile phones and computers
- Serial Communication: Bluetooth serial data transmission
- IoT Application: BLE sensor data collection
2 Bluetooth Connection Configuration
The development board has adapted the RTL8723DU module, and the Bluetooth driver and protocol stack have been configured.
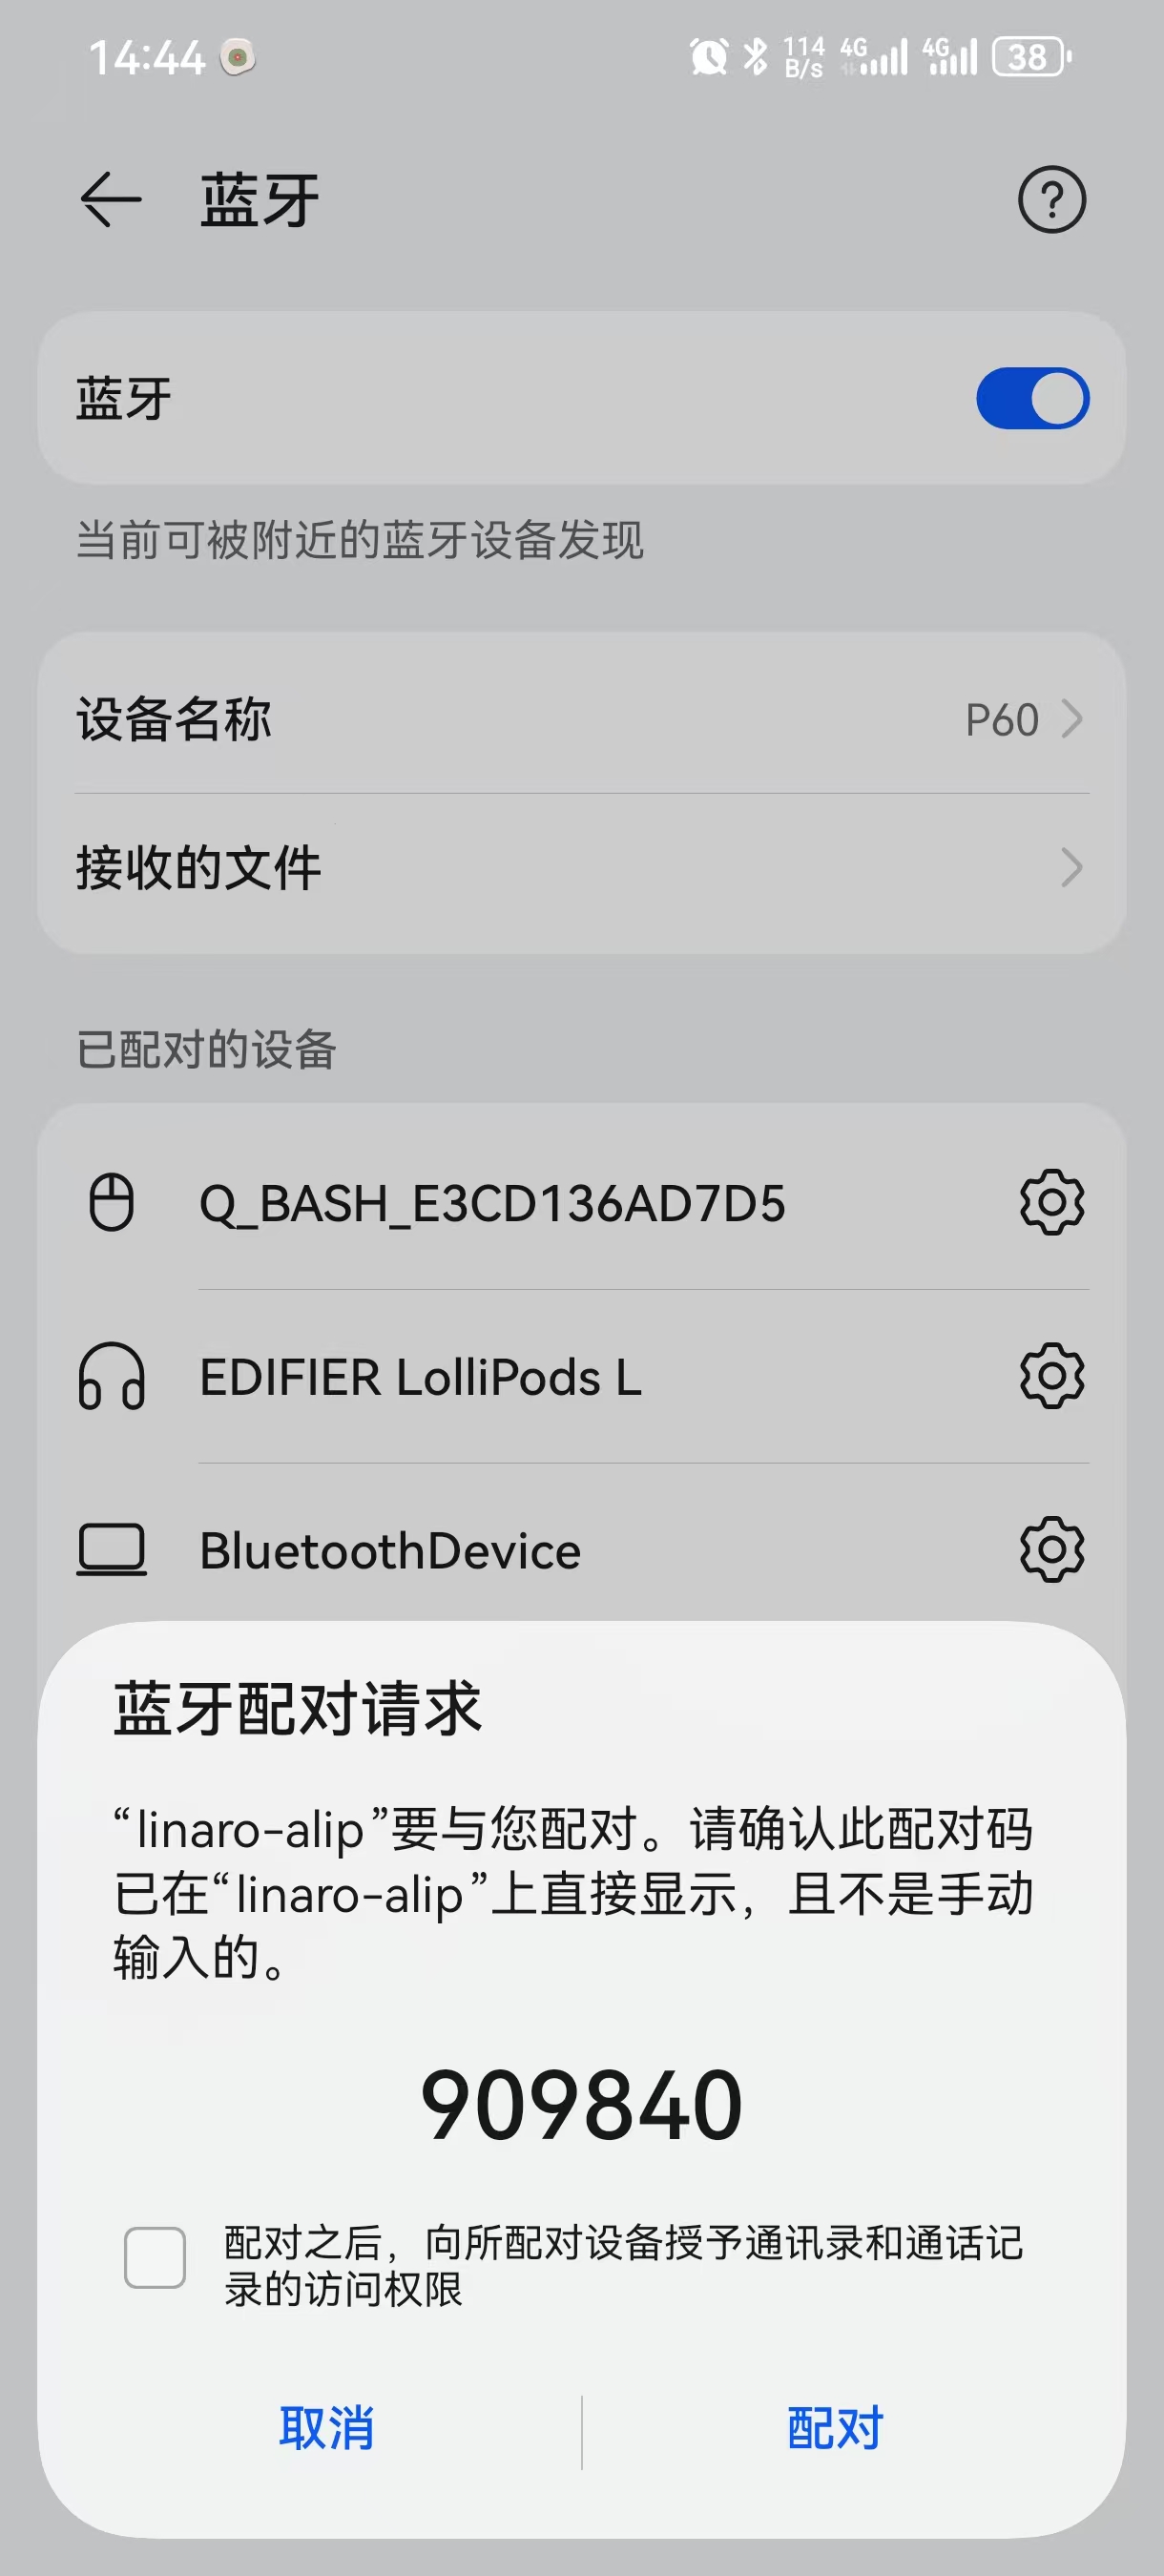
2.1 Connection Test
Testing requires a smartphone (an Android phone is used in this section). Turn on the Bluetooth function of the phone and the Bluetooth function of the development board, and then connect, as shown in the figure below:
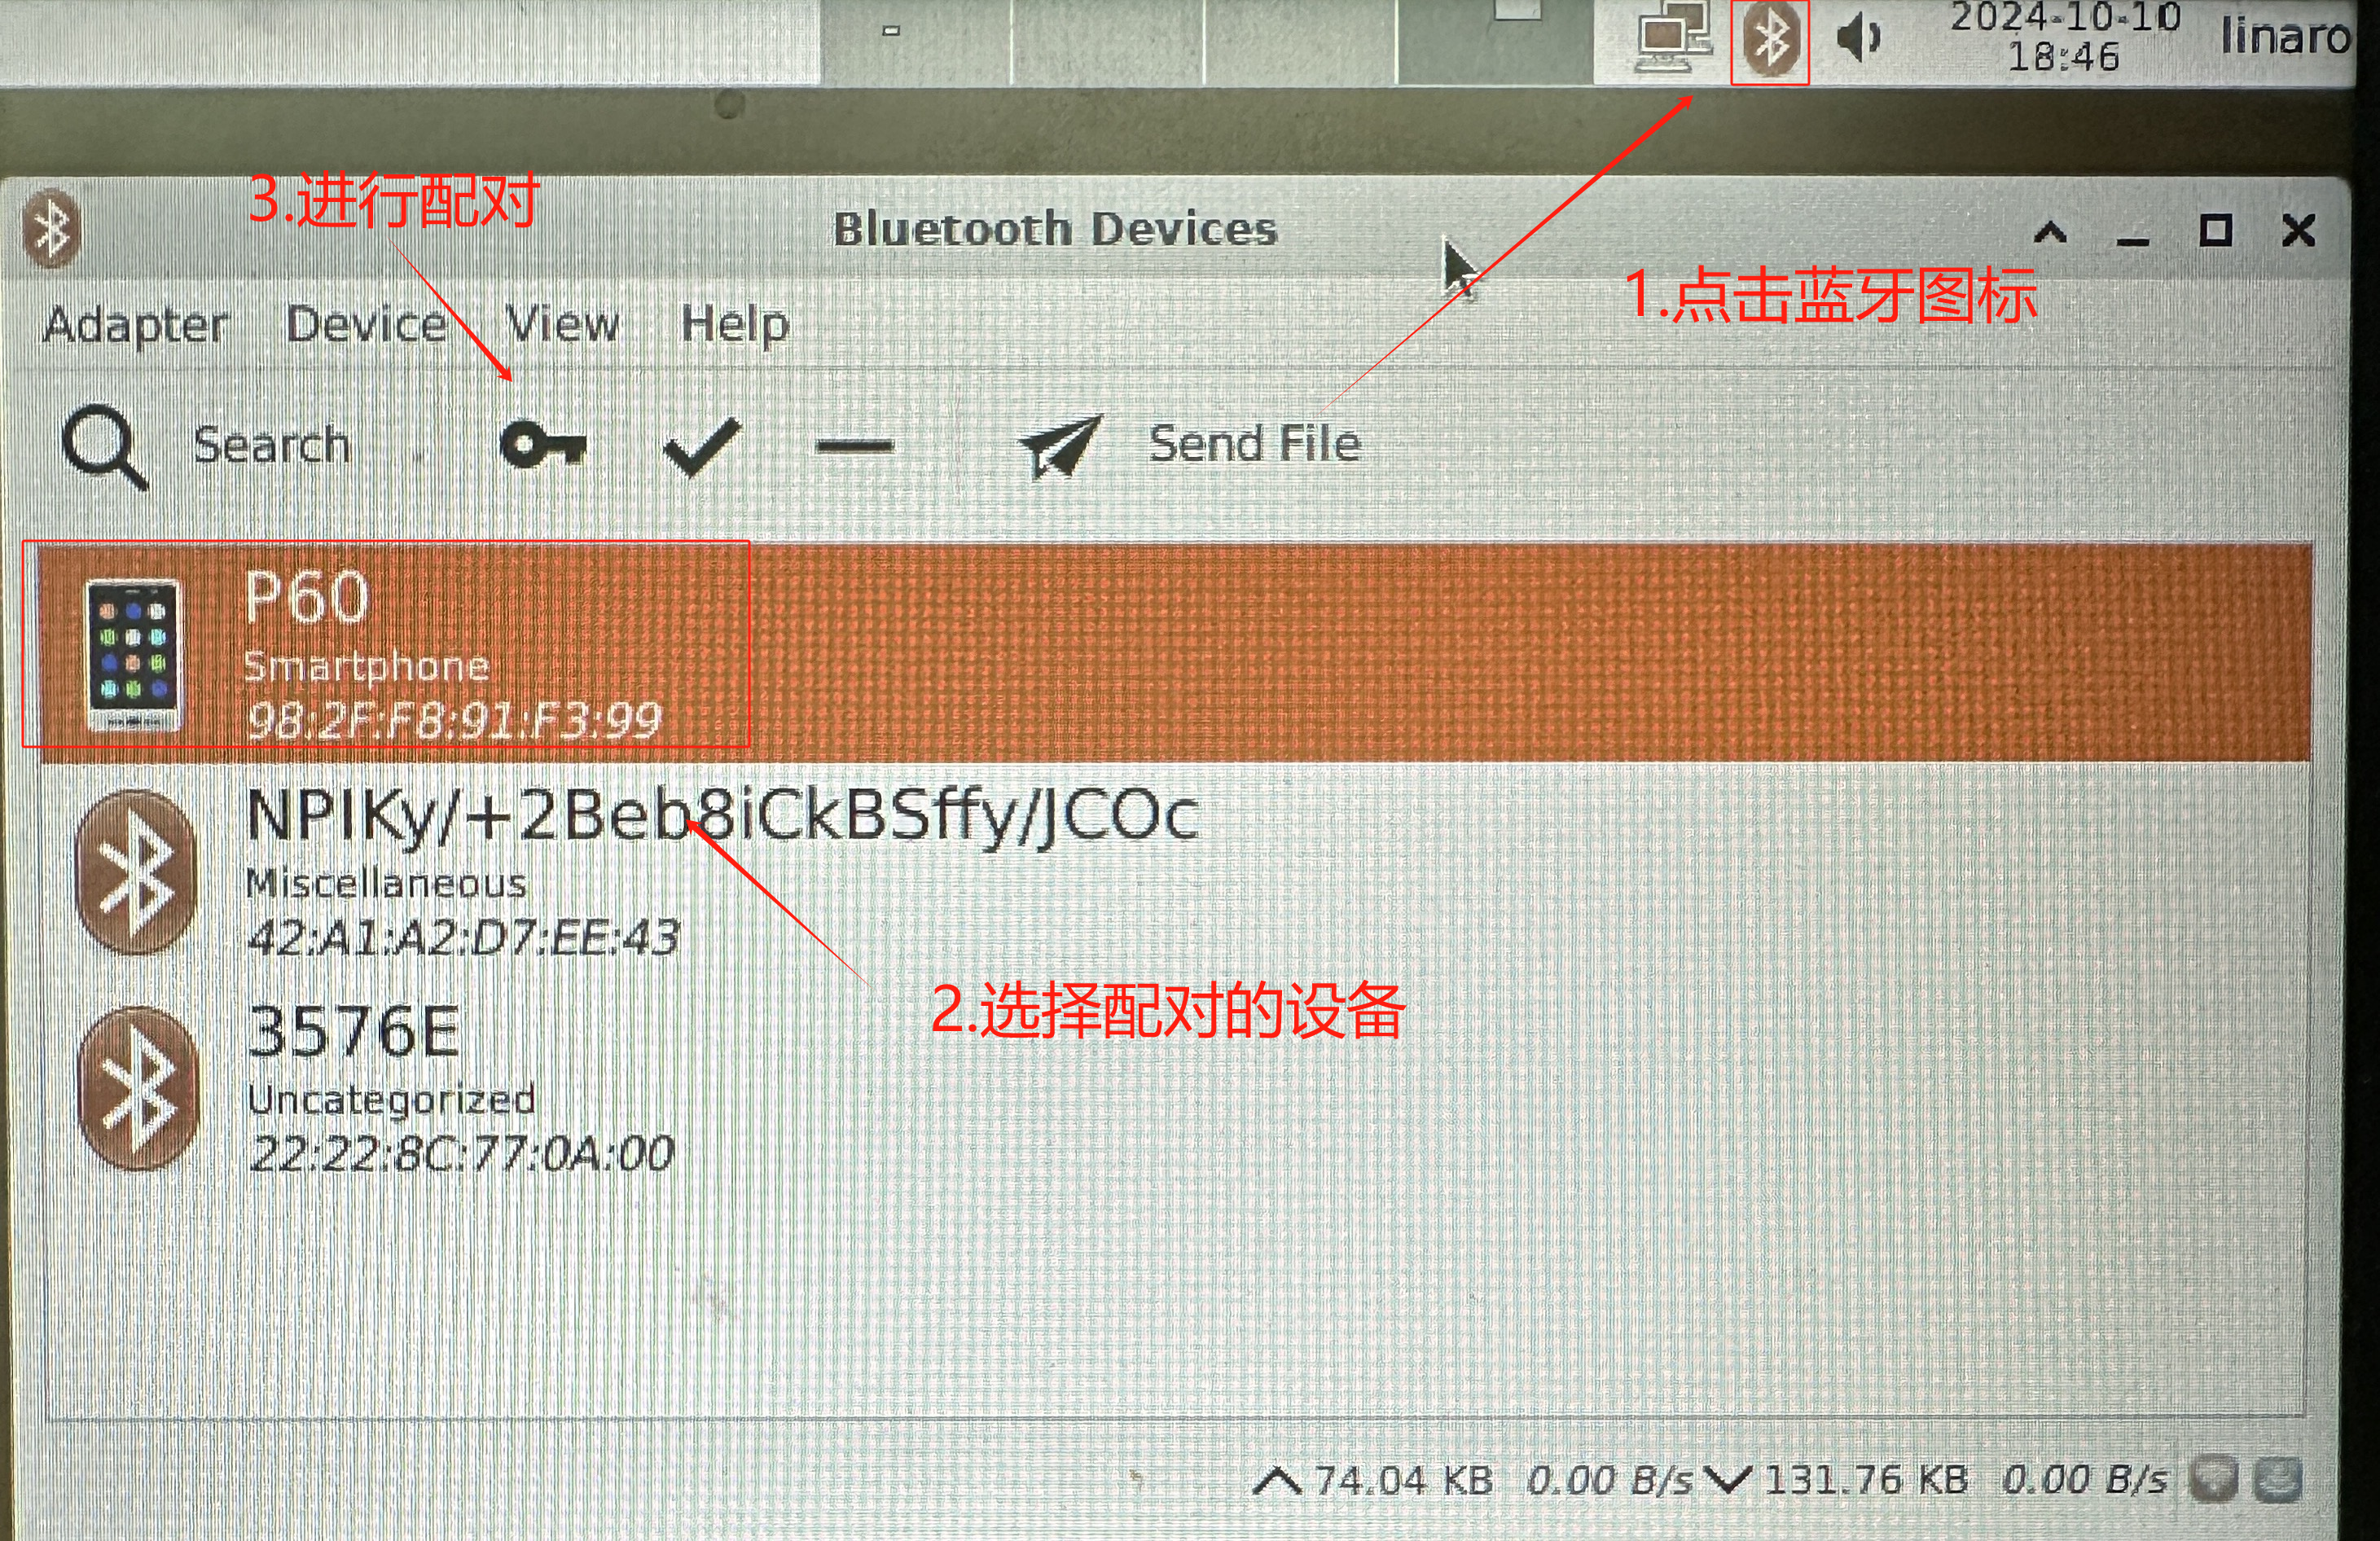
Development Board Side:

Phone Side:
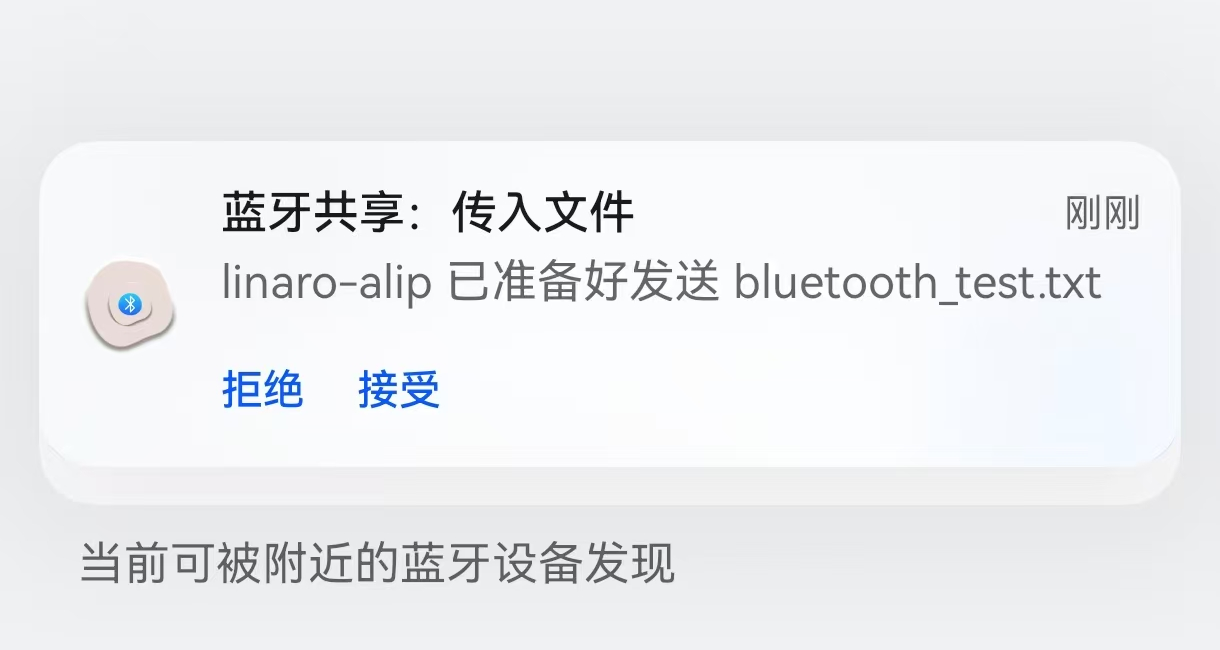
2.2 Data Sending and Receiving Test
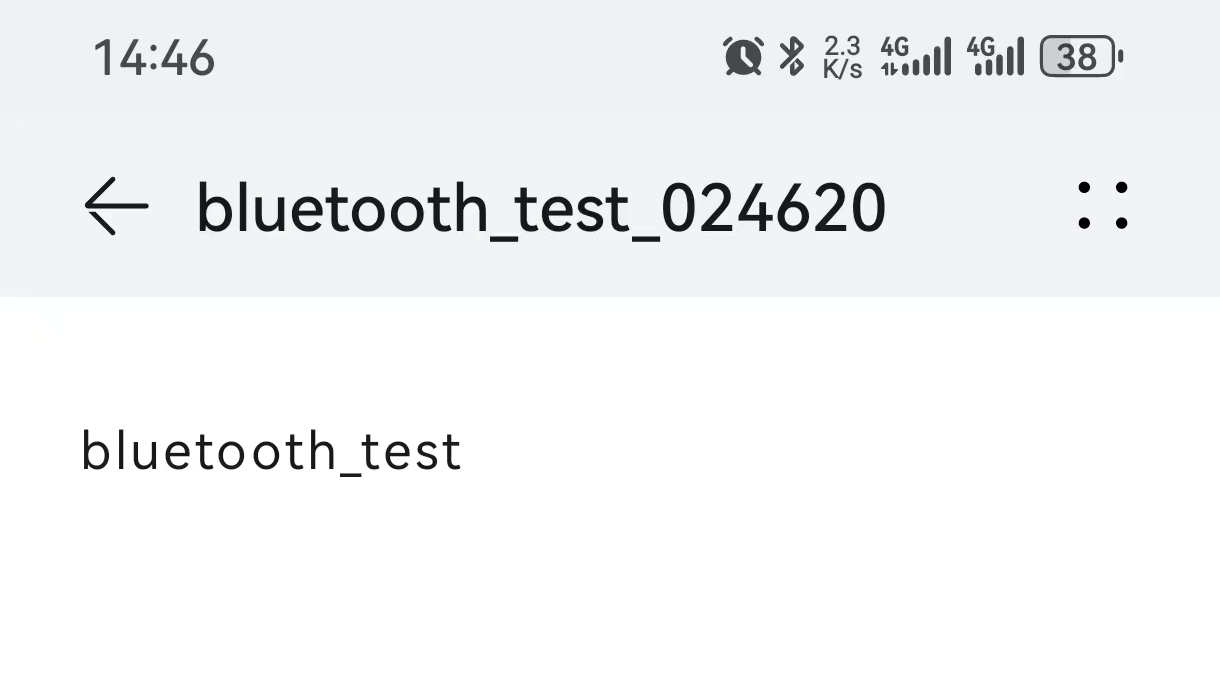
First, create a new bluetooth_test.txt file under home/linaro folder with the content: bluetooth_test

1) File Sending
The development board sends bluetooth_test.txt to the mobile phone via Bluetooth, and the mobile phone receives it.
Development Board Side:

Phone Side:
Check if the file content is consistent:
2) File Receiving
The mobile phone sends bluetooth_test.txt to the development board via Bluetooth, and the development board receives it.
Phone Side:


Development Board Side:


2.3 Command Line Bluetooth Configuration
hciconfig and hcitool
# View Bluetooth adapter information
hciconfig -a

# Enable Bluetooth adapter
sudo hciconfig hci0 up

# Set discoverable mode
sudo hciconfig hci0 piscan

# Scan nearby devices
hcitool scan

# View device information
hcitool info XX:XX:XX:XX:XX:XX

# Check connection status
hcitool con
Pairing and Authentication
# Pair using simple-agent
sudo simple-agent hci0 XX:XX:XX:XX:XX:XX

# Or use bluez-simple-agent
bluez-simple-agent hci0 XX:XX:XX:XX:XX:XX
3 Bluetooth Audio Application
3.1 Connecting Bluetooth Audio Devices
Install Audio Support Packages
# Install PulseAudio Bluetooth module
sudo apt-get install pulseaudio-module-bluetooth

# Restart PulseAudio
pulseaudio -k
pulseaudio --start
Configure Audio Devices
# View audio devices
pactl list short sinks

# Set default audio output
pactl set-default-sink bluez_sink.XX_XX_XX_XX_XX_XX.a2dp_sink

# Play test audio
speaker-test -t wav -c 2

# Play audio file using aplay
aplay /usr/share/sounds/alsa/Front_Left.wav
3.2 A2DP Audio Streaming
# After connecting A2DP device, check audio configuration
bluetoothctl
[bluetooth]# info XX:XX:XX:XX:XX:XX

# View Bluetooth audio devices in PulseAudio
pactl list sinks | grep -A 10 bluez

# Play audio to Bluetooth device
mpg123 -a bluez_sink.XX_XX_XX_XX_XX_XX.a2dp_sink music.mp3
4 BLE (Bluetooth Low Energy) Application
BLE Device Scanning and Connection
Using gatttool
# Scan BLE devices
sudo hcitool lescan

# Connect to BLE device
gatttool -b XX:XX:XX:XX:XX:XX -I

# In gatttool interactive mode:
[XX:XX:XX:XX:XX:XX][LE]> connect
[XX:XX:XX:XX:XX:XX][LE]> primary        # List primary services
[XX:XX:XX:XX:XX:XX][LE]> characteristics # List characteristics
[XX:XX:XX:XX:XX:XX][LE]> char-read-hnd 0x0010  # Read characteristic value
[XX:XX:XX:XX:XX:XX][LE]> char-write-req 0x0010 0100  # Write characteristic value
Using bluetoothctl for BLE Operations
bluetoothctl
[bluetooth]# scan on
[bluetooth]# connect XX:XX:XX:XX:XX:XX
[bluetooth]# gatt list-attributes
[bluetooth]# gatt select-attribute /org/bluez/hci0/dev_XX_XX_XX_XX_XX_XX/service0010/char0011
[bluetooth]# gatt read
[bluetooth]# gatt write "0x01 0x02"
5 Troubleshooting
5.1 Bluetooth Module Not Recognized
Check Steps:
# Check USB Device
lsusb | grep Realtek

# Check Bluetooth Adapter
hciconfig -a

# Check Kernel Module
lsmod | grep bluetooth

# Manually Load Bluetooth Module
sudo modprobe bluetooth
sudo modprobe btusb

# Check Bluetooth Service Status
sudo systemctl status bluetooth
5.2 Device Pairing Failed
Possible Causes and Solutions:
# Reset Bluetooth Adapter
sudo hciconfig hci0 reset

# Clear Pairing Cache
sudo rm -rf /var/lib/bluetooth/*/cache

# Restart Bluetooth Service
sudo systemctl restart bluetooth

# Check Authentication Agent
ps aux | grep agent
5.3 Audio Connection Issues
Resolution Steps:
# Check PulseAudio Modules
pactl list modules | grep bluetooth

# Reload Bluetooth Module
pactl unload-module module-bluetooth-discover
pactl load-module module-bluetooth-discover

# Check Audio Configuration
bluetoothctl
[bluetooth]# info XX:XX:XX:XX:XX:XX
5.4 Unstable Connection
Optimization Suggestions:
# Check Signal Strength
hcitool rssi XX:XX:XX:XX:XX:XX

# Adjust Power Management
echo 'SUBSYSTEM=="usb", ATTRS{idVendor}=="0bda", ATTRS{idProduct}=="d723", ATTR{power/autosuspend}="-1"' | sudo tee /etc/udev/rules.d/50-usb-bluetooth.rules

# Restart udev Service
sudo udevadm control --reload-rules
5.5 File Transfer Failed
Check and Fix:
# Check OBEX Service
sudo systemctl status obex

# Install OBEX Tools
sudo apt-get install obexftp obex-data-server

# Start OBEX Service
obex-data-server --auto-accept