Experiment 01 - Environment Setup
1. One-Click Configuration
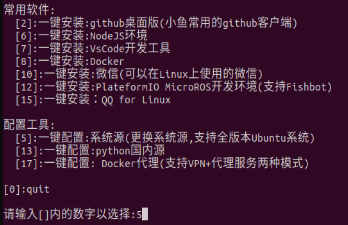
Open the terminal and run the installation command to execute the Fish ROS configuration script:
wget http://fishros.com/install -O fishros && . fishros
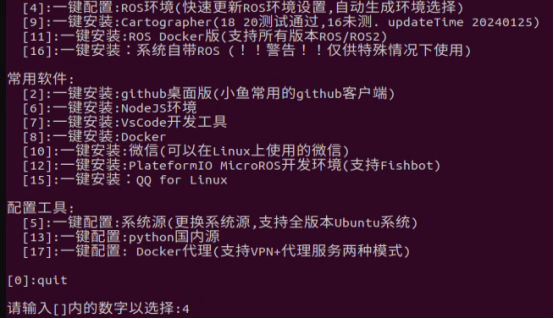
Then the following options will appear. Enter number 5 and press Enter to switch the system sources.
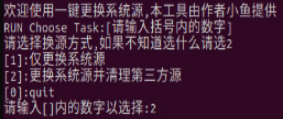
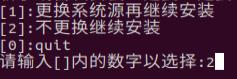
Then, enter number 2 and press Enter to configure system sources with one click.
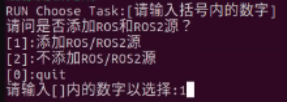
After configuring the system sources, the following interface will appear. Enter number 1 and press Enter to add ROS/ROS2 sources.
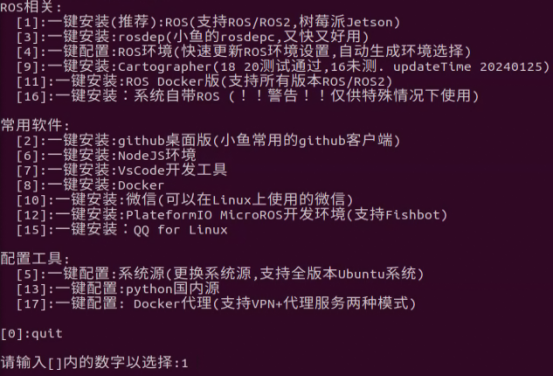
At this point, the system source related settings are complete. The next step is to install ROS2.
2. One-Click Installation
Open the Ubuntu terminal and enter the command:
wget http://fishros.com/install -O fishros && . fishros
Then we enter 1 for one-click installation -> Install without changing sources -> Select the ros version corresponding to your Ubuntu version -> Install
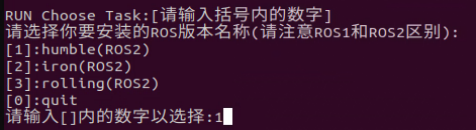
Enter number 2 (install without changing sources)
Enter number 1 and select humble (ROS2)
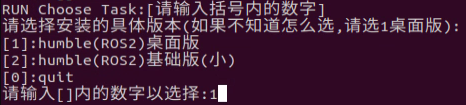
Enter number 1 and select humble (ROS2) Desktop version
After the installation is complete, open a new terminal and open and enter:
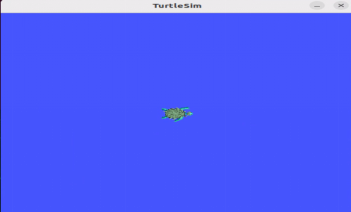
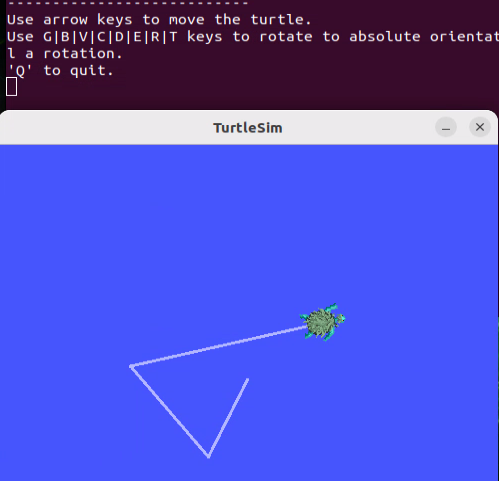
ros2 run turtlesim turtlesim_node
This will start the turtle simulation window, and a default small turtle will appear in the middle.
Open another terminal and run the following command:
ros2 run turtlesim turtle_teleop_key
After starting, the terminal will prompt: Use arrow keys to move the turtle. At this point, you can use the keyboard arrow keys to control the small turtle.
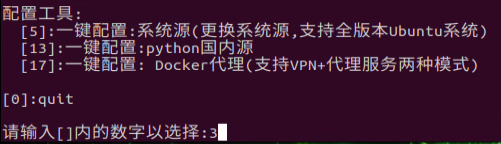
3. Configure rosdep
Open the Ubuntu terminal and enter the command:
wget http://fishros.com/install -O fishros && . fishros
Then enter 3 for one-click configuration (Note: If "Enter the following XXX command to complete update" appears, just follow the commands that appear in the terminal to update.)
4. Update System Environment
Open the Ubuntu terminal and enter the command:
wget http://fishros.com/install -O fishros && . fishros
Then enter 4 for one-click configuration
At this point, our ROS installation is complete.