HOME
Shop
  • English
  • 简体中文
HOME
Shop
  • English
  • 简体中文
  • Product Series

    • FPGA+ARM

      • GM-3568JHF

        • 1. Introduction

          • About GM-3568JHF
        • 2. Quick Start

          • 00 Introduction
          • 01 Environment Setup
          • 02 Compilation Instructions
          • 03 Flashing Guide
          • 04 Debug Tools
          • 05 Software Update
          • 06 View Information
          • 07 Test Commands
          • 08 App Compilation
          • 09 Source Code Acquisition
        • 3. Peripherals and Interfaces

          • 01 USB
          • 02 Display and Touch
          • 03 Ethernet
          • 04 WIFI
          • 05 Bluetooth
          • 06 TF-Card
          • 07 Audio
          • 08 Serial Port
          • 09 CAN
          • 10 RTC
        • 4. Application Development

          • 01 UART read and write case
          • 02 Key detection case
          • 03 LED light flashing case
          • 04 MIPI screen detection case
          • 05 Read USB device information example
          • 06 FAN Detection Case
          • 07 FPGA FSPI Communication Case
          • 08 FPGA DMA read and write case
          • 09 GPS debugging case
          • 10 Ethernet Test Cases
          • 11 RS485 reading and writing examples
          • 12 FPGA IIC read and write examples
          • 13 PN532 NFC card reader case
          • 14 TF card reading and writing case
        • 5. QT Development

          • 01 ARM64 cross compiler environment construction
          • 02 QT program added automatic startup service
        • 6. RKNN_NPU Development

          • 01 RK3568 NPU Overview
          • 02 Development Environment Setup
          • Run Official YOLOv5 Example
          • Model Conversion Detailed Explanation
          • Run Custom Model on Board
        • 7. FPGA Development

          • ARM and FPGA Communication
          • /fpga-arm/GM-3568JHF/FPGA/ch02-FPGA-Development-Manual.html
        • 8. Others

          • 01 Modification of the root directory file system
          • 02 System auto-start service
        • 9. Download

          • Download Resources
    • ShimetaPi

      • M4-R1

        • 1. Introduction

          • 1.1 About M4-R1
        • 2. Quick Start

          • 2.1 OpenHarmony Overview
          • 2.2 Image Burning
          • 2.3 Development Environment Preparation
          • 2.4 Hello World Application
        • 3. Application Development

          • 3.1 Getting Started

            • 3.1.1 ArkTS Language Overview
            • 3.1.2 UI Components (Part 1)
            • 3.1.3 UI Components (Part 2)
            • 3.1.4 UI Components (Part 3)
          • 3.2 Advanced

            • 3.2.1 Getting Started Guide
            • 3.2.2 Usage of Third Party Libraries
            • 3.2.3 Deployment of the Application
            • 3.2.4 Factory Reset
            • 3.2.5 System Debug
            • 3.2.6 APP Stability Testing
            • 3.2.7 Application Testing
          • 3.3 Getting Docs

            • 3.3.1 Official Website Information
          • 3.4 Development Instructions

            • 3.4.1 Full SDK
            • 3.4.2 Introduction of Third Party Libraries
            • 3.4.3 Introduction of HDC Tool
            • 3.4.4 Restore Factory Mode
            • 3.4.5 Update System API
          • 3.5 First Application

            • 3.5.1 First ArkTS App
          • 3.6 Application Demo

            • 3.6.1 UART Tool
            • 3.6.2 Graphics Tablet
            • 3.6.3 Digital Clock
            • 3.6.4 WIFI Tool
        • 4. Device Development

          • 4.1 Ubuntu Environment Development

            • 4.1.1 Environment Setup
            • 4.1.2 Download Source Code
            • 4.1.3 Compile Source Code
          • 4.2 Using DevEco Device Tool

            • 4.2.1 Tool Introduction
            • 4.2.2 Environment Construction
            • 4.2.3 Import SDK
            • 4.2.4 Function Introduction
        • 5. Peripherals and Interfaces

          • 5.1 Raspberry Pi Interfaces
          • 5.2 GPIO Interface
          • 5.3 I2C Interface
          • 5.4 SPI Communication
          • 5.5 PWM Control
          • 5.6 Serial Port Communication
          • 5.7 TF Card Slot
          • 5.8 Display Screen
          • 5.9 Touch Screen
          • 5.10 Audio
          • 5.11 RTC
          • 5.12 Ethernet
          • 5.13 M.2
          • 5.14 MINI PCIE
          • 5.15 Camera
          • 5.16 WIFI BT
          • 5.17 HAT
        • 6. FAQ

          • 6.1 Download Link
      • M5-R1

        • 1. Introduction

          • M5-R1 Development Documentation
        • 2. Quick Start

          • OpenHarmony Overview
          • Image Burning
          • Development Environment Preparation
          • Hello World Application and Deployment
        • 3. Peripherals and Interfaces

          • 3.1 Raspberry Pi Interfaces
          • 3.2 GPIO Interface
          • 3.3 I2C Interface
          • 3.4 SPI Communication
          • 3.5 PWM Control
          • 3.6 Serial Port Communication
          • 3.7 TF Card Slot
          • 3.8 Display Screen
          • 3.9 Touch Screen
          • 3.10 Audio
          • 3.11 RTC
          • 3.12 Ethernet
          • 3.13 M.2
          • 3.14 MINI PCIE
          • 3.15 Camera
          • 3.16 WIFI BT
          • 3.17 HAT
        • 4. Application Development

          • 4.1 Getting Started

            • 4.1.1 ArkTS Language Overview
            • 4.1.2 UI Components (Part 1)
            • 4.1.3 UI Components (Part 2)
            • 4.1.4 UI Components (Part 3)
          • 4.2 Advanced

            • 4.2.1 Getting Started Guide
            • 4.2.2 Usage of Third Party Libraries
            • 4.2.3 Deployment of the Application
            • 4.2.4 Factory Reset
            • 4.2.5 System Debug
            • 4.2.6 APP Stability Testing
            • 4.2.7 Application Testing
        • 5. Device Development

          • 5.1 Environment Setup
          • 5.2 Download Source Code
          • 5.3 Compile Source Code
        • 6. Download

          • Data Download
    • OpenHarmony

      • SC-3568HA

        • 1. Introduction

          • 1.1 About SC-3568HA
        • 2. Quick Start

          • 2.1 OpenHarmony Overview
          • 2.2 Image Burning
          • 2.3 Development Environment Preparation
          • 2.4 Hello World Application
        • 3. Application Development

          • 3.1 ArkUI

            • 3.1.1 ArkTS Language Overview
            • 3.1.2 UI Components (Part 1)
            • 3.1.3 UI Components (Part 2)
            • 3.1.4 UI Components (Part 3)
          • 3.2 Advanced

            • 3.2.1 Getting Started Guide
            • 3.2.2 Usage of Third Party Libraries
            • 3.2.3 Deployment of the Application
            • 3.2.4 Factory Reset
            • 3.2.5 System Debug
            • 3.2.6 APP Stability Testing
            • 3.2.7 Application Testing
        • 4. Device Development

          • 4.1 Environment Setup
          • 4.2 Download Source Code
          • 4.3 Compile Source Code
        • 5. Peripherals and Interfaces

          • 5.1 Raspberry Pi Interfaces
          • 5.2 GPIO Interface
          • 5.3 I2C Interface
          • 5.4 SPI Communication
          • 5.5 PWM Control
          • 5.6 Serial Port Communication
          • 5.7 TF Card Slot
          • 5.8 Display Screen
          • 5.9 Touch Screen
          • 5.10 Audio
          • 5.11 RTC
          • 5.12 Ethernet
          • 5.13 M.2
          • 5.14 MINI PCIE
          • 5.15 Camera
          • 5.16 WIFI BT
          • 5.17 HAT
        • 6. FAQ

          • 6.1 Download Link
      • M-K1HSE

        • 1. Introduction

          • 1.1 Product Introduction
        • 2. Quick Start

          • 2.1 Debug Tool Installation
          • 2.2 Development Environment Setup
          • 2.3 Source Code Download
          • 2.4 Build Instructions
          • 2.5 Flashing Guide
          • 2.6 APT Update Sources
          • 2.7 View Board Info
          • 2.8 CLI LED and Key Test
          • 2.9 GCC Build Programs
        • 3. Application Development

          • 3.1 Basic Application Development

            • 3.1.1 Development Environment Preparation
            • 3.1.2 First Application HelloWorld
            • 3.1.3 Develop HAR Package
          • 3.2 Peripheral Application Cases

            • 3.2.1 UART Read/Write
            • 3.2.2 Key Demo
            • 3.2.3 LED Flash
        • 4. Peripherals and Interfaces

          • 4.1 Standard Peripherals

            • 4.1.1 USB
            • 4.1.2 Display and Touch
            • 4.1.3 Ethernet
            • 4.1.4 WIFI
            • 4.1.5 Bluetooth
            • 4.1.6 TF Card
            • 4.1.7 Audio
            • 4.1.8 Serial Port
            • 4.1.9 CAN
            • 4.1.10 RTC
          • 4.2 Interfaces

            • 4.2.1 Audio
            • 4.2.2 RS485
            • 4.2.3 Display
            • 4.2.4 Touch
        • 5. System Customization Development

          • 5.1 System Porting
          • 5.2 System Customization
          • 5.3 Driver Development
          • 5.4 System Debugging
          • 5.5 OTA Upgrade
        • 6. Download

          • 6.1 Download
    • EVS-Camera

      • CF-NRS1

        • 1. Introduction

          • 1.1 About CF-NRS1
          • 1.2 Event-Based Concepts
          • 1.3 Quick Start
          • 1.4 Resources
        • 2. Development

          • 2.1 Development Overview

            • 2.1.1 Shimetapi Hybrid Camera SDK Introduction
          • 2.2 Environment & API

            • 2.2.1 Environment Overview
            • 2.2.2 Development API Overview
          • 2.3 Linux Development

            • 2.3.1 Linux SDK Introduction
            • 2.3.2 Linux SDK API
            • 2.3.3 Linux Algorithm
            • 2.3.4 Linux Algorithm API
          • 2.4 Service & Web

            • 2.4.1 EVS Server
            • 2.4.2 Time Server
            • 2.4.3 EVS Web
        • 3. Download

          • 3.1 Download
        • 4. Common Problems

          • 4.1 Common Problems
      • CF-CRA2

        • 1. Introduction

          • 1.1 About CF-CRA2
        • 2. Download

          • 2.1 Download
      • EVS Module

        • 1. Related Concepts
        • 2. Hardware Preparation and Environment Configuration
        • 3. Example Program User Guide
        • Resources Download
    • AI-model

      • 1684XB-32T

        • 1. Introduction

          • AIBOX-1684XB-32 Introduction
        • 2. Quick Start

          • First time use
          • Network Configuration
          • Disk usage
          • Memory allocation
          • Fan Strategy
          • Firmware Upgrade
          • Cross-Compilation
          • Model Quantization
        • 3. Application Development

          • 3.1 Development Introduction

            • Sophgo SDK Development
            • SOPHON-DEMO Introduction
          • 3.2 Large Language Models

            • Deploying Llama3 Example
            • /ai-model/AIBOX-1684XB-32/application-development/LLM/Sophon_LLM_api_server-Development-AIBOX-1684XB-32.html
            • /ai-model/AIBOX-1684XB-32/application-development/LLM/MiniCPM-V-2_6-AIBOX-1684XB-32.html
            • /ai-model/AIBOX-1684XB-32/application-development/LLM/Qwen-2-5-VL-demo-Development-AIBOX-1684XB-32.html
            • /ai-model/AIBOX-1684XB-32/application-development/LLM/Qwen-3-chat-demo-Development-AIBOX-1684XB-32.html
            • /ai-model/AIBOX-1684XB-32/application-development/LLM/Qwen3-Qwen Agent-MCP.html
            • /ai-model/AIBOX-1684XB-32/application-development/LLM/Qwen3-langchain-AI Agent.html
          • 3.3 Deep Learning

            • ResNet (Image Classification)
            • LPRNet (License Plate Recognition)
            • SAM (Universal Image Segmentation Foundation Model)
            • YOLOv5 (Object Detection)
            • OpenPose (Human Keypoint Detection)
            • PP-OCR (Optical Character Recognition)
        • 4. Download

          • Resource Download
      • 1684X-416T

        • 1. Introduction

          • AIBOX-1684X-416 Introduction
        • 2. Demo Simple Operation Guide

          • Simple instructions for using shimeta smart monitoring demo
      • RDK-X5

        • 1. Introduction

          • RDK-X5 Hardware Introduction
        • 2. Quick Start

          • RDK-X5 Quick Start
        • 3. Application Development

          • 3.1 AI Online Model Development

            • AI Online Development - Experiment01
            • AI Online Development - Experiment02
            • AI Online Development - Experiment03
            • AI Online Development - Experiment04
            • AI Online Development - Experiment05
            • AI Online Development - Experiment06
          • 3.2 Large Language Models (Voice)

            • Voice LLM Application - Experiment01
            • Voice LLM Application - Experiment02
            • Voice LLM Application - Experiment03
            • Voice LLM Application - Experiment04
            • Voice LLM Application - Experiment05
            • Voice LLM Application - Experiment06
          • 3.3 40pin-IO Development

            • 40pin IO Development - Experiment01
            • 40pin IO Development - Experiment02
            • 40pin IO Development - Experiment03
            • 40pin IO Development - Experiment04
            • 40pin IO Development - Experiment05
            • 40pin IO Development - Experiment06
            • 40pin IO Development - Experiment07
          • 3.4 USB Module Development

            • USB Module Usage - Experiment01
            • USB Module Usage - Experiment02
          • 3.5 Machine Vision

            • Machine Vision Technology Development - Experiment01
            • Machine Vision Technology Development - Experiment02
            • Machine Vision Technology Development - Experiment03
            • Machine Vision Technology Development - Experiment04
          • 3.6 ROS2 Base Development

            • ROS2 Basic Development - Experiment01
            • ROS2 Basic Development - Experiment02
            • ROS2 Basic Development - Experiment03
            • ROS2 Basic Development - Experiment04
      • RDK-S100

        • 1. Introduction

          • 1.1 About RDK-S100
        • 2. Quick Start

          • 2.1 First Use
        • 3. Application Development

          • 3.1 AI Online Model Development

            • 3.1.1 Volcano Engine Doubao AI
            • 3.1.2 Image Analysis
            • 3.1.3 Multimodal Visual Analysis
            • 3.1.4 Multimodal Image Comparison
            • 3.1.5 Multimodal Document Analysis
            • 3.1.6 Camera AI Vision Analysis
          • 3.2 Large Language Models

            • 3.2.1 Speech Recognition
            • 3.2.2 Voice Conversation
            • 3.2.3 Multimodal Image Analysis
            • 3.2.4 Multimodal Image Comparison
            • 3.2.5 Multimodal Document Analysis
            • 3.2.6 Multimodal Vision Application
          • 3.3 40pin-IO Development

            • 3.3.1 GPIO Output LED Blink
            • 3.3.2 GPIO Input
            • 3.3.3 Key Control LED
            • 3.3.4 PWM Output
            • 3.3.5 Serial Output
            • 3.3.6 I2C Experiment
          • 3.4 USB Module Development

            • 3.4.1 USB Voice Module
            • 3.4.2 Sound Source Localization
          • 3.5 Machine Vision

            • 3.5.1 USB Camera
            • 3.5.2 Image Processing Basics
            • 3.5.3 Object Detection
            • 3.5.4 Image Segmentation
          • 3.6 ROS2 Base Development

            • 3.6.1 Environment Setup
            • 3.6.2 Create and Build Workspace
            • 3.6.3 ROS2 Topic Communication
            • 3.6.4 ROS2 Camera Application
    • Core-Board

      • C-3568BQ

        • 1. Introduction

          • C-3568BQ Introduction
      • C-3588LQ

        • 1. Introduction

          • C-3588LQ Introduction
      • GC-3568JBAF

        • 1. Introduction

          • GC-3568JBAF Introduction
      • C-K1BA

        • 1. Introduction

          • C-K1BA Introduction

03 Ethernet

1 Ethernet Interface Overview

GM-3568JHF development board is equipped with 2 Gigabit Ethernet interfaces, implemented based on the integrated Ethernet controller of RK3568J processor, supporting high-speed network communication and multi-network environment applications.

InterfaceTypeDevice NameInterface StandardMax RateDescription
ETH0RGMIIend0IEEE 802.31000MbpsPrimary Ethernet interface, default network card
ETH1RGMIIend1IEEE 802.31000MbpsSecondary Ethernet interface

2 Network Connectivity Test

  • ETH0 RGMII: end0, default network card, usually used for primary network connection
  • ETH1 RGMII: end1, secondary network card, can be used for network redundancy or isolation
  • Connection Method: Use an Ethernet cable to connect the corresponding network port of the development board and the PC to the same router or switch.

Enter the file system and execute the following command to get the IP and view the network port configuration information.

root@linaro-alip:/# ifconfig
end0: flags=4163<UP,BROADCAST,RUNNING,MULTICAST>  mtu 1500
        inet 192.168.49.176  netmask 255.255.255.0  broadcast 192.168.49.255
        inet6 fe80::561a:9e84:b5bd:20d7  prefixlen 64  scopeid 0x20<link>
        ether 32:b0:e6:11:eb:7e  txqueuelen 1000  (Ethernet)
        RX packets 3236  bytes 236287 (230.7 KiB)
        RX errors 0  dropped 569  overruns 0  frame 0
        TX packets 745  bytes 63449 (61.9 KiB)
        TX errors 0  dropped 0 overruns 0  carrier 0  collisions 0
        device interrupt 69

end1: flags=4099<UP,BROADCAST,MULTICAST>  mtu 1500
        ether 36:b0:e6:11:eb:7e  txqueuelen 1000  (Ethernet)
        RX packets 0  bytes 0 (0.0 B)
        RX errors 0  dropped 0  overruns 0  frame 0
        TX packets 0  bytes 0 (0.0 B)
        TX errors 0  dropped 0 overruns 0  carrier 0  collisions 0
        device interrupt 67

Execute the following command to test whether the network port connection to the external network is normal, taking visiting "www.baidu.com" as an example. "-I" specifies the network port, if "-I" is not added, the default network card is used. You can press "Ctrl + C" to terminate the ping command.

root@linaro-alip:/# ping www.baidu.com -I end0
PING www.a.shifen.com (183.2.172.42) 56(84) bytes of data.
64 bytes from 183.2.172.42 (183.2.172.42): icmp_seq=1 ttl=50 time=9.28 ms
64 bytes from 183.2.172.42 (183.2.172.42): icmp_seq=2 ttl=50 time=8.77 ms
64 bytes from 183.2.172.42 (183.2.172.42): icmp_seq=3 ttl=50 time=8.65 ms
64 bytes from 183.2.172.42 (183.2.172.42): icmp_seq=4 ttl=50 time=8.83 ms
64 bytes from 183.2.172.42 (183.2.172.42): icmp_seq=5 ttl=50 time=8.63 ms
64 bytes from 183.2.172.42 (183.2.172.42): icmp_seq=6 ttl=50 time=8.73 ms

--- www.a.shifen.com ping statistics ---
6 packets transmitted, 6 received, 0% packet loss, time 5007ms
rtt min/avg/max/mdev = 8.630/8.813/9.275/0.216 ms

root@linaro-alip:/# ping www.baidu.com -I end1
PING www.a.shifen.com (183.2.172.42) 56(84) bytes of data.
64 bytes from 183.2.172.42 (183.2.172.42): icmp_seq=1 ttl=50 time=8.35 ms
64 bytes from 183.2.172.42 (183.2.172.42): icmp_seq=2 ttl=50 time=8.88 ms
64 bytes from 183.2.172.42 (183.2.172.42): icmp_seq=3 ttl=50 time=9.07 ms
64 bytes from 183.2.172.42 (183.2.172.42): icmp_seq=4 ttl=50 time=8.91 ms
64 bytes from 183.2.172.42 (183.2.172.42): icmp_seq=5 ttl=50 time=8.67 ms
64 bytes from 183.2.172.42 (183.2.172.42): icmp_seq=6 ttl=50 time=8.66 ms
64 bytes from 183.2.172.42 (183.2.172.42): icmp_seq=7 ttl=50 time=8.78 ms
64 bytes from 183.2.172.42 (183.2.172.42): icmp_seq=8 ttl=50 time=8.41 ms

--- www.a.shifen.com ping statistics ---
8 packets transmitted, 8 received, 0% packet loss, time 7011ms
rtt min/avg/max/mdev = 8.352/8.716/9.068/0.230 ms

3 TCP Bandwidth Test

1) Server Side

Connect the development board to the Internet and install the iperf3 tool, executing the following commands:

root@linaro-alip:/# sudo apt update
root@linaro-alip:/# sudo apt install iperf3

The development board acts as the server, executing the following command:

root@linaro-alip:/# iperf3 -s
-----------------------------------------------------------
Server listening on 5201 (test #1)
-----------------------------------------------------------

2) Client Side

The iperf3 tool for Windows can be obtained from the test toolkit.

Open PowerShell in Windows, enter the path where the iperf3 tool is located, and use Windows as the client to send data by executing the following command:

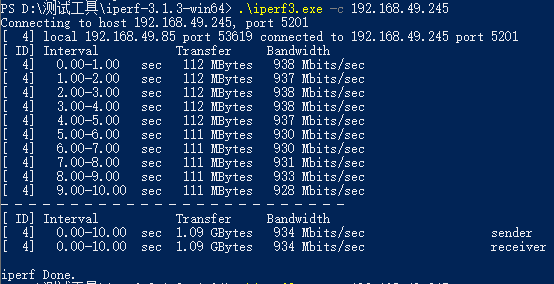
.\iperf3.exe -c 192.168.137.149 // 192.168.137.149 is the server IP address

3) Test Results

  • Server Side
root@linaro-alip:/# iperf3 -s
-----------------------------------------------------------
Server listening on 5201 (test #1)
-----------------------------------------------------------
Accepted connection from 192.168.49.85, port 53618
[  5] local 192.168.49.245 port 5201 connected to 192.168.49.85 port 53619
[ ID] Interval           Transfer     Bitrate
[  5]   0.00-1.00   sec   112 MBytes   936 Mbits/sec
[  5]   1.00-2.00   sec   112 MBytes   937 Mbits/sec
[  5]   2.00-3.00   sec   112 MBytes   939 Mbits/sec
[  5]   3.00-4.00   sec   112 MBytes   938 Mbits/sec
[  5]   4.00-5.00   sec   112 MBytes   937 Mbits/sec
[  5]   5.00-6.00   sec   111 MBytes   931 Mbits/sec
[  5]   6.00-7.00   sec   111 MBytes   929 Mbits/sec
[  5]   7.00-8.00   sec   111 MBytes   930 Mbits/sec
[  5]   8.00-9.00   sec   111 MBytes   933 Mbits/sec
[  5]   9.00-10.00  sec   111 MBytes   929 Mbits/sec
[  5]  10.00-10.00  sec   265 KBytes   885 Mbits/sec
- - - - - - - - - - - - - - - - - - - - - - - - -
[ ID] Interval           Transfer     Bitrate
[  5]   0.00-10.00  sec  1.09 GBytes   934 Mbits/sec                  receiver
-----------------------------------------------------------
  • Client Side

ETH

4 Advanced Network Configuration

4.1 Static IP Configuration

1) Temporary Configuration (Lost after Reboot)

# Configure ETH0 static IP
sudo ifconfig end0 192.168.1.100 netmask 255.255.255.0 up

# Add default gateway
sudo route add default gw 192.168.1.1 end0

# Configure DNS
echo "nameserver 8.8.8.8" | sudo tee /etc/resolv.conf

2) Permanent Configuration

Edit network configuration file:

# Edit network interface configuration
sudo nano /etc/network/interfaces

# Add the following content
auto end0
iface end0 inet static
    address 192.168.1.100
    netmask 255.255.255.0
    gateway 192.168.1.1
    dns-nameservers 8.8.8.8 8.8.4.4

auto end1
iface end1 inet static
    address 192.168.2.100
    netmask 255.255.255.0

4.2 Network Bridge Configuration

Create a network bridge to bridge two network ports:

# Install bridge tool
sudo apt-get install bridge-utils

# Create bridge
sudo brctl addbr br0

# Add network ports to bridge
sudo brctl addif br0 end0
sudo brctl addif br0 end1

# Enable bridge
sudo ifconfig br0 up

# Configure bridge IP
sudo ifconfig br0 192.168.1.100 netmask 255.255.255.0

4.3 VLAN Configuration

Configure VLAN for network isolation:

# Install VLAN tool
sudo apt-get install vlan

# Load 8021q module
sudo modprobe 8021q

# Create VLAN interfaces
sudo vconfig add end0 100
sudo vconfig add end0 200

# Configure VLAN interface IP
sudo ifconfig end0.100 192.168.100.1 netmask 255.255.255.0 up
sudo ifconfig end0.200 192.168.200.1 netmask 255.255.255.0 up

5 Network Monitoring and Diagnosis

5.1 Network Status Monitoring

# View network interface statistics
cat /proc/net/dev

# View network connection status
netstat -tuln

# View routing table
route -n

# View ARP table
arp -a

# Real-time monitoring of network traffic
sudo iftop -i end0

5.2 Network Performance Test

1) Bandwidth Test

# Server side (Development board)
iperf3 -s -p 5201

# Client side (PC)
iperf3 -c 192.168.1.100 -p 5201 -t 30 -i 1

# UDP Test
iperf3 -c 192.168.1.100 -u -b 1000M -t 10

2) Latency Test

# Ping test
ping -c 100 -i 0.01 192.168.1.1

# High-precision test using hping3
sudo hping3 -c 1000 -i u100 192.168.1.1

5.3 Network Packet Capture Analysis

# Install tcpdump
sudo apt-get install tcpdump

# Capture packets on specified interface
sudo tcpdump -i end0 -w capture.pcap

# View packets in real-time
sudo tcpdump -i end0 -n

# Filter specific protocols
sudo tcpdump -i end0 tcp port 80

6 Troubleshooting

1) Network Port Connection Failure

Check Steps:

# Check interface status
sudo ethtool end0

# Check cable connection
sudo ethtool end0 | grep "Link detected"

# Check driver loading
lsmod | grep stmmac

# Restart network service
sudo systemctl restart networking

2) Slow Network Speed

Possible Causes and Solutions:

# Check negotiation speed
sudo ethtool end0 | grep Speed

# Force Gigabit speed
sudo ethtool -s end0 speed 1000 duplex full autoneg off

# Check network congestion
sudo netstat -i

# Optimize network parameters
echo 1 > /proc/sys/net/ipv4/tcp_window_scaling

3) Packet Loss

Diagnosis and Solution:

# View packet loss statistics
cat /proc/net/dev | grep end0

# Check network backlog
cat /proc/sys/net/core/netdev_max_backlog

# Increase backlog size
echo 5000 > /proc/sys/net/core/netdev_max_backlog

4) IP Conflict

Solution:

# Check IP conflict
sudo arping -D -I end0 192.168.1.100

# Release and renew IP
sudo dhclient -r end0
sudo dhclient end0
Edit this page on GitHub
Last Updated:
Contributors: ZSL
Prev
02 Display and Touch
Next
04 WIFI