Test Commands
The command operations in this chapter are all executed in the board's terminal.
1 First Look at the /sys Directory
Similar to the /proc directory, the files/folders under the /sys directory provide users with information about devices, kernel modules, file systems, and other kernel components. For example, the subdirectory block stores all block devices; the subdirectory bus stores all bus types in the system, such as i2c, usb, sdio, pci, etc.; the subdirectory class categorizes devices by type, such as leds, lcd, mtd, pwm, etc.
Try executing the following commands in the board's terminal to view the directory contents at each level of sys:
#在板卡上的终端执行以下命令查看
ls /sys
ls /sys/class
ls /sys/class/leds
ls /sys/class/leds/work
As you can see, the /sys/class/leds directory of this board contains: work, the green light that beats like a heart on the development board.
Taking the /sys/class/leds/work directory as an example, it contains files such as brightness, device, max_brightness, power, subsystem, trigger, and uevent. Among them, brightness represents the LED's brightness, and trigger represents the LED's trigger mode. We can use commands such as echo and cat to modify or view these files to control the LED. The following uses an example to explain.
2 Controlling the Heartbeat LED
Before controlling the heartbeat LED, you need to switch to the root user.
Before controlling the heartbeat LED, we can first look at the trigger mode of the heartbeat LED.
cat /sys/class/leds/work/triggerAs you can see, the heartbeat state is currently selected.

The brightness file under the LED device represents its brightness value. In the kernel driver provided for this board, the heartbeat LED is directly IO-controlled; its brightness range is 1 and 0, representing on and off.
#灭了心跳灯,心脏毁灭
echo 0 > /sys/class/leds/work/brightness
#亮了心跳灯,心脏永恒
echo 1 > /sys/class/leds/work/brightness
当我们完成这操作后,可以查看心跳灯现在的触发方式,现在处于无控制状态
If you want to switch the LED back to heartbeat mode, after executing this, the heartbeat LED will re-enter the heartbeat state.
#在root权限下进行下列操作
echo heartbeat > /sys/class/leds/work/trigger
3 First Look at the /dev Directory
In addition to the /proc and /sys directories, the /dev directory also contains very rich device information. This directory contains all the external devices used by the Linux system. For example, /dev/tty is a serial port device, /dev/ram is memory. Through these device files, we can also access the corresponding hardware devices.
Try using the following commands to view the contents of the dev directory:
ls /dev
ls /dev/input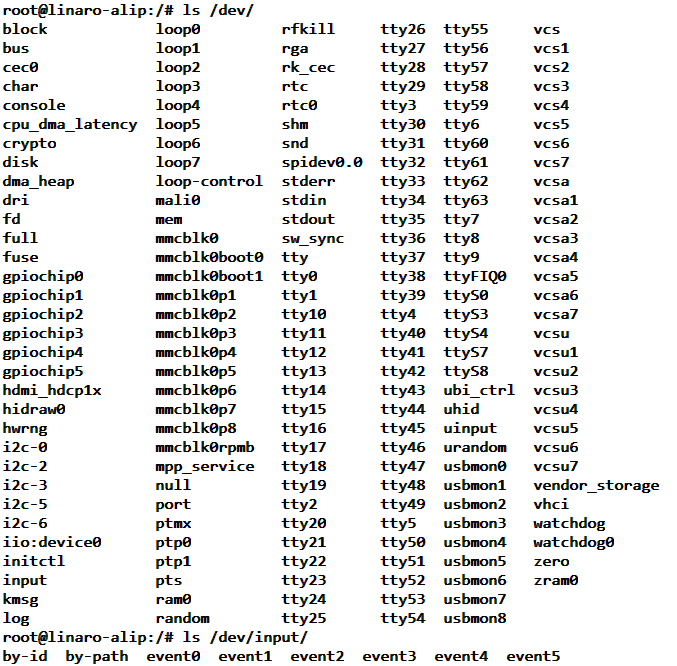
Taking the contents under the /dev/input directory shown above as an example, event0 is the input device's event file interface. Through them, you can learn about input events reported by devices. The number after event is not bound to the device. You can check the file /proc/bus/input/devices to understand what they each represent.
Execute the following command in the board's terminal:
cat /proc/bus/input/devices
As shown in the figure above, you can see that the current board contains multiple input devices. The specific board may vary:
event0: named rk805 pwrkey, it corresponds to the power key on/off, input0; some boards may not have this function.
event1: named goodix-ts, it corresponds to the gt9xx touchscreen, input1; some boards may not have this function.
event2: named hdmi_cec_key, it corresponds to receiving and processing HDMI CEC key events, input2; some boards may not have this function.
event3: named adc-keys, it corresponds to the Recovery key, input3; some boards may not have this function.
event4: named rk-headset, it corresponds to headphone insertion detection, input4; some boards may not have this function.
Tips
The flashing function of the Recovery key only works during kernel boot. After entering the system, this key loses its function. We can operate this key; the following uses this key as an example.
4 Detecting Keys
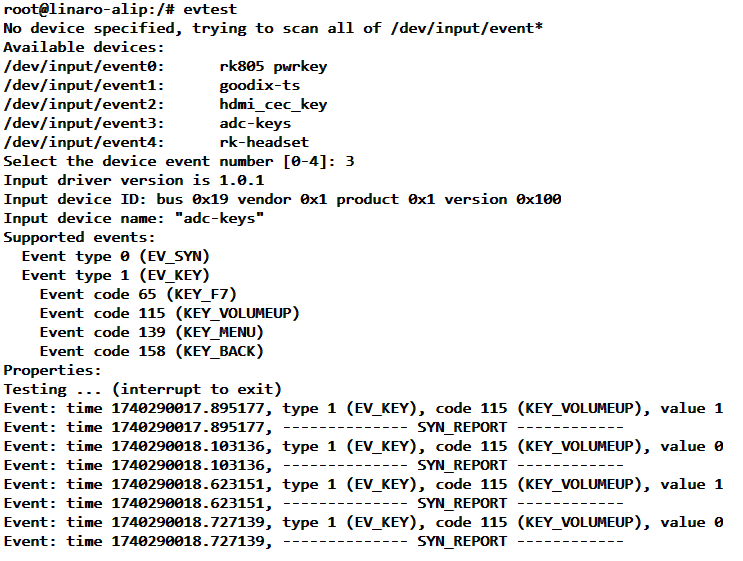
On the board, we can use the evtest tool to more conveniently view the input devices currently connected to the hardware and perform real-time detection on them.
Install the evtest tool with apt:
sudo apt install evtestNote: Before using the apt install command for the first time, you need to execute the following to refresh the image source first:
sudo apt updateUsing the evtest tool:
sudo evtestAfter executing the command, it will scan the event device input event files under the /dev/input directory and list them in the terminal.
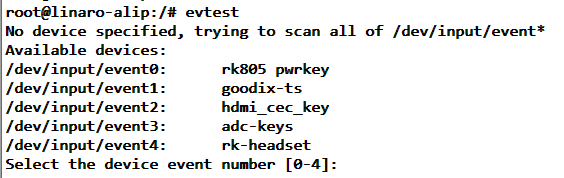
It prompts us to select the corresponding device by number for testing. Please select according to your own board's output.
We select "adc-keys", that is, press '3' and then press Enter to confirm. You can exit with "Ctrl" + "c".
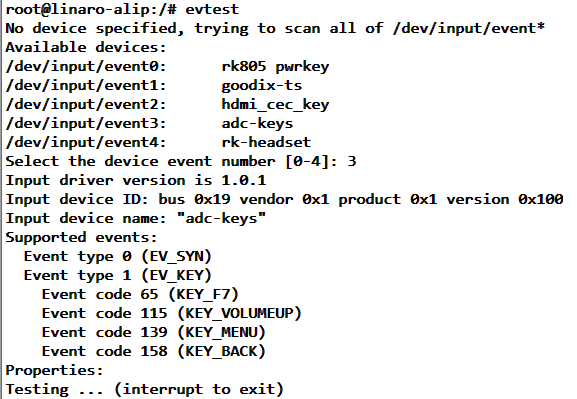
adc-keys corresponds to the Recovery key. When I perform one press and release operation, it is as shown in the figure below.