
Workspace Overview
Workbench IDE uses a five-zone layout: top bar + left navigation + central workspace + right panel + bottom status bar. This page pairs with a full screenshot so you can grasp the overall structure at a glance; for the detailed list see Feature Entries.
Main interface zones
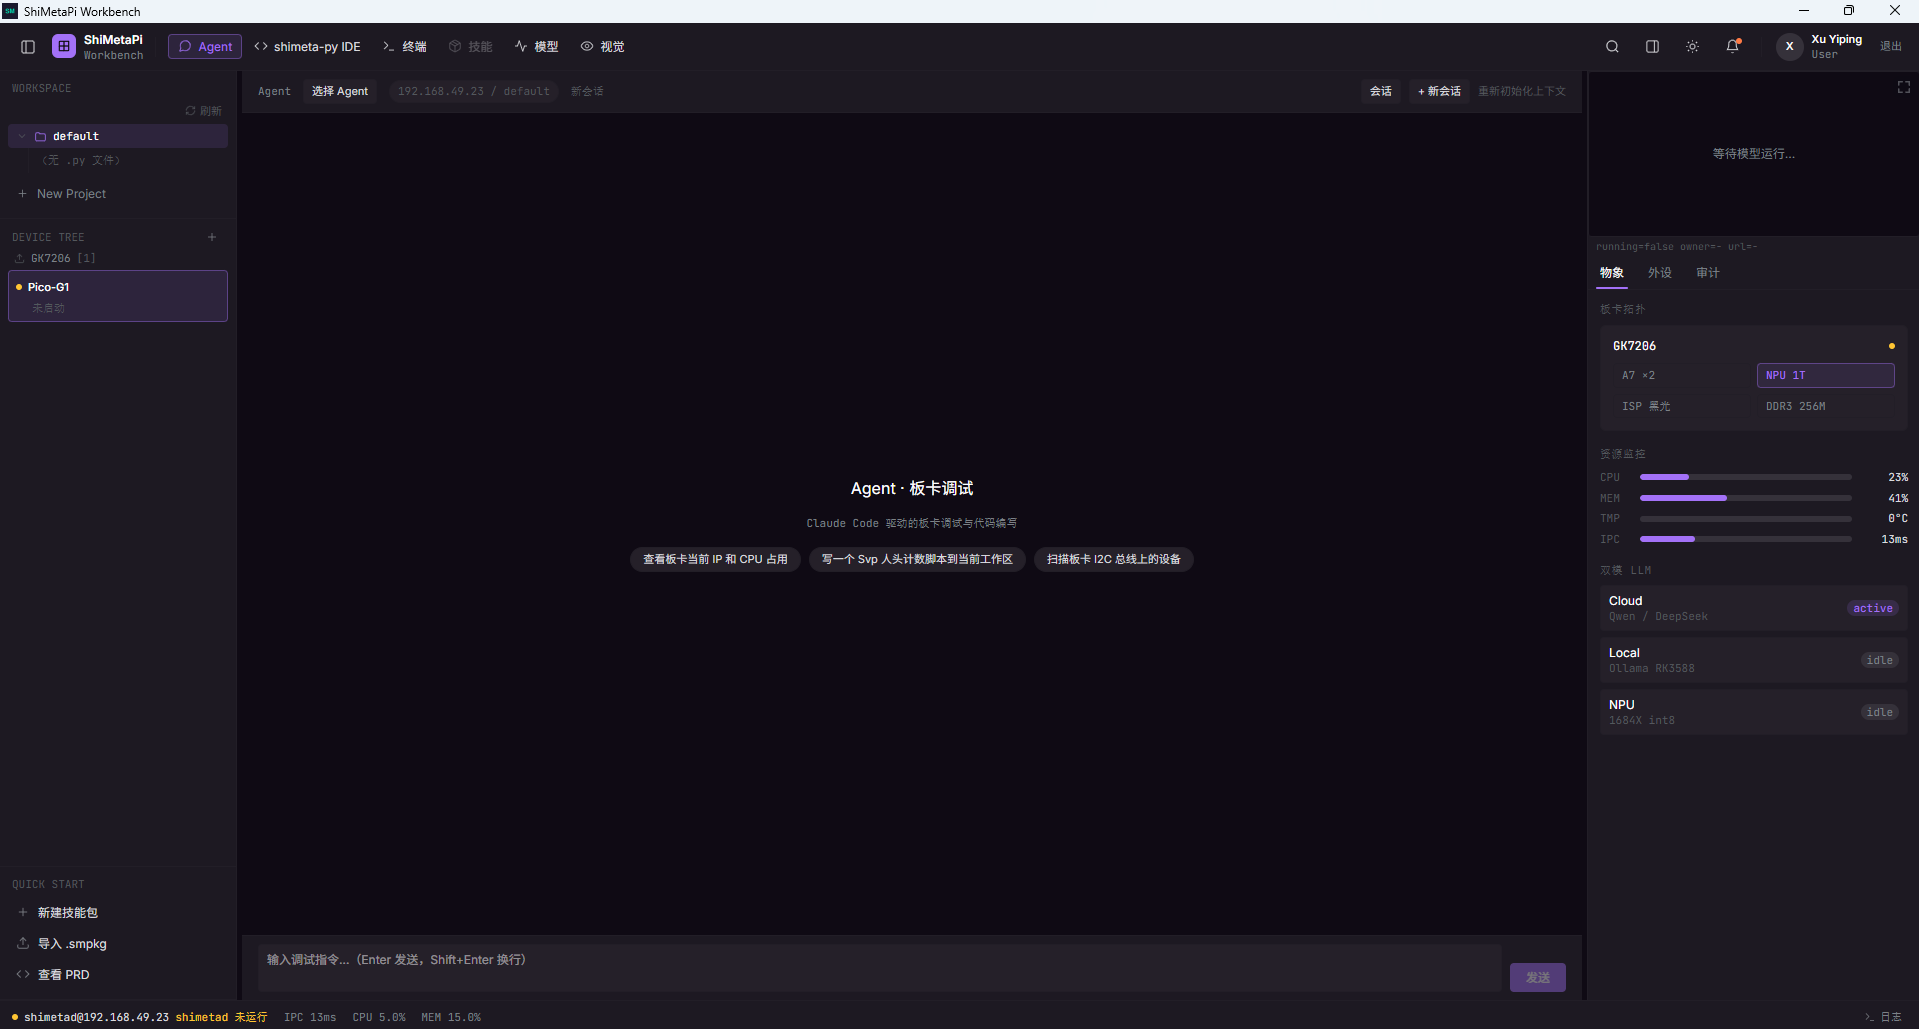
| Zone | Position | Where to look in the screenshot |
|---|---|---|
| Top bar | Topmost row | Title + 6 tabs + 6 buttons on the right |
| Left navigation | Left sidebar | The WORKSPACE / DEVICE TREE / QUICK START zones |
| Central workspace | Largest block in the middle | Content of the current tab (the Agent tab by default) |
| Right panel | Right sidebar | Status bar + Object/Peripherals/Audit + board topology + resource monitor |
| Bottom status bar | Bottom row | Board connection + IPC + CPU/MEM + log entry |
Top bar
6 tabs + 6 buttons on the upper right handle IDE-wide navigation. See Feature Entries → The 6 Top Tabs and Top-Right Buttons.
Left navigation
3 zones: WORKSPACE (workspaces and projects), DEVICE TREE (board management), QUICK START (skill package entry). See Feature Entries.
Central workspace
Shows the Agent tab by default (the Claude Code-powered board debugging assistant); the other 5 tabs (shimeta-py IDE / Terminal / Skills / Models / Vision) each carry different tasks. See Feature Entries.
Right panel
5 blocks: ① top status bar + ② Object view / Peripherals / Audit tabs + ③ board topology + ④ resource monitor (CPU/MEM/TMP/IPC) + ⑤ dual-mode LLM. See Feature Entries.
Bottom status bar
Shows in real time board IP · user · service status | IPC latency | CPU / MEM usage | > logs. See Feature Entries.
Quick reference for the 6 tabs
| Tab | One-line role |
|---|---|
| Agent | Claude Code-powered board debugging assistant; operate the board in natural language |
| shimeta-py IDE | Python code editor; run code directly on the board after editing |
| Terminal | SSH terminal; multiple tabs connect straight to the board |
| Skills | Skill package management (.smpkg); paired with QUICK START on the left |
| Models | Model Market + user models; one-click deploy to the board |
| Vision | Launch shimeta-svp / shimeta-xmm; watch the camera feed on the right |
Next
- ch02 Device Manager: adding boards in DEVICE TREE in detail
- ch05 Vision — SVP: using the 9 scene detections
- ch09 Agent Debugging Assistant: operate the board with Claude Code
- Feature Entries: complete index of all tab / zone entries