
PWM Control
1 PWM Introduction
1.1 PWM Basics
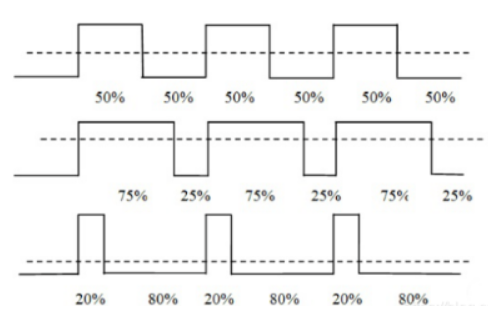
PWM (Pulse Width Modulation) is a technique that controls average power by changing the pulse width:
- Period: the time length of a complete PWM waveform
- Duty Cycle: the percentage of high-level time within the entire period
- Frequency: the repetition frequency of the PWM signal; frequency = 1/period
1.2 Board PWM Peripheral Interface Overview
Taking M4-R1 as an example:
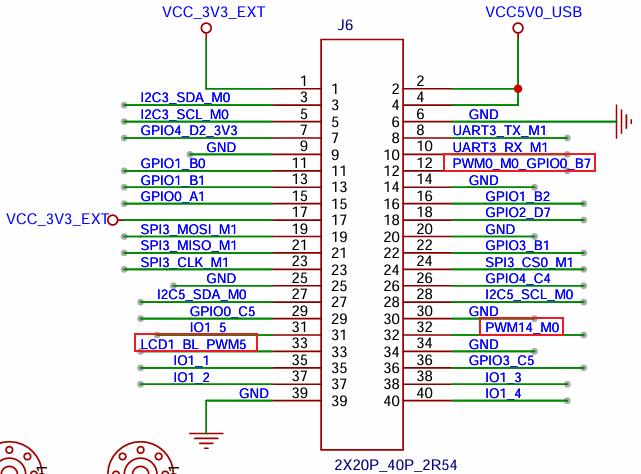
- On the board's 40PIN header, there are 3 GPIOs with PWM functionality.
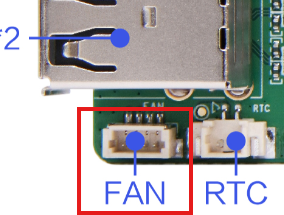
- The board's FAN interface provides 1 pin with PWM functionality. Among them, PWM5 (PIN33) is already occupied by the MIPI1 screen backlight.
| Board | PIN12 | PIN32 | PIN33 | FAN |
|---|---|---|---|---|
| M4-R1 | pwm0 | pwm14 | pwm5 | pwm9 |
The 40PIN header schematic is as follows:
The FAN interface is shown in the figure:
Note
pwm0, pwm5, and pwm9 are enabled by default.
2 PWM Usage — Command-Line Method
2.1 Check the PWM Device
Enter the following command in the terminal to check whether pwm is enabled.
ls -l /sys/class/pwm/As shown:

pwmchip1 and pwmchip2 are for the screen backlight, which the system turns on by default. When multiple pwm device-tree plugins are enabled, the smaller the pwm-controller value, the smaller the pwmchip allocated by the system.
比如我同时开启了pwm0,pwm5,pwm14,那么会出现以下对应关系

pwm0->pwmchip0
pwm5->pwmchip2
pwm14->pwmchip3
2.2 Export and Configure PWM
Below uses PWM9 as an example.
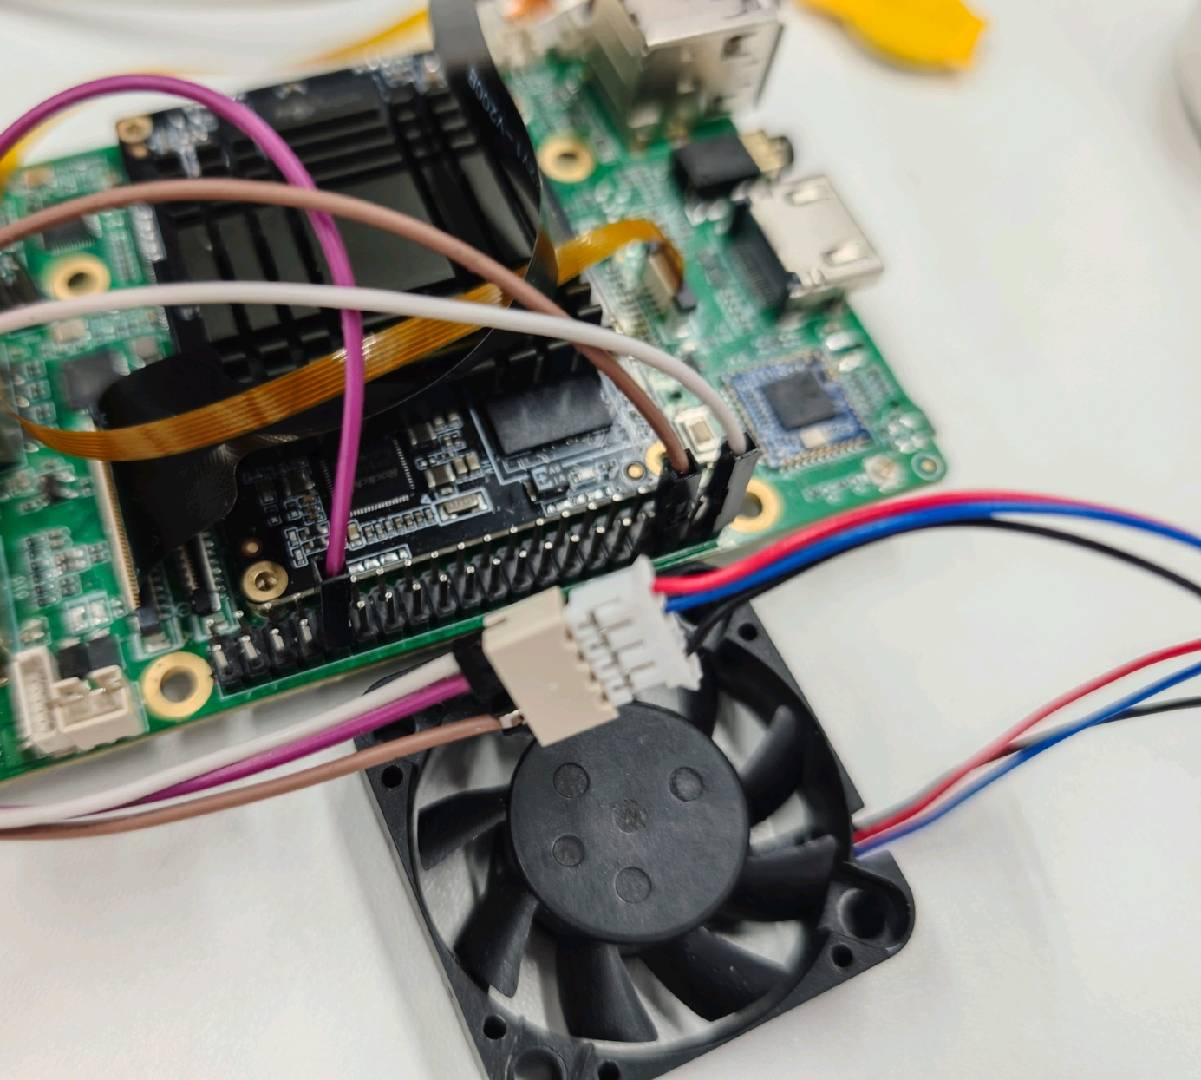
Connect the fan for testing; the wiring diagram is shown in the figure.
After wiring, the PWM pin outputs high level by default, so the fan will spin at full speed.
| White-Red | Purple-Blue | Brown-Black |
|---|---|---|
| VCC | PWM | GND |
#将 pwm9 导出到用户空间
echo 0 > /sys/class/pwm/pwmchip3/export

#设置 pwm 周期 单位为 ns
echo 1000000 > /sys/class/pwm/pwmchip3/pwm0/period

#设置占空比
echo 500000 > /sys/class/pwm/pwmchip3/pwm0/duty_cycle

#设置 pwm 极性
echo "inversed" > /sys/class/pwm/pwmchip3/pwm0/polarity   #正常,有效电平为高电平
Note
The example fan has its PWM-pin active level as high. On the M4R1 board, when the PWM polarity is set to inversed, the active level is high. At this point, adjusting the duty cycle can control the fan speed; the higher the duty cycle, the faster the speed.
Tips
When setting the period and duty_cycle values, note that in any case you must ensure that the period value is greater than or equal to the duty_cycle value.
2.3 Enable PWM
#使能 pwm
echo 1 > /sys/class/pwm/pwmchip3/pwm0/enable
When entering the above command, the fan is controlled by PWM; with the settings in 2.2, the high and low levels each occupy 50%.
2.4 Disable and Unexport PWM
#禁用 pwm
echo 0 > /sys/class/pwm/pwmchip3/pwm0/enable

#取消将 pwm9 导出到用户空间
echo 0 > /sys/class/pwm/pwmchip3/unexport
3 PWM Usage — NAPI Method
Through the NAPI interface and by modifying file permissions, the ability of a northbound application to control a southbound device is implemented.
3.1 NAPI Interface Introduction
A total of four NAPI interfaces are provided for developers.
setPwmPeriod: sets the period of the PWM signalsetPwmDutyCycle: sets the duty cycle of the PWM signalsetPwmPolarity: sets the polarity of the PWM signalsetPwmEnable: enables or disables PWM output
For detailed interface descriptions, see below:
1 setPwmPeriod - Set the Period of the PWM Signal
Interface Definition
export const setPwmPeriod: (period: string) => boolean;Function Description: Sets the period of the PWM signal.
Parameters:
period (string): PWM period value, in nanoseconds (ns).
Return Value:
boolean: returns true on success.
Usage Example:
// 设置PWM周期为1000000纳秒(1毫秒,频率1kHz)
const result = setPwmPeriod('1000000')
2. setPwmDutyCycle - Set the Duty Cycle of the PWM Signal
Function Description: Sets the duty cycle of the PWM signal.
Interface Definition
export const setPwmDutyCycle: (dutyCycle: string) => boolean;Parameters:
dutyCycle(string): duty-cycle value, in nanoseconds (ns); must be less than or equal to the period value.
Return Value:
boolean: returns true on success.
Usage Example:
// 设置占空比为500000纳秒(50%占空比,假设周期为1000000ns)
const result = setPwmDutyCycle('500000')
3. setPwmPolarity - Set the Polarity of the PWM Signal
Function Description: Sets the polarity of the PWM signal.
Interface Definition
export const setPwmPolarity: (polarity: string) => boolean;Parameters:
polarity(string): polarity value"normal": normal polarity (active high)"inversed": inversed polarity (active low)
Return Value:
boolean: returns true on success.
Usage Example:
// 设置为正常极性
const result = setPwmPolarity('normal')

// 设置为反转极性
const result = setPwmPolarity('inversed')
4. setPwmEnable - Enable or Disable PWM Output
Function Description: Enables or disables PWM output.
Interface Definition
export const setPwmEnable: (enable: string) => boolean;Parameters:
enable(string): enable state"1": enable PWM output"0": disable PWM output
Return Value:
boolean: returns true on success.
Usage Example:
// 启用PWM输出
const result = setPwmEnable('1')

// 禁用PWM输出
const result = setPwmEnable('0')
3.2 Step 1: Modify File Permissions
Note
If you are using the firmware image we provide, you can directly skip Step 1; the file permissions have already been modified in the firmware.Firmware acquisition address:
1) Check whether pwm9 was exported normally
ls /sys/class/pwm/pwmchip3If exported normally, PWM0 will be displayed, as shown in the figure below.

If it was not exported, export it via the following command.
echo 0 > /sys/class/pwm/pwmchip3/export2) Check whether the files under the /sys/class/pwm/pwmchip3/pwm0 directory have permission 777
ls -al /sys/class/pwm/pwmchip3/pwm0/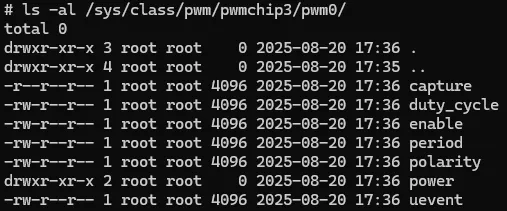
If as shown in the figure above, change permissions via the following command.
chmod 777 /sys/class/pwm/pwmchip3/pwm0/*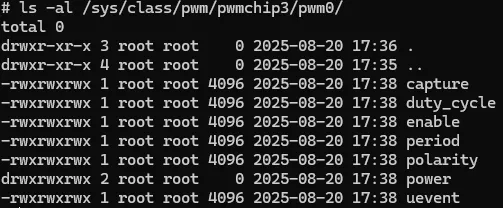
Note
M4-R1 OH5.0 exports pwm0 of pwmchip3 by default and changes all permissions in the pwm0 directory. If needed, download the relevant firmware from Baidu Netdisk yourself.
3.3 Step 2: Launch the Application
1) Get the HAP package resource
Note
pwm_fan.hap acquisition path:
2) Download the HAP package to the board
Download the HAP package from Baidu Netdisk to the board via hdc install.
Materials Path
hap package: \05-Development Materials\01-OpenHarmory Development Materials\Peripheral Test APP\HAP\PWM_Fan.hap
Project source code: \05-Development Materials\01-OpenHarmory Development Materials\Peripheral Test APP\SRC\PWM_Fan
In the example, the HAP package downloaded from Baidu Netdisk is placed in the E drive directory. Open the terminal and enter the following command:
hdc install E:\pwm_fan.hapThe execution result is shown in the figure. Displaying "install bundle successfully", "APP finish" indicates that the application installation is complete.

At this point the application icon is displayed on the M4R1 desktop.
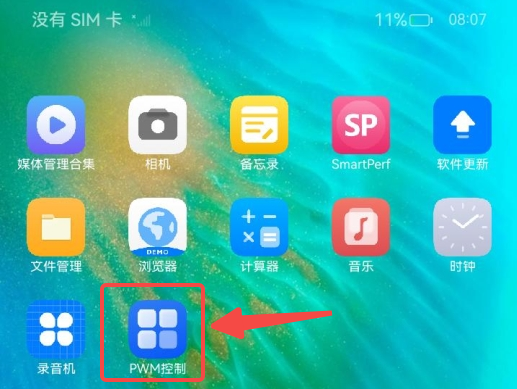
3) Apply the program
Click the [PWM Control] icon on the desktop to enter the application. The application interface is shown in the figure:
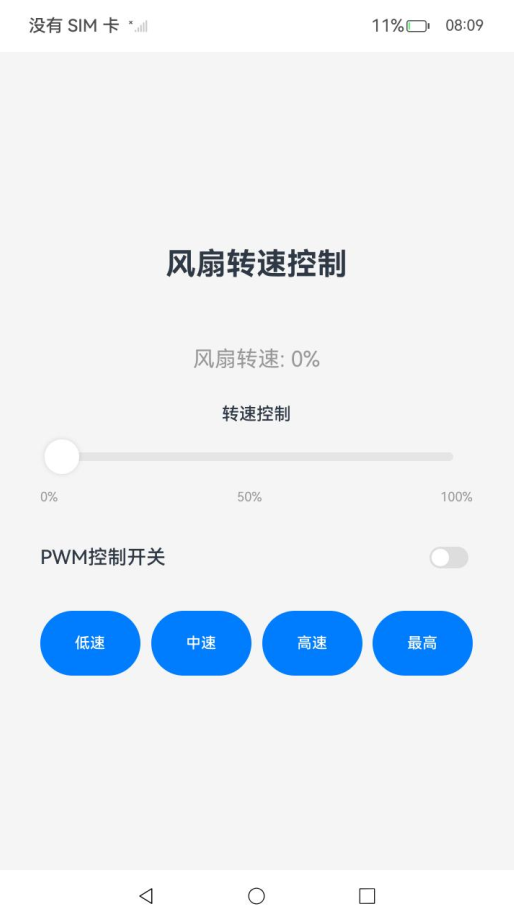
UI Interface Introduction Click the PWM control switch to enable PWM control; the fan will initialize its speed to 0. Through the slider you can control the fan speed. The four buttons below are simple controls: low speed, medium speed, high speed, and maximum correspond to 25%, 50%, 75%, and 100% respectively.