HOME
Shop
  • English
  • 简体中文
HOME
Shop
  • English
  • 简体中文
  • Product Series

    • FPGA+ARM

      • GM-3568JHF

        • Introduction

          • GM-3568JHF Introduction
        • Quick Start

          • Preface
          • Environment Setup
          • Compilation Notes
          • Flashing Guide
          • Debugging Tools
          • Software Update
          • Viewing System Information
          • Test Commands
          • Application Compilation
          • Source Code Access
        • Peripherals & Interfaces

          • USB
          • Display and Touch
          • Ethernet
          • WIFI
          • Bluetooth
          • TF-Card
          • Audio
          • Serial Port
          • CAN
          • RTC
        • Application Development

          • UART Read/Write Demo
          • Key Detection Demo
          • LED Blink Demo
          • MIPI Screen Detection Demo
          • Read USB Device Information Demo
          • FAN Detection Demo
          • FPGA FSPI Communication Demo
          • FPGA DMA Read/Write Demo
          • GPS Debugging Demo
          • Ethernet Test Demo
          • RS485 Read/Write Demo
          • FPGA I2C Read/Write Demo
          • PN532 NFC Card-Reading Demo
          • TF Card Read/Write Demo
        • QT Development

          • ARM64 Cross-Compiler Environment Setup
          • Adding a QT Program to Boot Auto-Start
        • RKNN_NPU Development

          • RK3568 NPU Overview
          • Development Environment Setup
          • Run the Official YOLOv5 Example
        • FPGA Development

          • ARM and FPGA Communication
          • FPGA Development Manual
        • Others

          • Modifying the Root Filesystem
          • System Auto-Start Services
        • Downloads

          • Downloads
      • MB-E30P

        • Introduction

          • MB-E30P Introduction
        • Quick Start

          • Preface
          • Environment Setup
          • Compilation Instructions
          • Flashing Guide
          • Debugging Tools
          • Software Update
          • Viewing Information
          • Test Commands
          • Application Compilation
          • Source Code Acquisition
        • Peripherals & Interfaces

          • USB
          • Display and Touch
          • Ethernet
          • WIFI
          • Bluetooth
          • TF-Card
          • Audio
          • RTC
        • Application Development

          • Key Detection Demo
          • LED Blink Demo
          • MIPI Screen Detection Demo
          • Read USB Device Information Demo
          • FAN Detection Demo
          • FPGA FSPI Communication Demo
          • FPGA DMA Read/Write Demo
          • Ethernet Test Demo
          • FPGA IIC Read/Write Demo
          • PN532 NFC Card Reading Demo
          • TF Card Read/Write Demo
        • QT Development

          • ARM64 Cross-Compiler Environment Setup
          • Adding a QT Program to the Boot Auto-Start Service
        • RKNN_NPU Development

          • RK3568 NPU Overview
          • Development Environment Setup
          • Run the Official YOLOv5 Example
          • Model Conversion In Detail
          • Run Custom Models on the Board
        • FPGA Development

          • ARM and FPGA Communication
          • FPGA Development Manual
        • Others

          • Modifying the Root Filesystem
          • System Auto-Start Service
        • Downloads

          • Downloads
    • ShimetaPi

      • M4-R1

        • Introduction

          • M4-R1 Introduction
        • Quick Start

          • OpenHarmony Overview
          • Image Burning
          • Application Development Quick Start
          • Device Development Quick Start
        • Application Development

          • ArkUI

            • ArkTS Language Overview
            • UI Components - Row Container Introduction
            • UI Components - Column Container Introduction
            • UI Components - Text Component
            • UI Components - Toggle Component
            • UI Components - Slider Component
            • UI Components - Animation Component & Transition Component
          • Documentation

            • OpenHarmony Official Materials
          • Development Notes

            • Full-SDK Replacement Tutorial
            • Introducing and Using Third-Party Libraries
            • HDC Debugging
            • Restore Factory Mode via Command Line
            • Upgrade App to System Permission
          • First App

            • Build Your First ArkTS Application - HelloWorld
          • Demos

            • Serial-Debug-Assistant Application Demo
            • Writing-Board Application Demo
            • Digital Clock Application Demo
            • Wi-Fi Information Acquisition Application Demo
        • Device Development

          • Ubuntu Development

            • Environment Setup
            • Download Source Code
            • Compile Source Code
          • DevEco Device Tool

            • Tool Introduction
            • Development Environment Construction
            • Import the SDK
            • HUAWEI DevEco Tool Function Introduction
        • Kernel Peripherals & Interfaces

          • Guide
          • Device Tree Introduction
          • NAPI Introduction
          • ArkTS Introduction
          • NAPI Development Hands-on Demo
          • GPIO Introduction
          • I2C Communication
          • SPI Communication
          • PWM Control
          • UART Communication
          • TF Card (MicroSD)
          • Screen (Display)
          • Touch
          • Ethernet
          • M.2 SSD
          • Audio
          • WIFI & BT
          • Camera
        • Downloads

          • Downloads
      • M5-R1

        • Introduction

          • M5-R1 Development Docs
        • Quick Start

          • Image Burning
          • Environment Setup
          • Download Source Code
        • Peripherals & Interfaces

          • Raspberry Pi Interfaces
          • GPIO Interface
          • I2C Interface
          • SPI Communication
          • PWM Control
          • Serial Port Communication
          • TF Card
          • Display
          • Touch
          • Audio
          • RTC
          • Ethernet
          • M.2
          • MINI-PCIE
          • Camera
          • WIFI & BT
        • Downloads

          • Downloads
      • Pico-G1

        • Product Overview

          • Product Introduction
          • SDK Version Information
        • Quick Start

          • Development Environment Setup
          • Image Build
          • Image Flashing
          • System Login
          • Network Configuration
          • File Transfer
          • SDK Directory Structure
          • Deploying Your First Application
          • Deploying Your First Driver
          • Mounting an SD Card
        • Peripherals & Interfaces

          • GPIO Control
          • UART Serial Communication
          • I2C Communication
          • SPI Communication
        • MPP Media Development

          • MPP Media Processing Software
          • Image Processing Chain
          • Video Input
          • Image Encoding
        • NPU & AI

          • NPU Driver and Runtime Library Architecture
          • .xmm Model Loading
          • SVP Video Processing
          • AI Noise Reduction (AI_NR)
        • Application Samples

          • Encryption/Decryption Application
          • ADC Acquisition Application
          • Low-Power Application
          • Audio Processing Application
          • Video Encoding Application
          • Video Input Application
          • Video Graphics Subsystem (VGS) Application
          • 08 Region Overlay Application
          • 09 Intelligent Video Engine Application
          • 10 UVC Webcam Application
          • 11 All-in-One Quickstart Application
          • 12 FPN Correction Application
          • 13 Regional Motion Detection Application
          • 14 MTCNN Face Detection Application
        • Expansion Board Peripheral Examples

          • 00 - Pico Expansion Board Peripheral Examples Overview
          • 01 - OLED Display Application
          • 02 - TFT Display Application
          • 03 - MPU6050 Gyroscope Application
          • 04 - ADC Acquisition Application
          • 05 - Passive Buzzer Application
          • 06 - MQ Gas Sensor Application
          • 07 - GPS Positioning Application
          • 08 - SHT20 Temperature & Humidity Application
          • 09 - Ultrasonic Ranging Application
          • 10 - SpO2 Sensor Application
          • 11 - DC Motor Control Application
          • 12 - Servo Control Application
    • OpenHarmony

      • SC-3568HA

        • Introduction

          • SC-3568HA Overview
        • Quick Start Guide

          • OpenHarmony Overview
          • Image Flashing
          • Setting Up the Development Environment
          • Hello World Application and Deployment
        • Application Development

          • ArkUI

            • Introduction to ArkTS Language
            • Introduction to UI Components and Practical Applications (Part 1)
            • Introduction to UI Components and Practical Applications (Part 2)
            • Introduction to UI Components and Practical Applications (Part 3)
          • Expand

            • Getting Started Guide
            • Referencing and Using Third-Party Libraries
            • Application Compilation and Deployment
            • Command-Line Factory Reset
            • System Debugging -- HDC Debugging
            • APP Stability Testing
            • Chapter 7 Application Testing
        • Device Development

          • Environment Setup
          • Download Source Code
          • Compiling Source Code
        • Peripheral And Interface

          • Raspberry Pi interface
          • GPIO Interface
          • I2C Interface
          • SPI communication
          • PWM (Pulse Width Modulation) control
          • Serial port communication
          • TF Card
          • Display Screen
          • Touch
          • Audio
          • RTC
          • Ethernet
          • M.2
          • MINI-PCIE
          • Camera
          • WIFI&BT
          • Raspberry Pi expansion board
        • Downloads

          • Downloads
      • M-K1HSE

        • Introduction

          • M-K1HSE Introduction
        • Quick Start

          • Development environment construction
          • Source code acquisition
          • Compilation Notes
          • Burning Guide
        • Application Development

          • Application Development Environment Setup
          • First Application - Hello World
        • Peripherals and interfaces

          • 01 Audio
          • 02 RS485
          • 03 Display
        • System customization development

          • System transplant
          • System customization
          • Driver Development
          • System Debugging
          • OTA Update
        • Downloads

          • Downloads
    • HVS Camera

      • Quick Start

        • SDK Overview
        • Downloads
        • Your First C++ Program
        • Python Data Analysis
        • MultiVision Studio
      • Development

        • Programming Guides

          • Open Camera
          • Read Events
          • Recording & Replay
          • Event Processing (Denoising)
          • Display & Visualization
          • Tuning
          • Capture APS Image
        • Toolkit SDK

          • Hybrid Vision Toolkit
          • Quick Start
          • C++ API
          • Python API
        • Algorithm

          • Hybrid Vision Algo
          • Hybrid Vision Algo API
          • Windows Algo SDK
        • Samples Overview
        • Applications
      • Fundamentals

        • Event Camera Fundamentals
        • HVS Hybrid Vision
        • Event Visualization
        • Data Formats Reference
        • Glossary
        • Bias & Tuning
        • Video Tutorials
      • USB Cameras

        • HVS Camera Quick Start
        • Networking Capabilities

          • HVS Camera System Architecture
          • EVS Network Server
          • EVS Time Sync
          • Web Window
        • HVS Camera Compatibility Matrix
        • FAQ & Troubleshooting Guide
        • Products

          • CF-NRS1 (Lingguang No.1 Hybrid Vision Camera)
      • MIPI Modules

        • MIPI Module Quick Start
        • Carrier Boards

          • RDK X5 Carrier Board Adaptation
          • Raspberry Pi Carrier Board Adaptation
          • Digua Pi Carrier Board Adaptation
          • ShimeTai Board Carrier Board Adaptation
        • MIPI Module Compatibility Matrix
        • Products

          • EVS_003 Sensor Module
    • AI-model

      • 1684XB-32T

        • Introduction

          • AIBOX-1684XB-32 Introduction
        • Quick Start

          • First Use
          • Network Configuration
          • Disk Usage
          • Memory Allocation
          • Fan Control Strategy
          • Firmware Upgrade
          • Cross Compilation
          • Model Quantization
        • Application Development

          • Development Overview

            • Sophgo SDK Development
            • Sophgo Demo Introduction
          • Large Language Models

            • Deploying Llama3 Example
            • Sophon LLM_api_server Development
            • Deploying MiniCPM-V-2_6
            • Qwen-2-5-VL Image and Video Recognition Demo
            • Qwen3-chat Demo
            • Qwen3-Qwen Agent-MCP Development
            • Qwen3-langchain-AI Agent
          • Deep Learning

            • ResNet (Image Classification)
            • LPRNet (License Plate Recognition)
            • SAM (General Image Segmentation Foundation Model)
            • YOLOv5 (Object Detection)
            • OpenPose (Human Keypoint Detection)
            • PP-OCR (Optical Character Recognition)
        • Downloads

          • Downloads
      • 1684X-416T

        • Introduction

          • AIBOX-1684X-416 Introduction
        • Demo Quick Guide

          • ShimeTai Intelligent Monitoring Demo Quick Usage Guide
      • RDK-X5

        • Introduction

          • RDK-X5 Hardware Introduction
        • Quick Start

          • RDK-X5 Quick Start
        • Application Development

          • AI Online Model Development

            • Experiment 01 - Access Volcengine Doubao AI
            • Experiment 02 - Image Analysis
            • Experiment 03 - Multimodal Visual Analysis & Localization
            • Experiment 04 - Multimodal Image-Text Comparison
            • Experiment 05 - Multimodal Document/Table Analysis
            • Experiment 06 - Camera-based AI Visual Analysis
          • Large Language Models

            • Experiment 01 - Speech Recognition
            • Experiment 02 - Voice Conversation
            • Experiment 03 - Multimodal Image Analysis - Voice
            • Experiment 04 - Multimodal Image Comparison - Voice
            • Experiment 05 - Multimodal Document Analysis - Voice
            • Experiment 06 - Multimodal Vision Application - Voice
          • ROS2 Basics

            • Experiment 01 - Environment Setup
            • Experiment 02 - Create & Build a Workspace Package
            • Experiment 03 - Run ROS2 Topic Communication Node
            • Experiment 04 - ROS2 Camera Application
          • 40-pin IO Development

            • Experiment 01 - GPIO Output (LED Blink)
            • Experiment 02 - GPIO Input
            • Experiment 03 - Button-controlled LED
            • Experiment 04 - PWM Output
            • Experiment 05 - Serial Output
            • Experiment 06 - I2C Experiment
            • Experiment 07 - SPI Experiment
          • USB Module Usage

            • Experiment 01 - USB Voice Module Usage
            • Experiment 02 - Sound Source Localization Module
          • Machine Vision Practice

            • Experiment 01 - Open USB Camera
            • Experiment 02 - Color Recognition
            • Experiment 03 - Gesture Recognition
            • Experiment 04 - YOLOv5 Object Detection
      • RDK-S100

        • Introduction

          • RDK-S100 Hardware Introduction
        • Quick Start

          • RDK-S100 Quick Start
        • Application Development

          • AI Online Model Development

            • Experiment 01 - Access Volcengine Doubao AI
            • Experiment 02 - Image Analysis
            • Experiment 03 - Multimodal Visual Analysis & Localization
            • Experiment 04 - Multimodal Image-Text Comparison
            • Experiment 05 - Multimodal Document/Table Analysis
            • Experiment 06 - Camera-based AI Visual Analysis
          • Large Language Models

            • Experiment 01 - Speech Recognition
            • Experiment 02 - Voice Conversation
            • Experiment 03 - Multimodal Image Analysis - Voice
            • Experiment 04 - Multimodal Image Comparison - Voice
            • Experiment 05 - Multimodal Document Analysis - Voice
            • Experiment 06 - Multimodal Vision Application - Voice
          • ROS2 Basics

            • Experiment 01 - Environment Setup
            • Experiment 02 - Create & Build a Workspace Package
            • Experiment 03 - Run ROS2 Topic Communication Node
            • Experiment 04 - ROS2 Camera Application
          • 40-pin IO Development

            • Experiment 01 - GPIO Output (LED Blink)
            • Experiment 02 - GPIO Input
            • Experiment 03 - Button-controlled LED
            • Experiment 04 - PWM Output
            • Experiment 05 - Serial Output
            • Experiment 06 - I2C Experiment
            • Experiment 07 - SPI Experiment
          • USB Module Usage

            • Experiment 01 - USB Voice Module Usage
            • Experiment 02 - Sound Source Localization Module
          • Machine Vision Practice

            • Experiment 01 - Open USB Camera
            • Experiment 02 - Image Processing Basics
            • Experiment 03 - Object Detection
            • Experiment 04 - Image Segmentation
      • RK1828

        • Introduction

          • M5-182X-A1 AI Edge Box - Product Introduction
          • M5-182X-A1 Hardware Specifications
          • M5-182X-A1 Usage & Safety
        • Quick Start

          • M5-182X-A1 Image Flashing
          • RK182X Hardware Installation & Verification
          • RK182X Development Environment Quick Setup
          • RK182X SDK Overview
          • RK182X Environment Setup in Detail
          • RK182X Quick Start
          • Vendor SDK Data Extraction Record
        • Development Guide

          • ClawChips Architecture and Principles
          • SKILL User Manual
          • RK182X Series LLM Inference (RK1828 Model)
          • RK182X Series CNN Inference (RK1828 Model)
          • Model Conversion
          • RK182X AI Agent Application Development Guide
          • RK182X Industrial Anomaly Detection Application
        • SDK Reference

          • RKNN3-SDK Overview

            • RKNN3 SDK Overview
          • RKNN3-Toolkit

            • RKNN3 Toolkit Installation and Usage
          • RKLLM

            • RKLLM On-Device LLM Inference
          • RK182X Series NPU Overview and Architecture (RK1828 Model)
          • RK182X INT8 Quantized Inference Deployment
          • RK182X MPP Multimedia Framework
          • MPP Details

            • RK182X Video Decoding
            • RK182X Video Encoding
          • NPU Details

            • RKNN Model Conversion
            • RK182X NPU INT8 Quantized Inference
            • RK182X Multi-Model Parallel Inference
          • RGA Details

            • RK182X RGA 2D Graphics Acceleration
          • VPU Details

            • RK182X VPU Codec
        • Hardware Reference

          • RK182X Series Hardware Architecture Overview (RK1828 Model)
          • RK182X Pin Definitions and Multiplexing Configuration
          • RK182X Pin Definitions
          • RK182X Power Management
          • RK182X Clock and PLL Configuration
          • RK182X Clock and Frequency Configuration
        • Tutorials

          • Hello World
          • Hello RK1828 - The First Program
          • RTSP Streaming
          • RTSP Streaming + AI Analysis
          • ShiMetaPi AI Lobster One-Click Deployment
          • PaddleOCR-VL Text Recognition
          • Qwen3-1.7B LLM Text Chat
          • AI Multi-View Inspection (Qwen3-VL Wrapper)
          • YOLOv5 Object Detection
        • Downloads

          • Downloads
        • FAQ

          • FAQ
    • Core-Board

      • C-3568BQ

        • Introduction

          • C-3568BQ Overview
      • C-3588LQ

        • Introduction

          • C-3588LQ Overview
      • GC-3568JBAF

        • Introduction

          • GC-3568JBAF Overview
      • C-K1BA

        • Introduction

          • C-K1BA Overview
    • Software Platform

      • ShiMetaPi Workbench

        • Introduction

          • Product Overview
          • Core Architecture
          • Feature Entries
          • Supported Hardware
          • Release Notes
        • Quick Start

          • Install & Login
          • Connect the Device
          • Set Up the Environment
          • Connect to AIHub
          • First Inference
        • User Guide

          • Workspace Overview
          • Device Manager
          • Model Market
          • One-Click Deploy
          • Vision — SVP
          • Vision - Custom Models
          • shimeta-py IDE
          • Terminal
          • Agent Debug Assistant
          • Settings and Resources
        • FAQ

          • Installation & Login
          • Device Connection
          • Models & Deployment
          • Vision & Runtime
          • Settings & Other
      • ShimetaPi Repository

        • Introduction

          • ShimetaPi Software Repository
        • Pico G1 (GK7206)

          • Quick Start

            • Installation & First Inference
            • shimeta_infer — Image Inference
            • shimeta_camera — Real-time Camera Inference
            • SVP Scene Detection
            • File Transfer & Built-in Model Reference
            • FAQ
          • HTTP API & Python SDK

            • HTTP API Reference
      • Model Fine-tuning Platform

        • Introduction

          • Model Training Platform
        • Quick Start

          • Register & Login
          • Create Your First Model (30-Minute Quick Experience)
        • Training Guide

          • Data Preparation & Annotation
          • Training Parameter Configuration
          • Start & Monitor Training
          • Model Evaluation & Testing
        • Model Deployment

          • Export Model
          • Deploy to Edge Device

Voice LLM Applications

Experiment 03 - Multimodal Image Analysis - Voice Dialogue

Experiment preparation:

  1. Ensure you have connected to Volcengine Doubao AI and iFLYTEK AI (refer to Experiment 01 and Experiment 02).
  2. Find an image to use as the experiment material. Image import supports both relative and absolute paths. The relative path defaults to AI_online_voice/assets/sample.jpg (a default relative-path image is included in the package; you may replace it, but the filename must remain sample.jpg).

Experiment steps: (Ensure the voice module is connected)

  1. cd AI_online_voice # Enter the main directory
  2. python examples/03_voice_image_dialogue.py # Run the example program
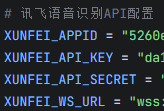
  3. After entering the program, follow the terminal prompts. First enter y to enter image selection. You can use voice to choose between an absolute path or a relative path. For an absolute path, manually enter the image path; the relative path defaults to assets/sample.jpg.

Terminal example:

Relative path selection:
TOOL

Absolute path selection:

TOOL

Image analysis:

TOOL
# -*- coding: utf-8 -*-
"""
03_voice_image_dialogue.py

实验03:语音选择上传图片 + 语音交互分析图片
- 基于 02_voice_dialogue.py:保留录音与讯飞实时识别,新增图像路径选择与图像+文本联合分析
- 路径选择支持语音选择“绝对路径/相对路径”,并以终端输入方式给出实际路径字符串
- 图像仅支持 JPG/JPEG/PNG;相对路径相对于项目根目录(AI_online_voice)解析

使用方法:
- python examples/03_voice_image_dialogue.py
- 交互命令:
  - i:选择并上传图像(语音选择绝对/相对路径)
  - r [秒数]:录音指定秒数,识别,并将结果与已选图片一起发给豆包
  - p:回放最近一次录音(如果存在)
  - h:帮助
  - q:退出
"""

import os
import sys
import json
import base64
import wave
from typing import Optional

CURRENT_DIR = os.path.dirname(os.path.abspath(__file__))
PROJECT_ROOT = os.path.dirname(CURRENT_DIR)
sys.path.append(PROJECT_ROOT)

# 尝试加载根目录 config.py(与 02_voice_dialogue 保持一致)
WORKSPACE_ROOT = os.path.dirname(PROJECT_ROOT)
import importlib.util
ROOT_CONFIG = None
_root_cfg_path = os.path.join(WORKSPACE_ROOT, "config.py")
if os.path.exists(_root_cfg_path):
    try:
        _spec = importlib.util.spec_from_file_location("root_config", _root_cfg_path)
        ROOT_CONFIG = importlib.util.module_from_spec(_spec)
        _spec.loader.exec_module(ROOT_CONFIG)
    except Exception:
        ROOT_CONFIG = None

from utils.audio_processor import AudioProcessor
import config
import requests
from urllib.parse import urlparse, quote
import time, hmac, ssl, hashlib
import email.utils as email_utils

# 参考实验02的实现,内联定义讯飞 WS 客户端与豆包文本客户端
class DoubaoAPIClient:
    """简化版豆包API客户端,内联实现文本聊天以避免导入冲突"""
    def __init__(self):
        cfg = ROOT_CONFIG if ROOT_CONFIG else config
        self.api_key = getattr(cfg, "API_KEY", None)
        self.model_endpoint = getattr(cfg, "MODEL_ENDPOINT", None)
        self.base_url = getattr(cfg, "API_BASE_URL", None)
        self.timeout = getattr(cfg, "REQUEST_TIMEOUT", 30)
        if not self.api_key or not self.model_endpoint or not self.base_url:
            raise ValueError("请在 config.py 中配置 API_KEY / MODEL_ENDPOINT / API_BASE_URL")

    def _make_request(self, messages, **kwargs):
        try:
            base = (self.base_url or "").rstrip('/')
            url = base if base.endswith('chat/completions') else f"{base}/chat/completions"
            headers = {
                "Authorization": f"Bearer {self.api_key}",
                "Content-Type": "application/json",
                "Accept": "application/json",
            }
            data = {
                "model": self.model_endpoint,
                "messages": messages,
                "temperature": kwargs.get("temperature", 0.7),
                "max_tokens": kwargs.get("max_tokens", 1000),
                "top_p": kwargs.get("top_p", 0.9),
                "stream": kwargs.get("stream", False),
            }
            for k, v in kwargs.items():
                if k not in data:
                    data[k] = v
            resp = requests.post(url, json=data, headers=headers, timeout=self.timeout)
            if resp.status_code == 200:
                try:
                    return resp.json()
                except Exception as e:
                    print(f"[豆包] JSON解析失败: {e}")
                    print(f"[豆包] 响应文本片段: {resp.text[:500]}")
                    return None
            else:
                print(f"[豆包] API请求失败: {resp.status_code}")
                print(f"[豆包] 请求URL: {url}")
                print(f"[豆包] 模型: {self.model_endpoint}")
                try:
                    err_json = resp.json()
                    print(f"[豆包] 错误详情(JSON): {json.dumps(err_json, ensure_ascii=False)[:500]}")
                except Exception:
                    print(f"[豆包] 错误详情(Text): {resp.text[:500]}")
                if resp.status_code == 401:
                    print("[豆包] 认证失败,请检查 API_KEY")
                elif resp.status_code == 404:
                    print("[豆包] 接入点不存在,请检查 MODEL_ENDPOINT")
                elif resp.status_code == 429:
                    print("[豆包] 请求频率过高,请稍后重试")
                elif resp.status_code == 500:
                    print("[豆包] 服务器内部错误,请稍后重试")
                return None
        except Exception as e:
            print(f"豆包请求异常: {e}")
            return None

    def chat_text(self, text: str, system_prompt: str = None, **kwargs):
        try:
            messages = []
            if system_prompt:
                messages.append({"role": "system", "content": system_prompt})
            messages.append({"role": "user", "content": text})
            result = self._make_request(messages, **kwargs)
            if result and "choices" in result and result["choices"]:
                return result["choices"][0]["message"]["content"]
            return None
        except Exception as e:
            print(f"文本对话失败: {e}")
            return None

try:
    import websocket
    from websocket import WebSocketTimeoutException
except Exception:  # pragma: no cover
    websocket = None
    WebSocketTimeoutException = Exception


class XunfeiRealtimeSpeechClient:
    """简化版的讯飞实时语音识别客户端(WebSocket)。
    - 复用我们在 01_voice_chat.py 中优化过的健壮性:
      - 安全 JSON 解析
      - 增量文本聚合
      - 超时容错,返回已识别的文本
    """

    def __init__(self):
        self.app_id = getattr(config, "XUNFEI_APPID", "")
        self.api_key = getattr(config, "XUNFEI_API_KEY", "")
        self.api_secret = getattr(config, "XUNFEI_API_SECRET", "")
        self.host_url = getattr(config, "XUNFEI_WS_URL", "")
        self.timeout = getattr(config, "REQUEST_TIMEOUT", 15)

    def _safe_json_loads(self, s):
        try:
            return json.loads(s)
        except Exception:
            return None

    def _build_auth_url(self):
        url = self.host_url
        # 使用标准库解析,兼容不同 websocket-client 版本
        try:
            parsed = urlparse(url)
            host = parsed.netloc or url.split("//")[-1].split("/")[0]
            path = parsed.path or "/v2/iat"
        except Exception:
            host = url.split("//")[-1].split("/")[0]
            path = "/v2/iat"
        # 鉴权:生成签名字符串
        try:
            date = email_utils.formatdate(timeval=None, localtime=False, usegmt=True)
        except Exception:
            # 回退到 RFC 7231 格式
            date = time.strftime("%a, %d %b %Y %H:%M:%S GMT", time.gmtime())
        signature_origin = f"host: {host}\ndate: {date}\nGET {path} HTTP/1.1"
        signature_sha = hmac.new(
            self.api_secret.encode("utf-8"),
            signature_origin.encode("utf-8"),
            digestmod=hashlib.sha256,
        ).digest()
        signature = base64.b64encode(signature_sha).decode("utf-8")
        authorization_origin = (
            f"api_key=\"{self.api_key}\", algorithm=\"hmac-sha256\", headers=\"host date request-line\", signature=\"{signature}\""
        )
        authorization = base64.b64encode(authorization_origin.encode("utf-8")).decode("utf-8")

        auth_url = f"{url}?authorization={quote(authorization)}&date={quote(date)}&host={quote(host)}"
        return auth_url

    def transcribe_audio_ws(self, wav_path):
        if websocket is None:
            print("[错误] 缺少 websocket-client 依赖,请安装后重试:pip install websocket-client")
            return None

        # 读取音频数据
        try:
            with open(wav_path, "rb") as f:
                audio_bytes = f.read()
        except Exception as e:
            print(f"[错误] 读取音频失败: {e}")
            return None

        # 初始化增量聚合
        final_text_parts = []
        saw_final_status = False

        url = self._build_auth_url()
        print(f"[WS] 连接: {url}")
        ws = websocket.create_connection(url, timeout=self.timeout, sslopt={"cert_reqs": ssl.CERT_NONE})

        try:
            # 发送首帧
            init_payload = {
                "common": {"app_id": self.app_id},
                "business": {
                    "language": "zh_cn",
                    "domain": "iat",
                    "accent": "mandarin",
                    "vad_eos": 2000,
                },
                "data": {
                    "status": 0,
                    "format": "audio/L16;rate=16000",
                    "audio": base64.b64encode(audio_bytes[:1200]).decode("utf-8"),
                    "encoding": "raw",
                },
            }
            ws.send(json.dumps(init_payload))
            print("[首帧发送] bytes=", len(audio_bytes[:1200]))

            # 发送中间帧(简单一次性发送余下数据)
            middle_payload = {
                "data": {
                    "status": 1,
                    "format": "audio/L16;rate=16000",
                    "audio": base64.b64encode(audio_bytes[1200:]).decode("utf-8"),
                    "encoding": "raw",
                }
            }
            ws.send(json.dumps(middle_payload))
            print("[中间帧发送] bytes=", len(audio_bytes[1200:]))

            # 发送结束帧
            end_payload = {
                "data": {"status": 2, "format": "audio/L16;rate=16000", "audio": "", "encoding": "raw"}
            }
            ws.send(json.dumps(end_payload))
            print("[结束帧发送]")

            # 接收返回,聚合文本
            while True:
                try:
                    msg = ws.recv()
                except WebSocketTimeoutException:
                    print("[WS] 接收超时,返回已聚合文本")
                    break
                except Exception as e:
                    print(f"[WS] 接收异常: {e}")
                    break

                data = self._safe_json_loads(msg)
                if not data:
                    print("[WS] 非法 JSON,忽略")
                    continue

                code = data.get("code", -1)
                status = data.get("data", {}).get("status")
                message = data.get("message")
                print(f"[WS返回] code={code}, status={status}, message={message}")

                if code != 0:
                    print("[WS] 识别失败: ", data)
                    break

                # 解析增量识别文本
                result = data.get("data", {}).get("result")
                if result and result.get("ws"):
                    # 将分段结果拼接
                    parts = []
                    for ws_seg in result.get("ws", []):
                        for cw in ws_seg.get("cw", []):
                            w = cw.get("w")
                            if w:
                                parts.append(w)
                    if parts:
                        final_text_parts.append("".join(parts))
                        print("[增量结果] ", "".join(parts))

                if status == 2:
                    saw_final_status = True
                    print("[WS] 收到最终状态,结束接收")
                    break
        finally:
            try:
                ws.close()
            except Exception:
                pass

        aggregated = "".join(final_text_parts).strip()
        if aggregated:
            return aggregated
        if saw_final_status:
            return aggregated  # 为空也返回
        return None


class DoubaoImageClient(DoubaoAPIClient):
    """在豆包文本客户端基础上,扩展图像+文本联合对话能力。
    通过 data URI 作为 image_url,将本地图片以 Base64 嵌入消息。
    """
    def chat_with_image_file(self, text: str, image_path: str, system_prompt: str = None, **kwargs) -> Optional[str]:
        try:
            if not image_path or not os.path.exists(image_path):
                print(f"[豆包图像] 文件不存在: {image_path}")
                return None
            ext = os.path.splitext(image_path)[1].lower()
            if ext not in (".jpg", ".jpeg", ".png"):
                print("[豆包图像] 仅支持 JPG/JPEG/PNG 格式")
                return None
            mime = "image/jpeg" if ext in (".jpg", ".jpeg") else "image/png"
            with open(image_path, "rb") as f:
                b64 = base64.b64encode(f.read()).decode("utf-8")
            messages = []
            if system_prompt:
                messages.append({"role": "system", "content": system_prompt})
            content = [
                {"type": "text", "text": text},
                {"type": "image_url", "image_url": {"url": f"data:{mime};base64,{b64}"}},
            ]
            messages.append({"role": "user", "content": content})
            # 复用父类的请求方法
            result = self._make_request(messages, **kwargs)
            if result and "choices" in result and result["choices"]:
                return result["choices"][0]["message"]["content"]
            return None
        except Exception as e:
            print(f"[豆包图像] 发送失败: {e}")
            return None


class VoiceImageDialogueApp:
    def __init__(self):
        self.processor = AudioProcessor()
        self.asr_client = XunfeiRealtimeSpeechClient()
        self.doubao = DoubaoImageClient()
        self.last_audio = None
        self.last_wav = None
        self.image_path = None

    def _resolve_path(self, p: str, is_absolute: bool = False) -> Optional[str]:
        if not p:
            return None
        p = os.path.expanduser(p)
        if os.name != "nt":
            p = p.replace("\\", "/")
        if is_absolute or os.path.isabs(p):
            return os.path.abspath(p)
        # 相对路径相对于项目根目录(AI_online_voice)
        return os.path.abspath(os.path.join(PROJECT_ROOT, p))

    def print_help(self):
        print("\n指令帮助:")
        print("  i        选择并上传图像(绝对路径手动输入;相对路径默认 assets/sample.jpg)")
        print("  r [秒数]  录音指定秒数,识别,并发给豆包进行图像分析")
        print("  p        回放最近一次录音")
        print("  h        查看帮助")
        print("  q        退出\n")

    def handle_image_select(self):
        print("[图片选择] 录音 5 秒选择路径类型(说:绝对路径 或 相对路径;相对路径默认 assets/sample.jpg)")
        audio_file = self.processor.record(5)
        if not audio_file:
            print("[错误] 路径类型录音失败")
            return
        wav_path = self.processor.convert_to_wav(audio_file) or audio_file
        selection_text = None
        try:
            selection_text = self.asr_client.transcribe_audio_ws(wav_path)
        except Exception as e:
            print(f"[识别异常] {e}")
        choice = None
        if selection_text:
            t = selection_text.lower()
            if ("绝对" in t) or ("absolute" in t):
                choice = "abs"
            elif ("相对" in t) or ("relative" in t):
                choice = "rel"
        if not choice:
            print("[提示] 未识别到路径类型。请输入:abs(绝对) 或 rel(相对)")
            try:
                choice = input("路径类型(abs/rel): ").strip().lower()
            except Exception:
                return
        is_abs = choice.startswith("a")
        if is_abs:
            path_input = input("请输入图片绝对路径: ").strip()
            final_path = self._resolve_path(path_input, is_absolute=True)
        else:
            rel_default = "assets/sample.jpg"
            print(f"[使用默认相对路径] {rel_default}")
            final_path = self._resolve_path(rel_default, is_absolute=False)
        if not final_path or not os.path.exists(final_path):
            print(f"[错误] 图像文件不存在: {final_path}")
            print("[示例] 绝对: /home/user/pic.jpg | 相对: assets/sample.jpg")
            return
        ext = os.path.splitext(final_path)[1].lower()
        if ext not in (".jpg", ".jpeg", ".png"):
            print("[错误] 仅支持 JPG/JPEG/PNG 格式")
            return
        self.image_path = final_path
        print(f"[图片已设置] {final_path}")

    def handle_record(self, duration_sec: int):
        print(f"[操作] 开始录音 {duration_sec} 秒…")
        audio_file = self.processor.record(duration_sec)
        if not audio_file:
            print("[错误] 录音失败")
            return
        self.last_audio = audio_file
        try:
            with wave.open(audio_file, "rb") as wf:
                print(f"[原始音频信息] rate={wf.getframerate()}, ch={wf.getnchannels()}, width={wf.getsampwidth()*8}bit, frames={wf.getnframes()}")
        except Exception as e:
            print(f"[原始音频信息读取失败] {e}")
        wav_path = self.processor.convert_to_wav(audio_file)
        if not wav_path:
            print("[错误] 转换 WAV 失败")
            return
        self.last_wav = wav_path
        print(f"[识别] 发送至讯飞实时识别…")
        text = self.asr_client.transcribe_audio_ws(wav_path)
        if not text:
            print("[识别失败] 未获取到文本")
            return
        print(f"[识别结果] {text}")

        print("[豆包] 发送到豆包进行图像分析…")
        try:
            sys_prompt = getattr(ROOT_CONFIG, "SYSTEM_PROMPT", None) if ROOT_CONFIG else None
            if self.image_path:
                reply = self.doubao.chat_with_image_file(text, self.image_path, system_prompt=sys_prompt)
            else:
                # 未设置图片时,退化为纯文本对话
                reply = self.doubao.chat_text(text, system_prompt=sys_prompt)
            if reply:
                print("[豆包回复]", reply)
            else:
                print("[豆包回复] None")
        except Exception as e:
            print("[豆包错误] ", e)

    def handle_play(self):
        if not self.last_audio:
            print("[提示] 尚且有回放的录音。请先使用 r 指令录音。")
            return
        print("[播放] 回放最近一次录音…")
        self.processor.play(self.last_audio)

    def run(self):
        print("\n=== 03 语音选择图片并分析(讯飞 + 豆包)实验 ===")
        print("启动时可先进行图片选择(i),之后用 r 进行语音分析")
        self.print_help()
        # 启动阶段建议先选择图片(可跳过)
        try:
            first = input("是否立即选择图片? (y/n): ").strip().lower()
            if first.startswith("y"):
                self.handle_image_select()
        except Exception:
            pass

        while True:
            try:
                cmd = input("请输入指令 (i/r/p/h/q): ").strip()
            except (EOFError, KeyboardInterrupt):
                print("\n[退出]")
                break
            if not cmd:
                continue
            if cmd == "q":
                print("[退出]")
                break
            if cmd == "h":
                self.print_help()
                continue
            if cmd == "p":
                self.handle_play()
                continue
            if cmd == "i":
                self.handle_image_select()
                continue
            if cmd.startswith("r"):
                parts = cmd.split()
                duration = 5
                if len(parts) >= 2:
                    try:
                        duration = int(parts[1])
                    except Exception:
                        print("[提示] 秒数无效,使用默认 5 秒")
                self.handle_record(duration)
                continue
            print("[提示] 未知指令。输入 h 查看帮助。")


if __name__ == "__main__":
    VoiceImageDialogueApp().run()
Edit this page on GitHub
Prev
Experiment 02 - Voice Conversation
Next
Experiment 04 - Multimodal Image Comparison - Voice